Use a GUI to Set Up WireGuard Point-to-Site
This article will show you how to set up a Point to Site WireGuard VPN (Virtual Private Network) with the Pro Custodibus GUI (Graphical User Interface). In our example scenario, we’ll use the GUI to configure WireGuard on a VPN server; this VPN server will provide remote access to some internal applications at a cloud site from my laptop and phone.
The diagram below illustrates this scenario:

The VPN Server, running in the cloud site and listening at the public IP address of 18.237.177.185 on UDP port 51820, will accept WireGuard connections from My Laptop and My Phone, and forward the packets tunneled through WireGuard from My Laptop and My Phone to hosts at the cloud site that otherwise aren’t publicly accessible.
The other hosts in the cloud site have IP addresses in the 10.90.0.0/16 block, like the “Internal App” shown in the above diagram with an IP address of 10.90.1.89. Within the WireGuard VPN, we’ll use an IP address of 10.0.0.1 for the VPN server, an IP address of 10.0.0.2 for My Laptop, and an IP address of 10.0.0.3 for My Phone.
When I access the Internal App on My Laptop or My Phone, I’ll use its internal IP address of 10.90.1.89 to connect to it — like by entering http://10.90.1.89/ into the address bar of a browser on My Laptop or My Phone. The VPN Server will masquerade packets from the WireGuard VPN when it forwards them into the cloud site; so from the perspective of the Internal App, those packets will appear to originate from the VPN Server itself, which has an IP address of 10.90.2.67 within the cloud site.
If you compare this to the Manual Point to Site Configuration Guide, My Laptop would be Endpoint A in that guide, the VPN Server would by Host β, and the Internal App would be Endpoint B.
These are the steps we’ll follow to set this up:
Prep the VPN Server
Pretty much any old Linux server will work fine as a VPN server for WireGuard. You can set up one specifically as a VPN server, or you can use an existing server that’s also being used for other purposes (like one also being used as an outbound NAT gateway). Follow these steps to set it up:
Provision the Server
Whether you set up a new server or use an existing one, make sure you provision the server with the following attributes:
-
The server needs a publicly-accessible UDP port on which it can accept new connections.
-
The server needs network access to the your internal apps (like the Internal App host in our scenario).
-
You need root access on the server.
See the Point to Cloud WireGuard with AWS Private Subnets and Point to Cloud WireGuard With an Azure Hub VNet articles for detailed guides about how to launch and set up the cloud networking components for a server like this in AWS or Azure.
Install WireGuard
Install WireGuard on the VPN server. The VPN server in our example will run Ubuntu 20.04, so for it you just need to SSH into it as an sudoer user and run the following command:
$ sudo apt install wireguardSign Up to Pro Custodibus
Sign Up for a Pro Custodibus account if you haven’t done so yet; see the Getting Started With Pro Custodibus guide if you need detailed instructions (but it’s just a simple one-page form, so you probably won’t need instructions).
Deploy the Pro Custodibus Agent
In the Pro Custodibus UI, register a host for the VPN server, and deploy the Pro Custodibus agent to the VPN server. Follow the Register a WireGuard Host and Deploy the Pro Custodibus Agent sections of the Getting Started guide for this; or refer to the docs for Adding a Host, Downloading the Agent, and Installing the Agent.
Add a WireGuard Interface for the VPN Server
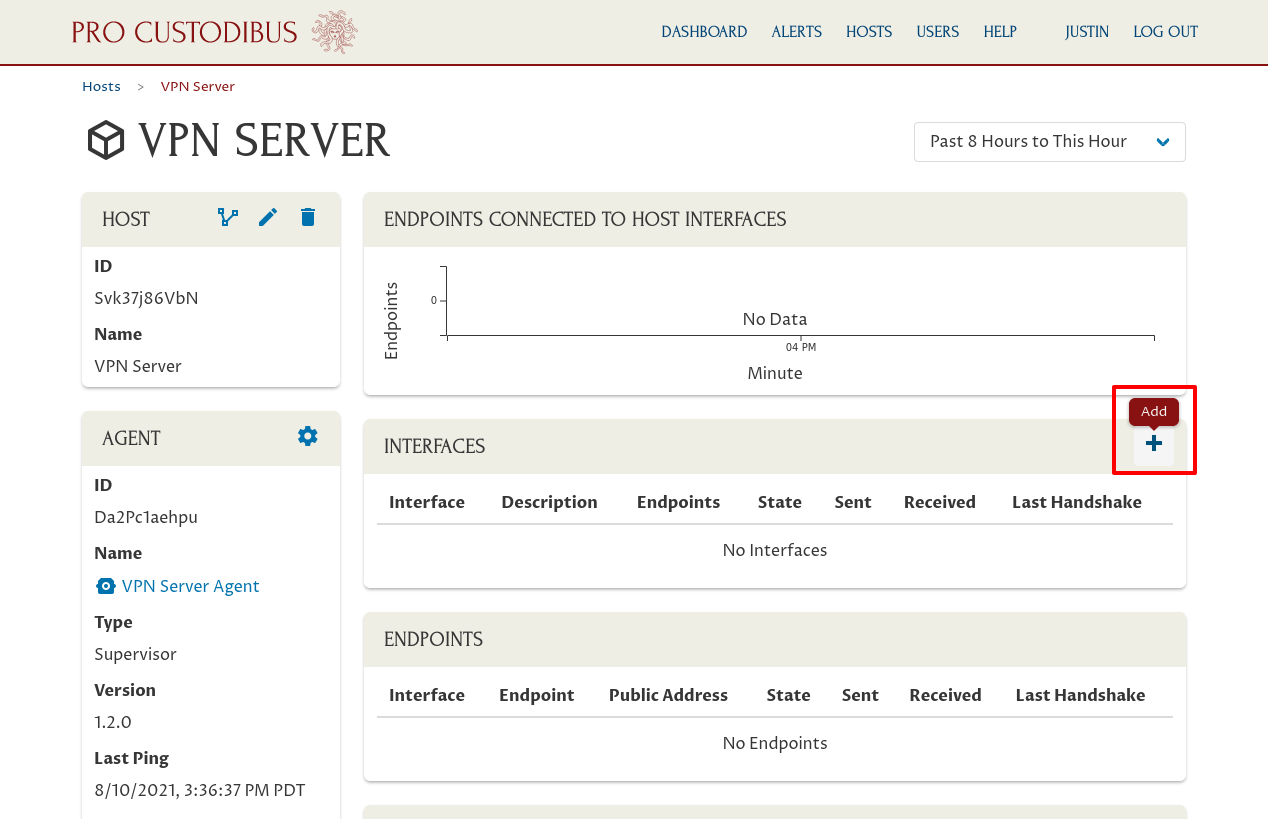
Now you should have a host page for the VPN Server in the Pro Custodibus web UI that looks like this:

(You can navigate to the list of hosts in Pro Custodibus by clicking the Hosts link in the navigation bar at the top of the page — click VPN Server in that list to navigate to the above page.)
Click the Add icon in the Interfaces panel to add a new WireGuard interface to the host:
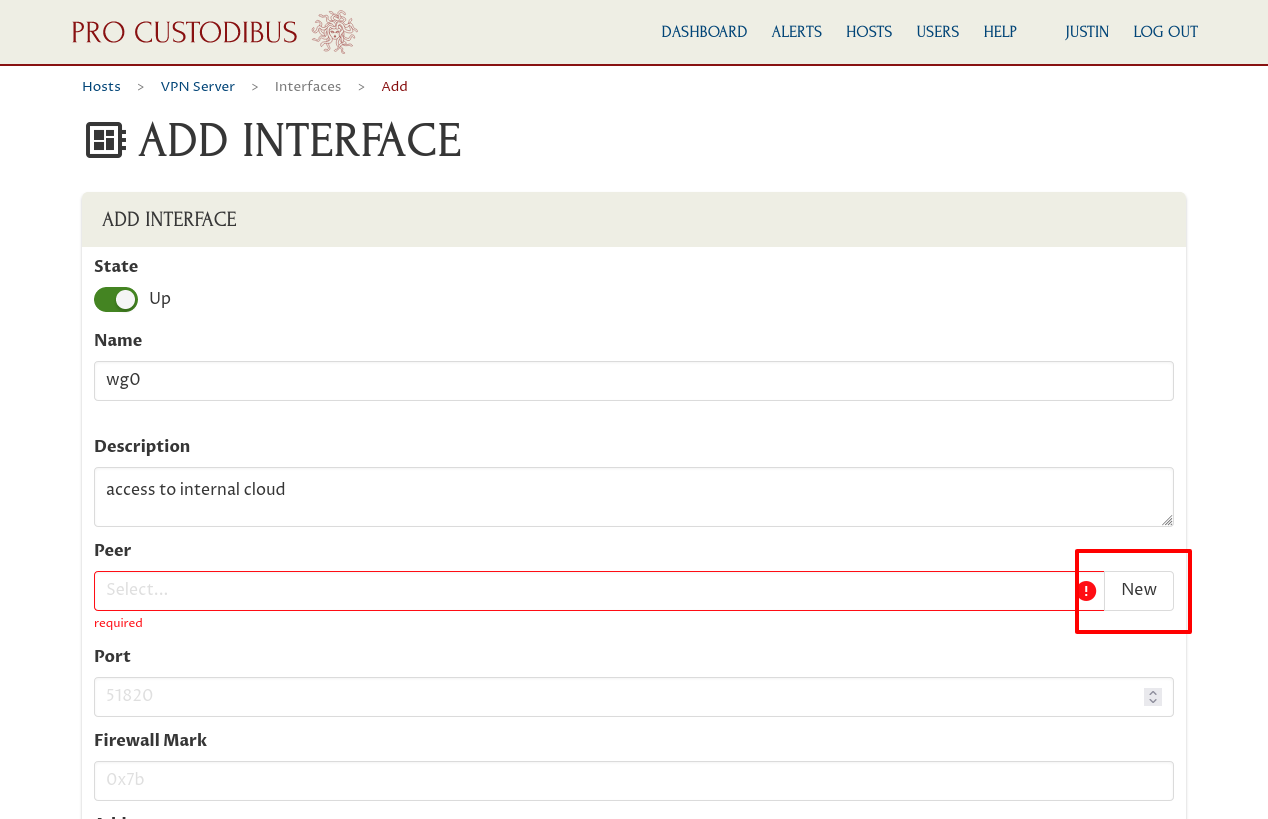
On the “Add Interface” page, enter a basic interface name like “wg0” into the Name field; and optionally enter a description like “access to internal cloud” into the Description field.
|
Important
|
The WireGuard interface name is used internally by the host’s operating system as an identifier for the interface, so it should be short and sweet (and usually you don’t ever want to rename it). The description is just for your own use, however, so it can be long and meandering, and you can change it as often as you like. |
If we had already created a peer identity for the VPN Server, we’d select that identity in the Peer field. We haven’t, so click the New button adjoining the Peer field:
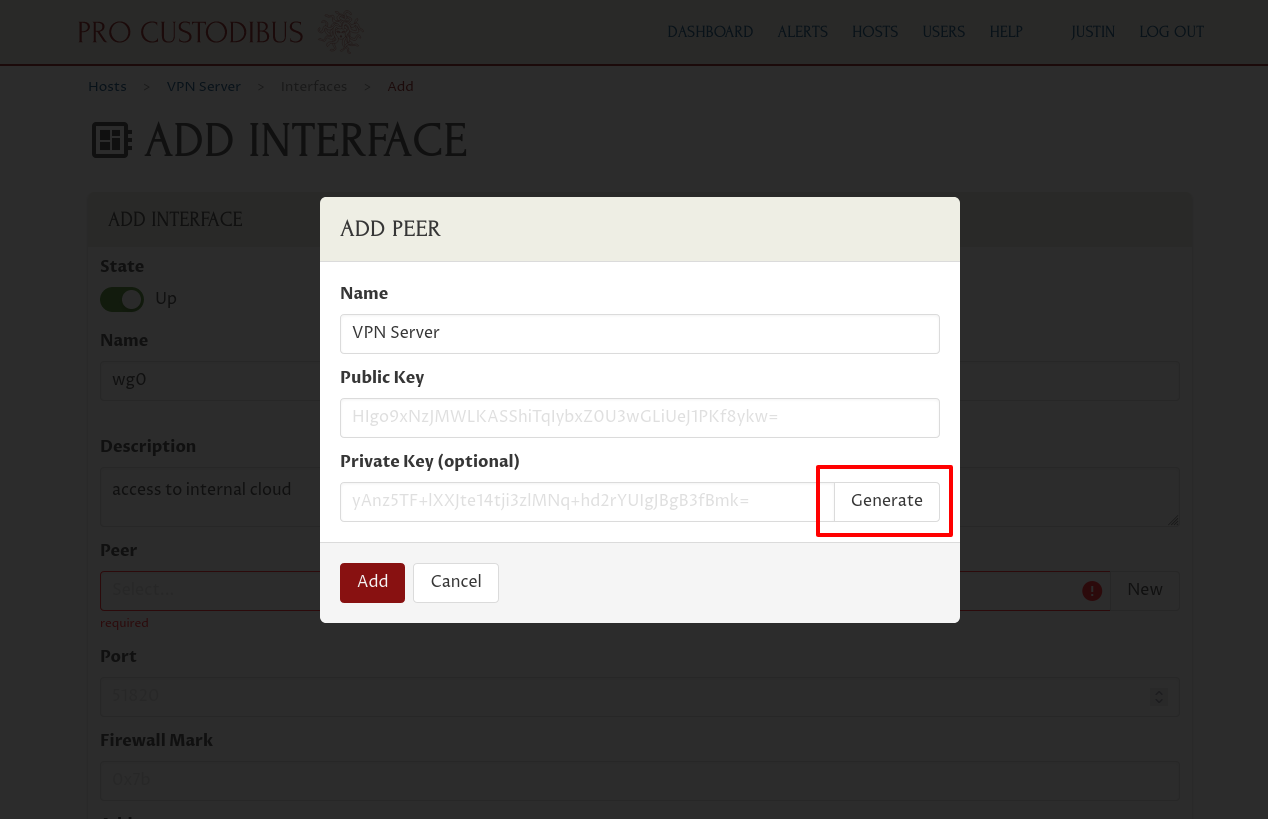
This peer is for the identity of the interface itself. The X25519 public-key pair associated with the peer identifies it globally and uniquely.
So enter “VPN Server” (or some other descriptive name) into the Name field of the “Add Peer” dialog. Then click the Generate button adjoining the Private Key field to generate a new random public-key pair:
|
Note
|
The Private Key field is optional. However, Pro Custodibus will not be able to create the interface for you if you do not supply the private key — you’ll have to first create the interface on the host manually (and then, once created, you can use Pro Custodibus to manage it). See the docs for the Private Key Field of the Add Peer form for more information. |
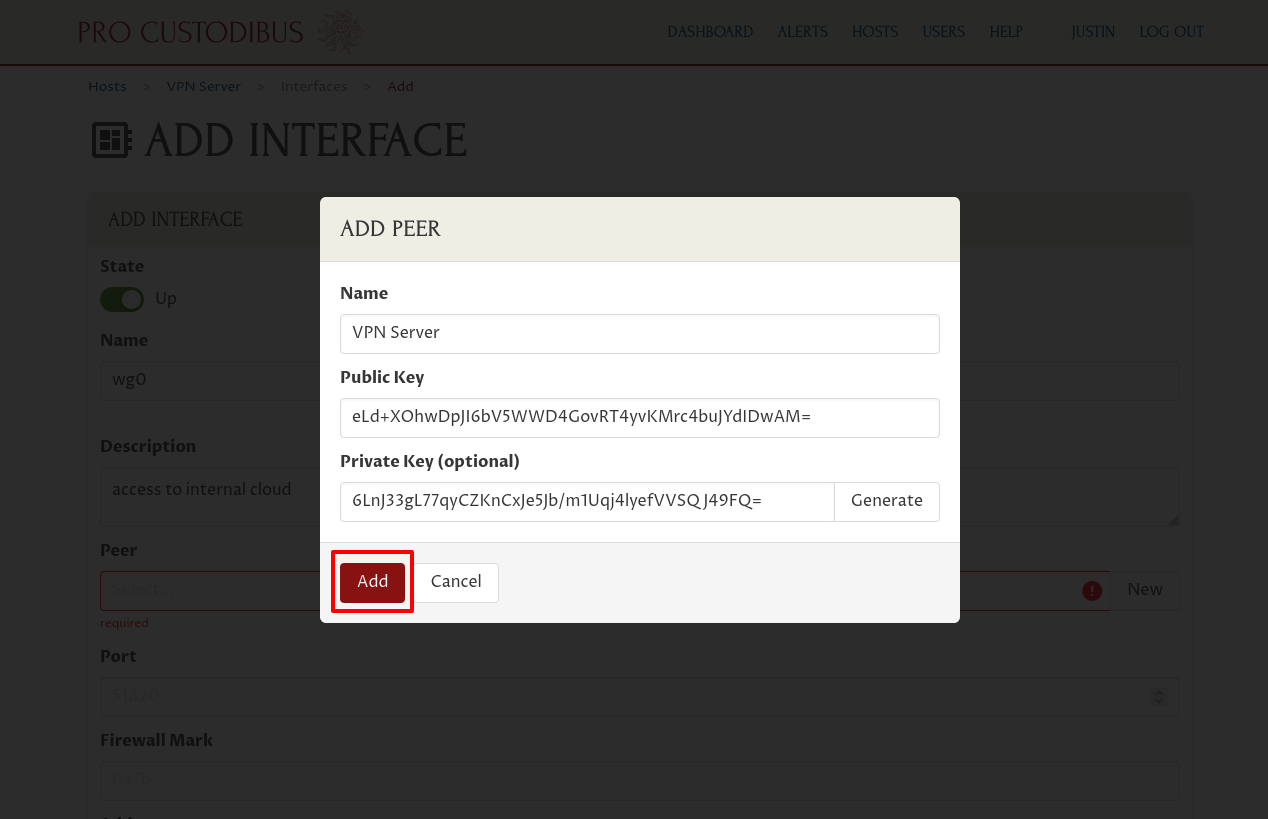
Then click the Add button at the bottom of the dialog:
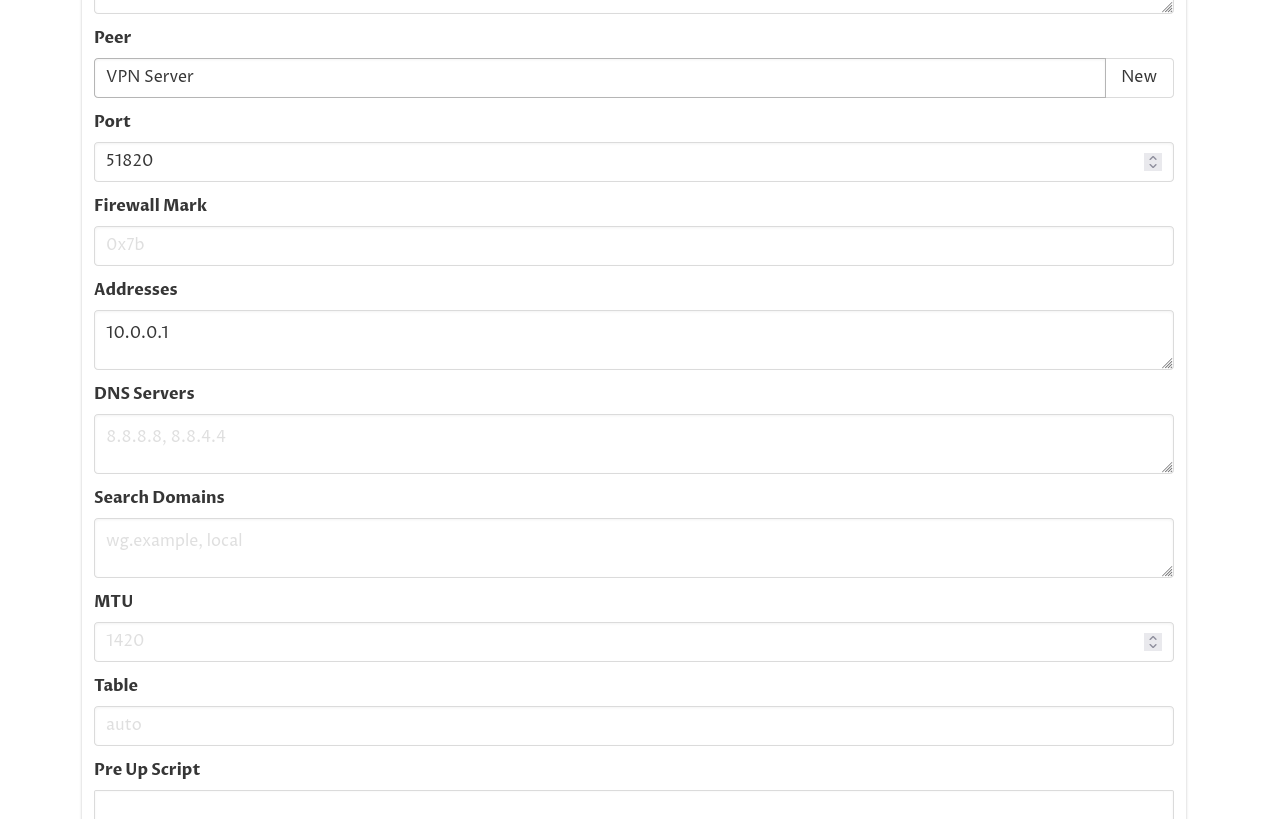
Next, enter the UDP port number on which the interface will listen, like “51820”, into the Port field.
|
Important
|
The port you select must be publicly accessible from the Internet. You’ll probably need to adjust some firewall rules at the site to allow access to this port. |
Enter the private IP address or addresses that the interface will use within the WireGuard network, like “10.0.0.1”, into the Addresses field:
|
Note
|
The other fields in this form are only necessary for advanced use — we can skip them in this scenario. |
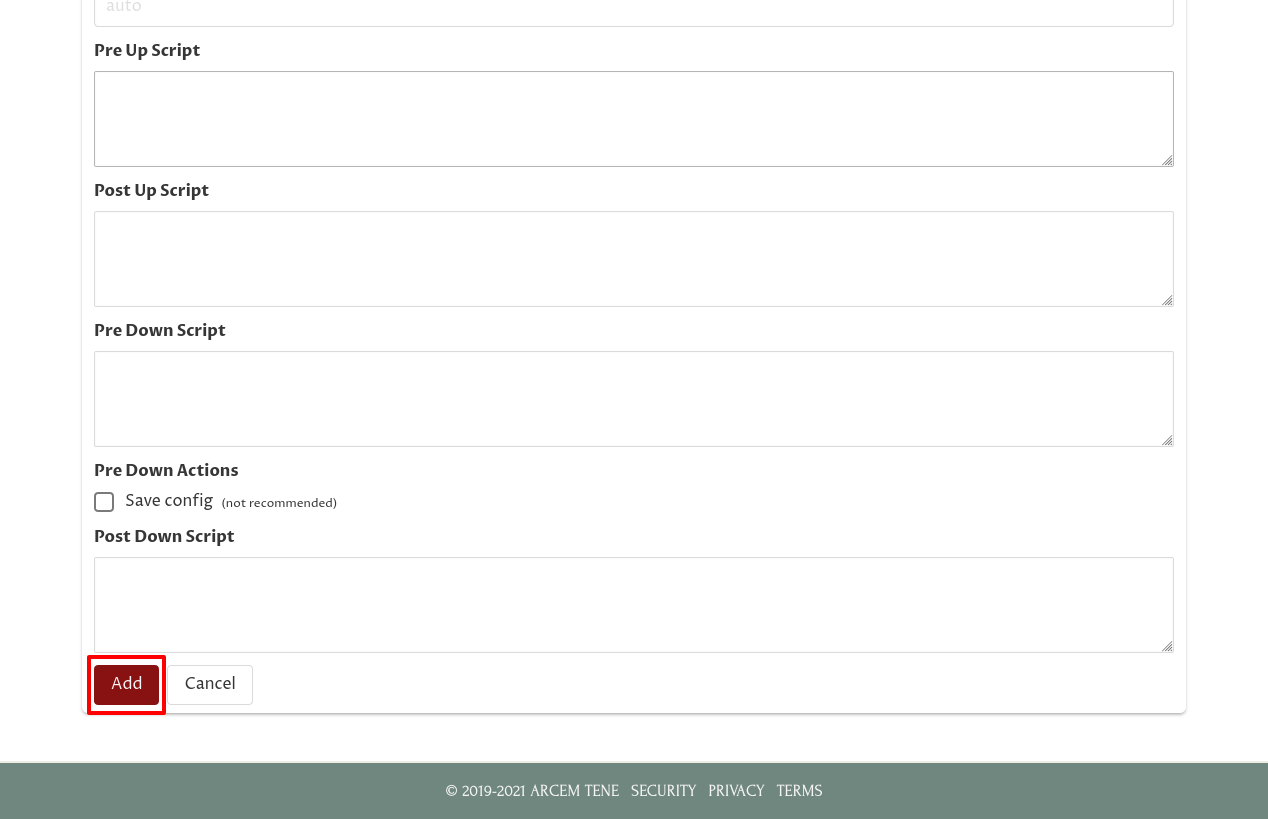
Finally, enter the following Pre Up Script content:
sysctl -w net.ipv4.ip_forward=1
iptables -t mangle -A PREROUTING -i %i -j MARK --set-mark 0x10
iptables -t nat -A POSTROUTING ! -o %i -m mark --mark 0x10 -j MASQUERADE
The first line will make sure packet forwarding is enabled on the VPN server. The next two lines will apply masquerading (aka SNAT, Source Network Address Translation) to any packets that are forwarded from this WireGuard interface out any other network interface. Masquerading will make those forwarded packets appear to have come from the VPN server itself (which means the hosts which receive those packets will just send any packets in reply back to the VPN server — so you don’t have to configure any special routing rules at the site to get replies back to the VPN server).
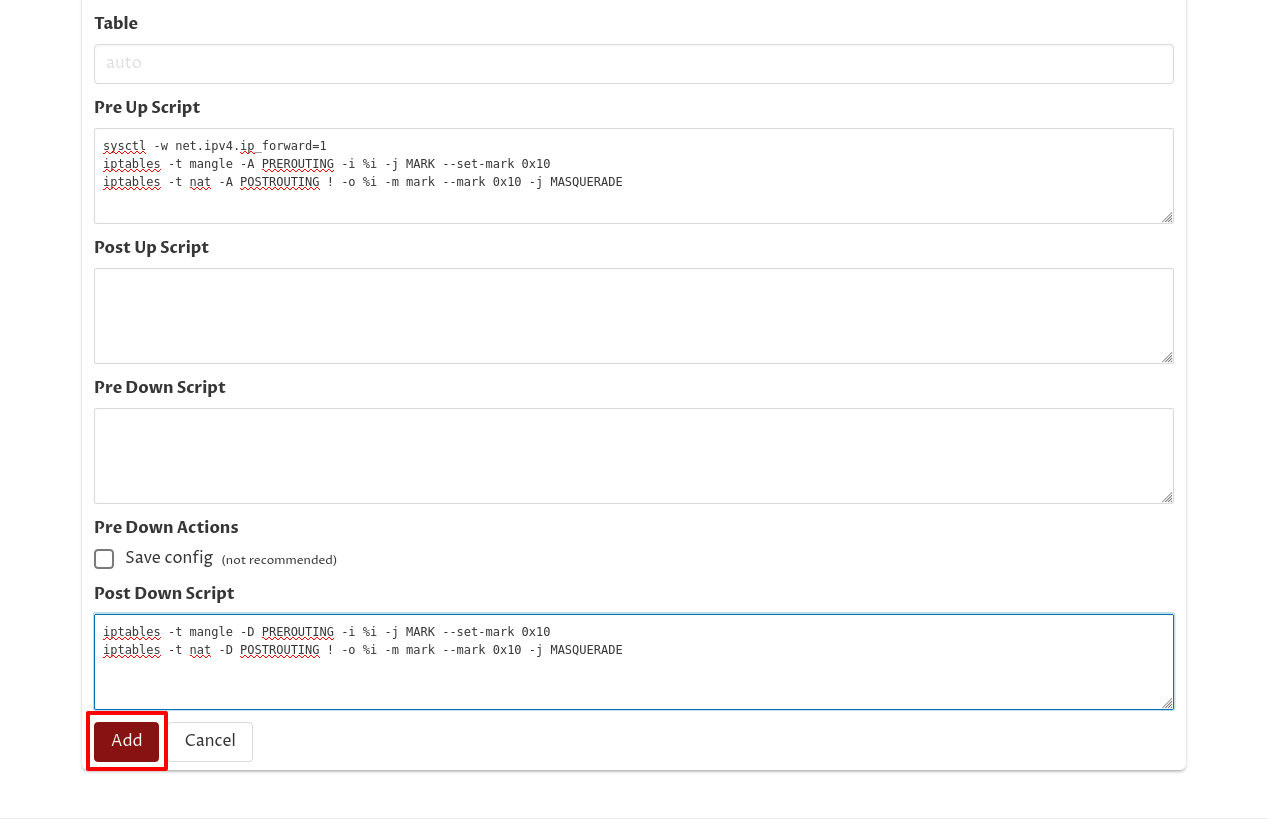
Then enter the following Post Down Script content to remove these firewall rules when the interface is shut down:
iptables -t mangle -D PREROUTING -i %i -j MARK --set-mark 0x10
iptables -t nat -D POSTROUTING ! -o %i -m mark --mark 0x10 -j MASQUERADE
And then click the Add button at the bottom of the form:
This will queue the new WireGuard interface for creation. In a minute or two, the Pro Custodibus agent running on the VPN Server will pull this queued update and apply it to the VPN server, creating the interface.
For more details about the “Add Interface” form, see the Add an Interface docs.
Add an Endpoint to My Laptop on the VPN Server
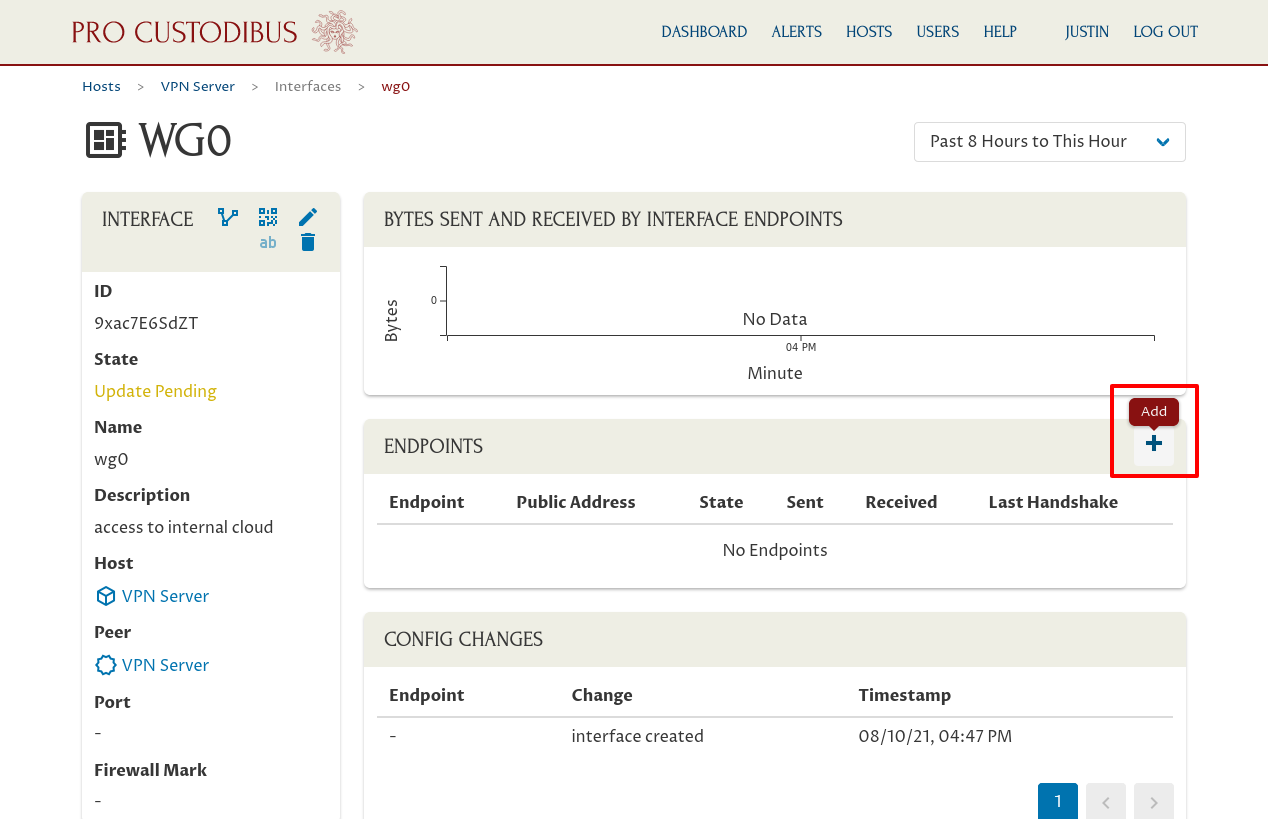
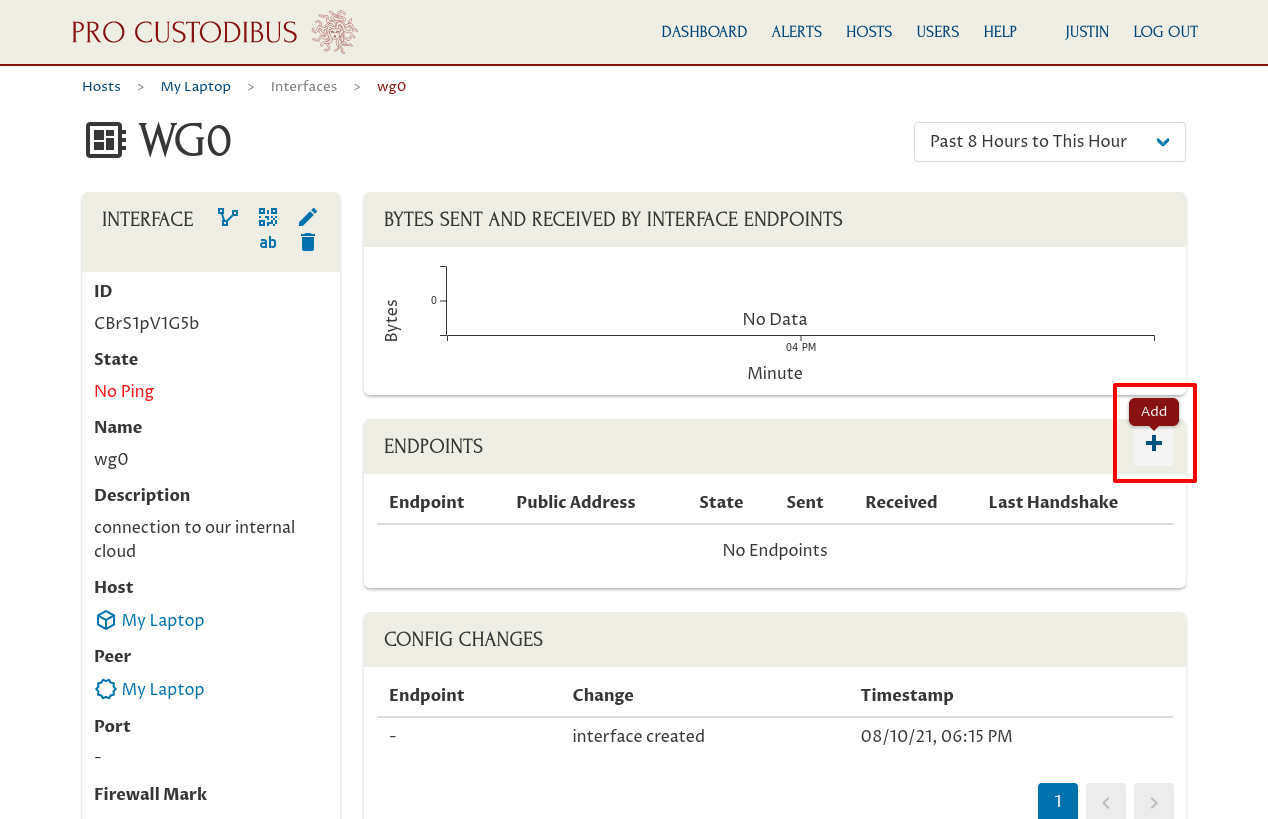
The new WireGuard interface on the VPN Server won’t have any peers able to connect to it yet, however. To allow My Laptop to connect to the VPN Server, we can use the Pro Custodibus UI to add an endpoint to My Laptop on the VPN Server.
On the main page for the interface, click the Add icon in the Endpoints panel:
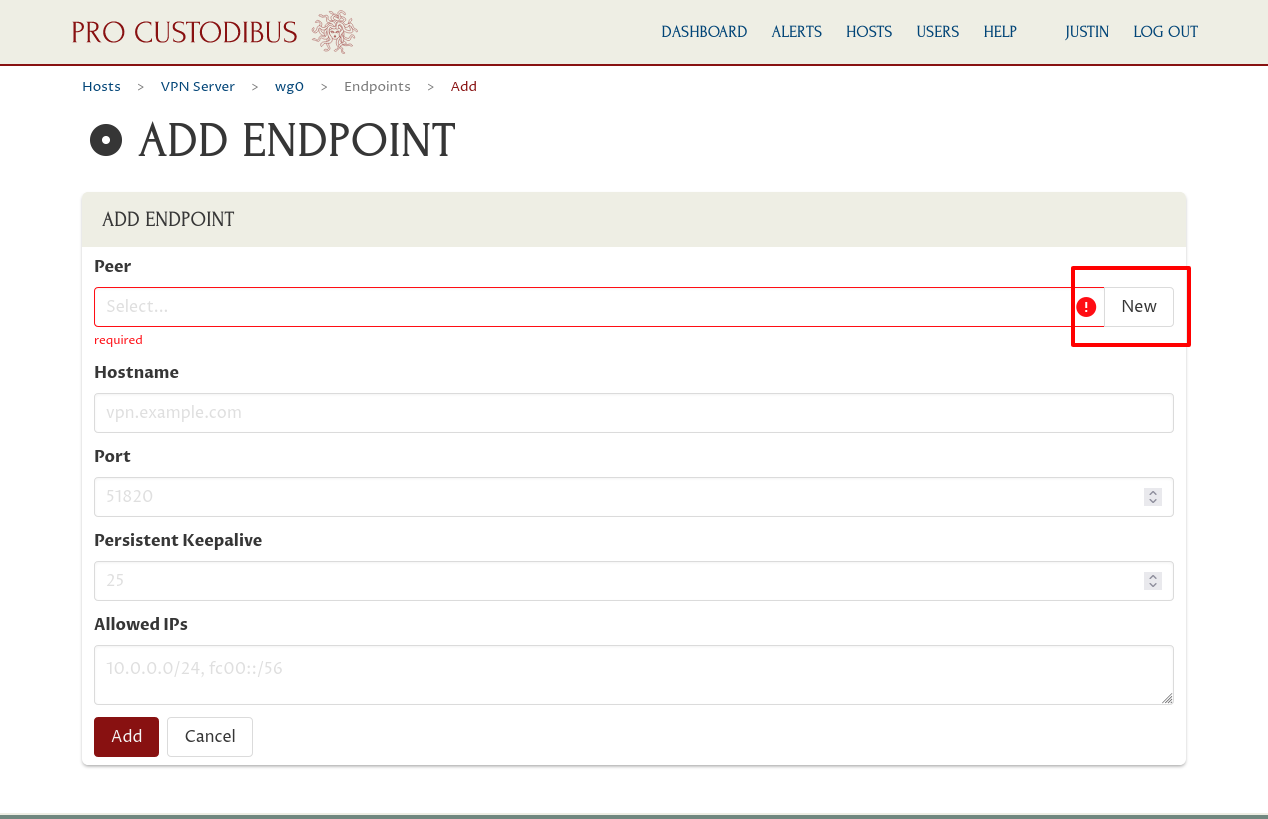
If we had already created a peer identity for My Laptop, we’d select it in the Peer field. We haven’t, so click the New button adjoining the Peer field:
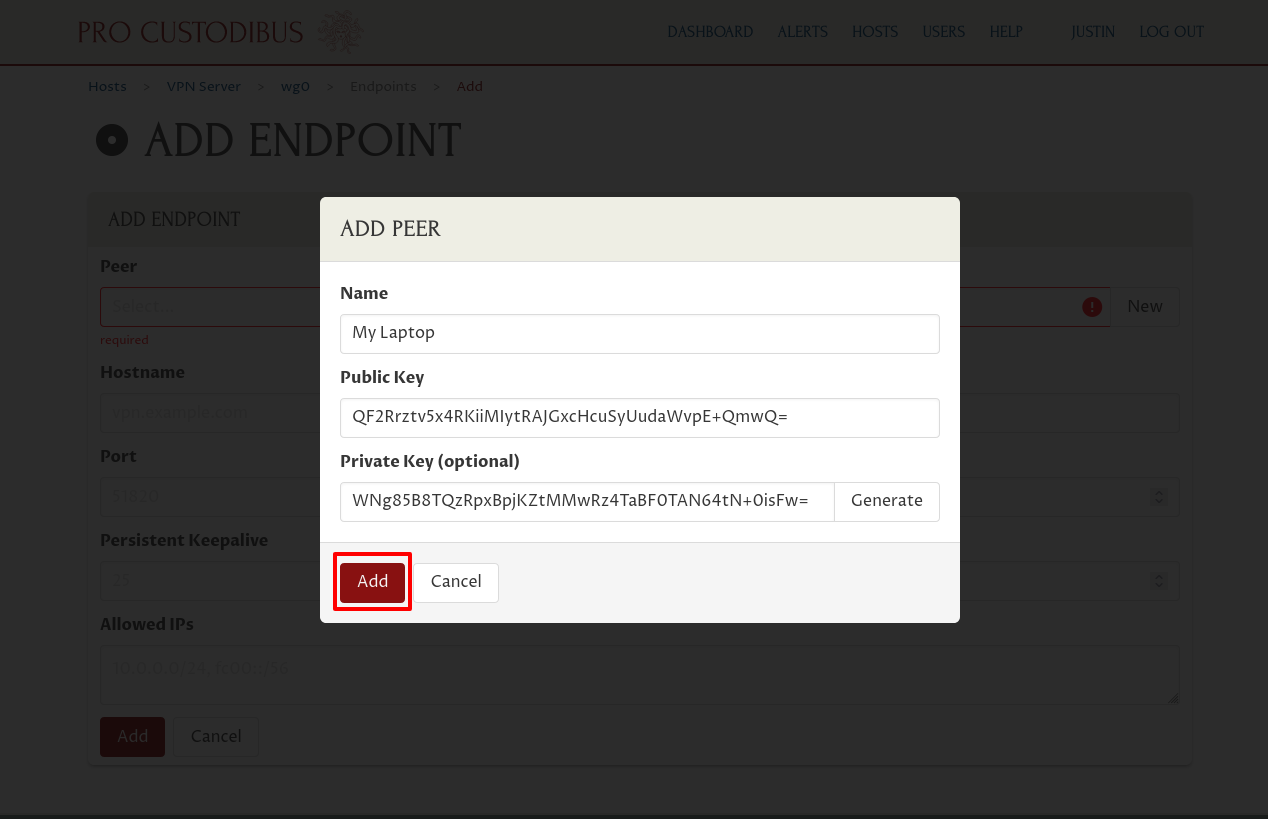
Enter “My Laptop” (or some other descriptive name) into the Name field of the “Add Peer” dialog. Then click the Generate button adjoining the Private Key field to generate a new random public-key pair:

Then click the Add button at the bottom of the dialog:
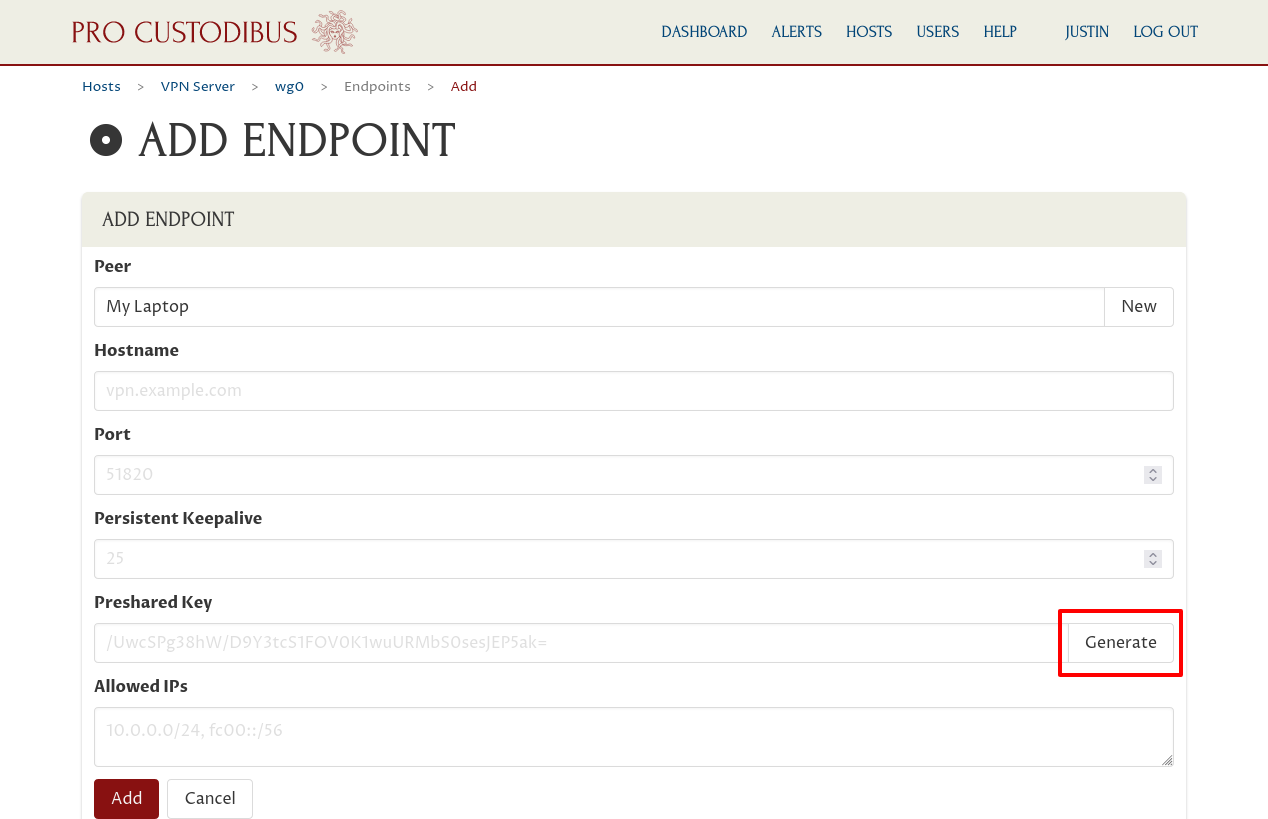
Optionally, click the Generate button adjoining the Preshared Key field to generate a new random preshared key to use for the connection:
|
Note
|
You don’t need to use preshared keys with WireGuard (but Pro Custodibus makes them easy to use and manage). See the Preshared Keys docs for a discussion about why you would want to use them. |
Next, enter the IP address or addresses that the host should route to the endpoint into the Allowed IPs field. For the endpoint from the “site” to a “point” in a point-to-site scenario, this will just be the internal WireGuard IP address (or addresses) we’ve chosen for the point; for My Laptop, it’s 10.0.0.2.
Finally, click the Add button at the bottom of the form:

This will queue the endpoint to be added to the interface on the VPN Server. In a minute or two, the Pro Custodibus agent running on the VPN Server will pull this queued update and apply it.
For more details about the “Add Endpoint” form, see the Add an Endpoint docs.
Add an Endpoint to My Phone on the VPN Server
Now that we’ve configured the VPN server to allow My Laptop to connect to it, we’ll do the same thing for My Phone.
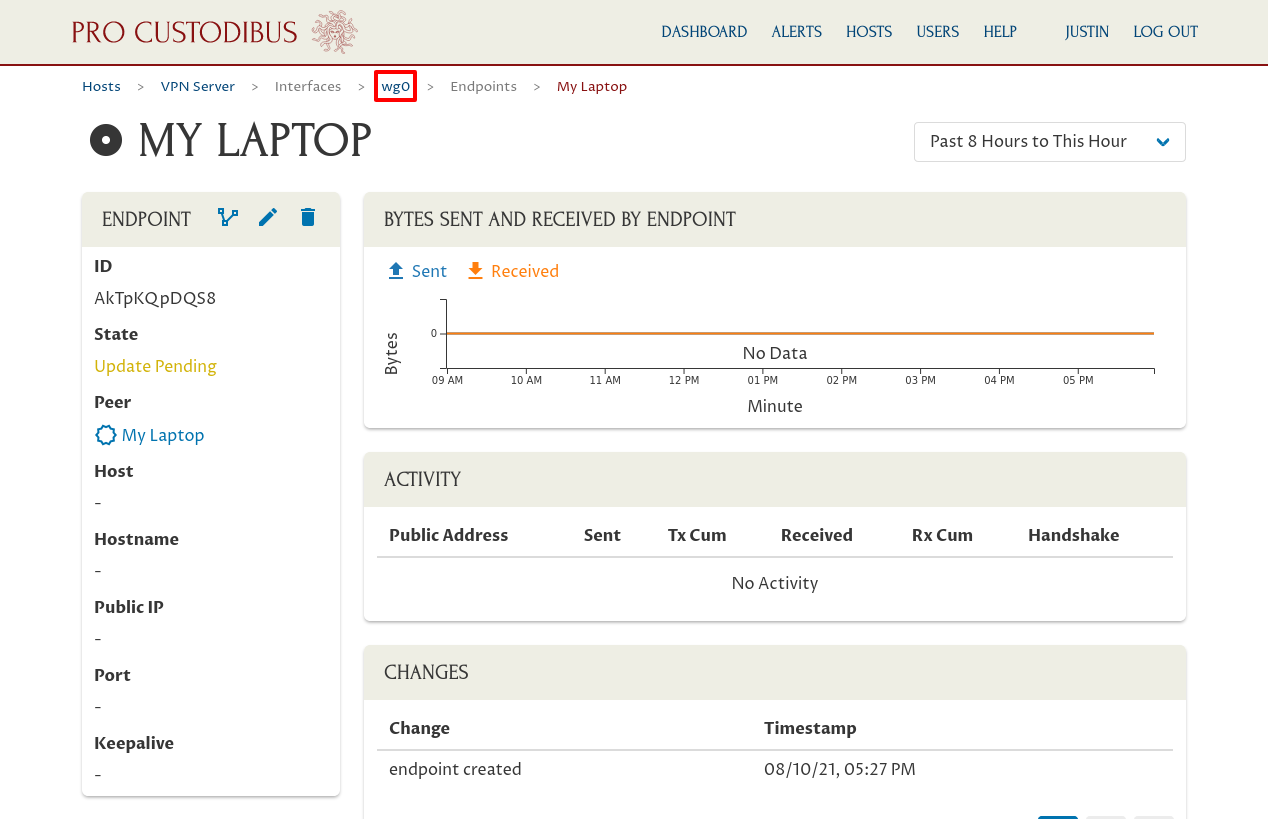
To get back to the main page for the “wg0” interface of the VPN Server, click the wg0 link in the breadcrumbs of the page for the endpoint we just created (the My Laptop endpoint):
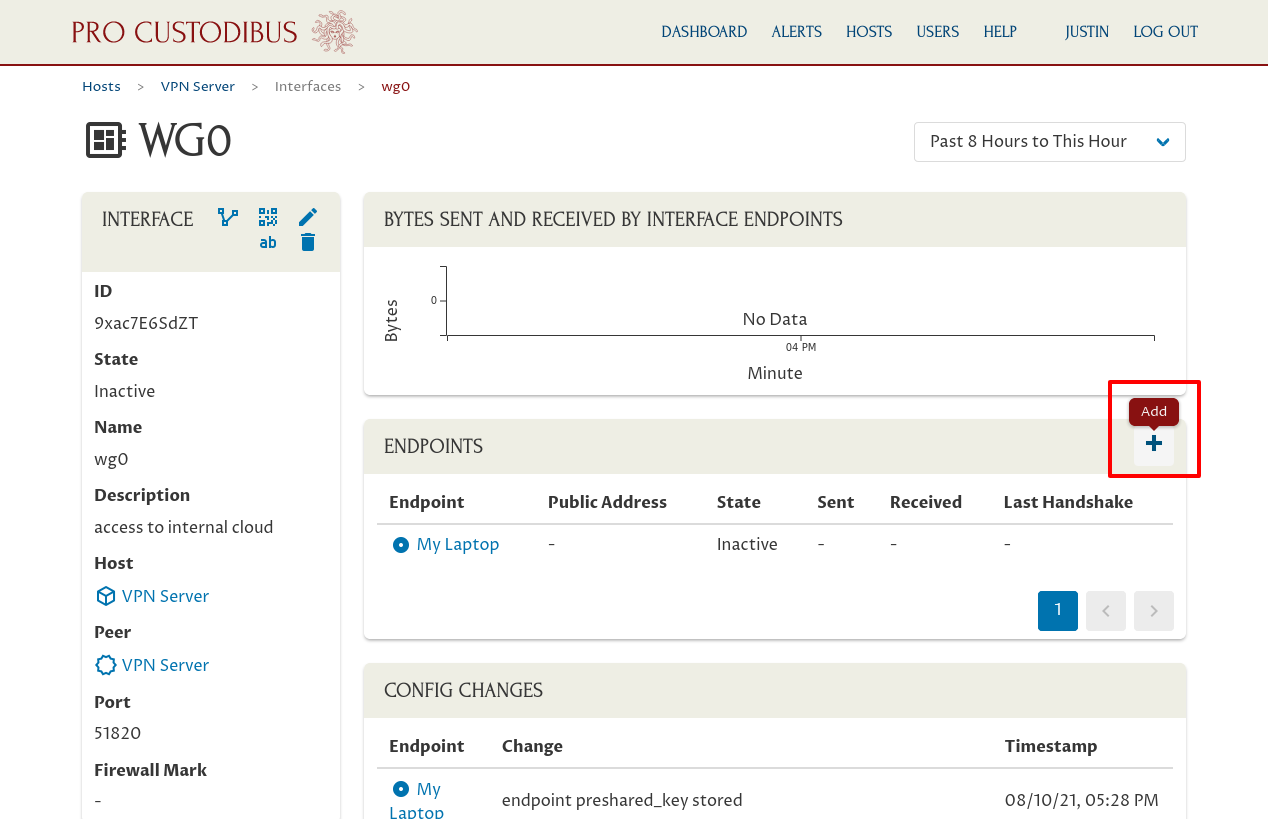
Back on the main page for the interface, click the Add icon in the Endpoints panel:
If we had already created a peer identity for My Phone, we’d select it in the Peer field. We haven’t, so click the New button adjoining the Peer field:
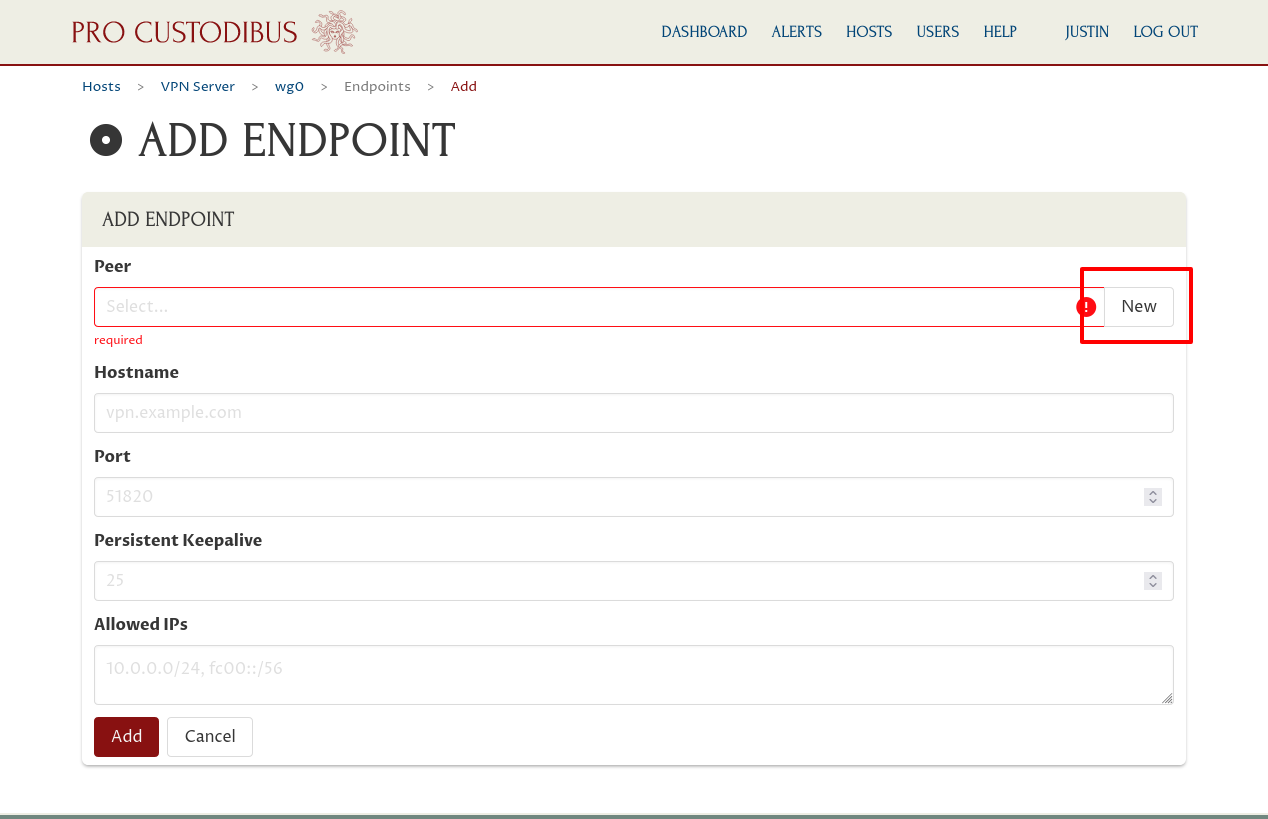
Next, enter “My Phone” (or some other descriptive name) into the Name field of the “Add Peer” dialog. Then click the Generate button adjoining the Private Key field:

Then click the Add button at the bottom of the dialog:

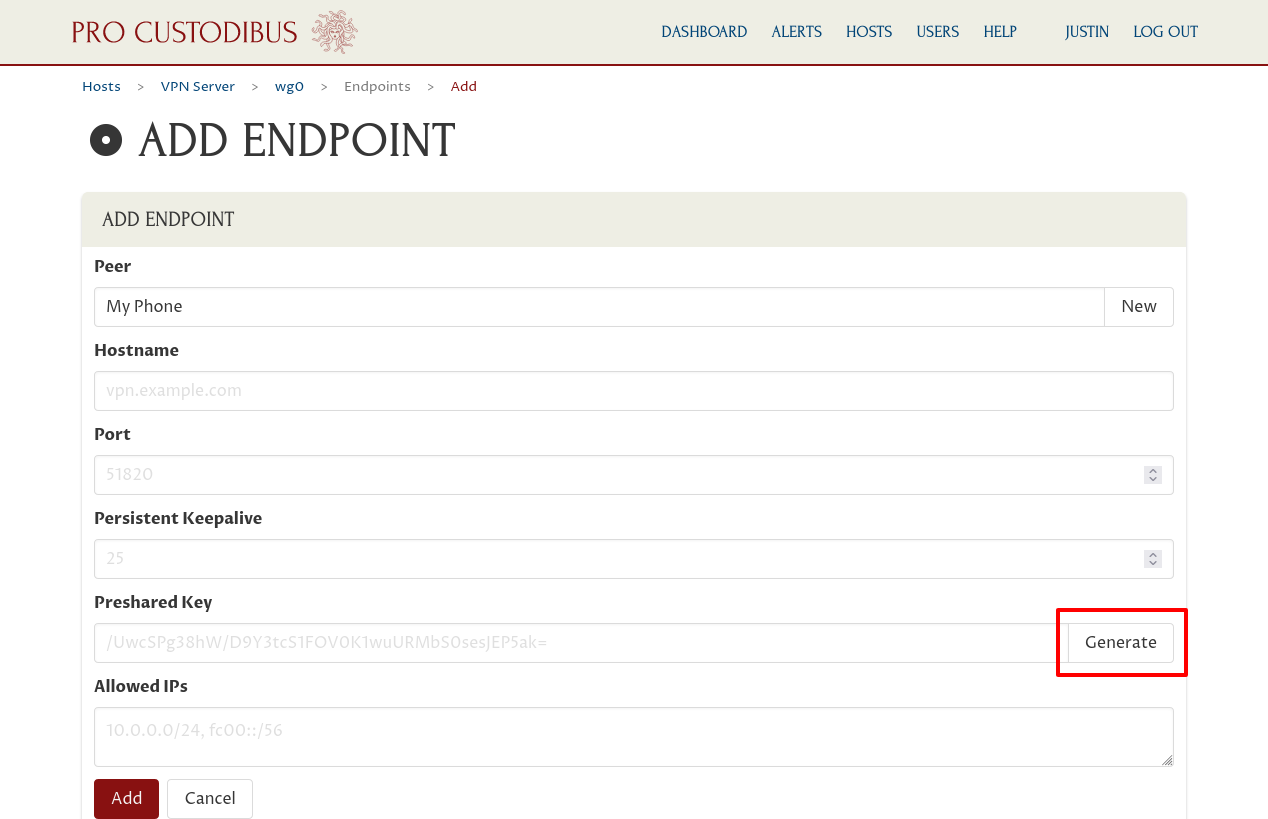
Optionally, click the Generate button adjoining the Preshared Key field to generate a new random preshared key to use for the connection:
Next, enter the IP address or addresses that the host should route to the endpoint into the Allowed IPs field. For the endpoint from the “site” to a “point” in a point-to-site scenario, this will just be the internal WireGuard IP address (or addresses) we’ve chosen for the point; for My Phone, it’s 10.0.0.3.
Finally, click the Add button at the bottom of the form:

This will queue the endpoint to be added to the interface on the VPN Server. In a minute or two, the Pro Custodibus agent running on the VPN Server will pull this queued update and apply it.
For more details about the “Add Endpoint” form, see the Add an Endpoint docs.
Add a WireGuard Interface for My Laptop
Now that the VPN Server is configured and ready to go, we’ll configure My Laptop. We first need to create a host entry for it in Pro Custodibus; then we can add a WireGuard interface to it.
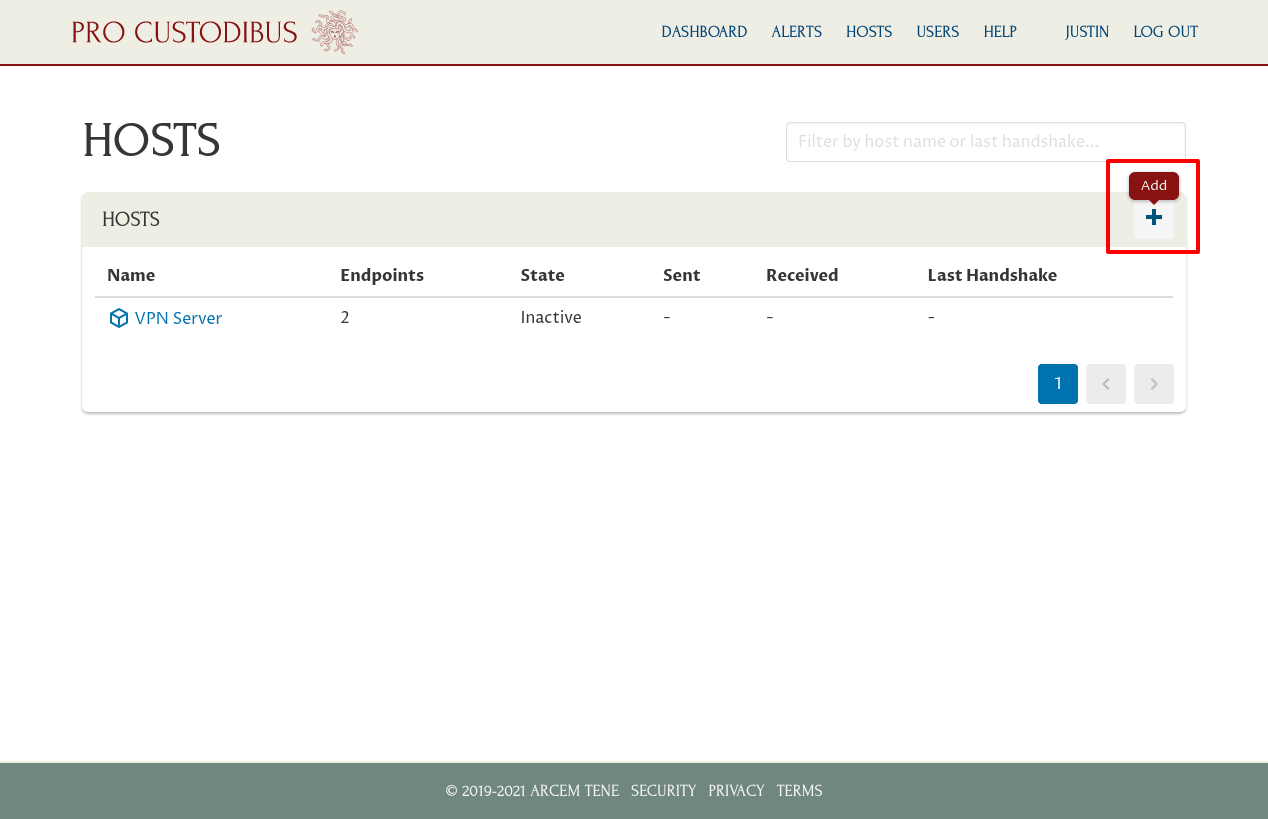
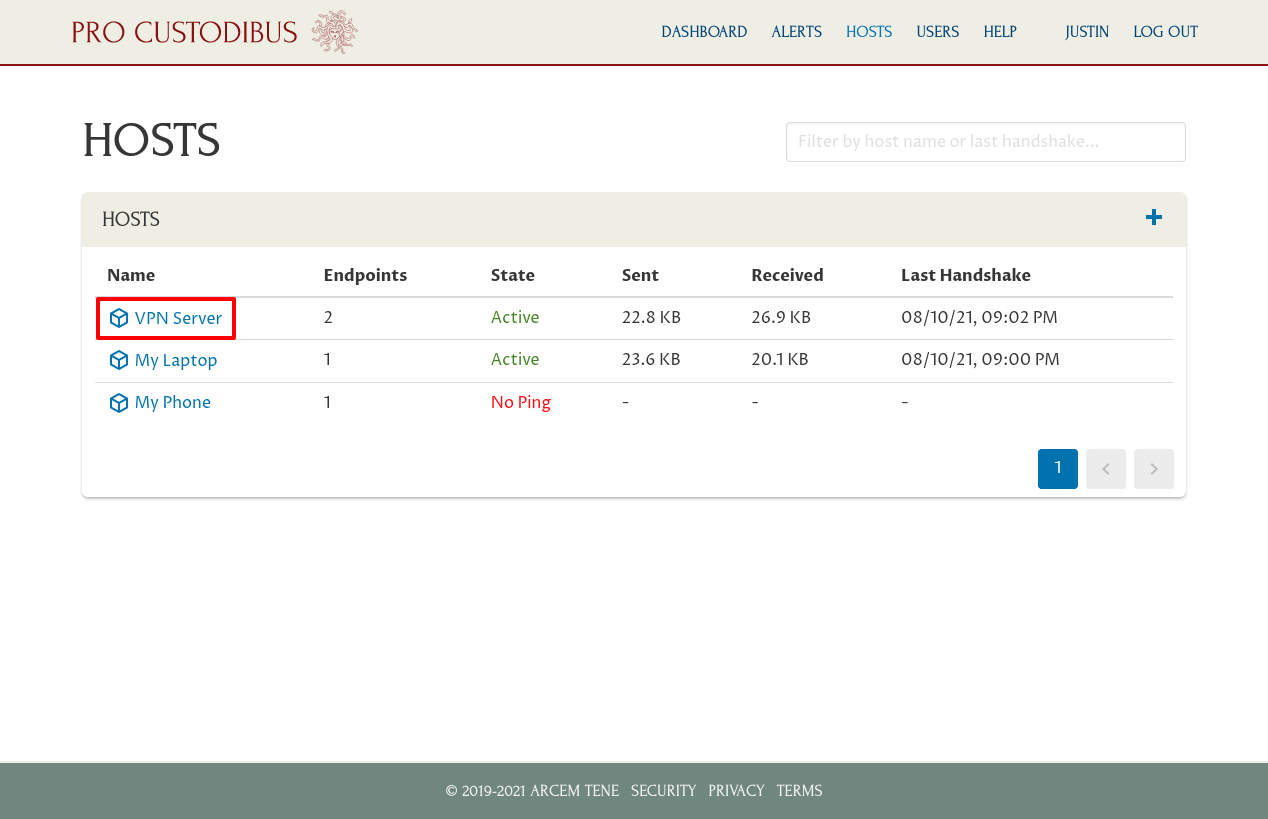
Click the Hosts link in the navigation bar at the top of the page to navigate to the main hosts list:
Then click the Add icon in the Hosts panel:
Then enter a name for the host, like “My Laptop”, in the Name field; and click the Add button:

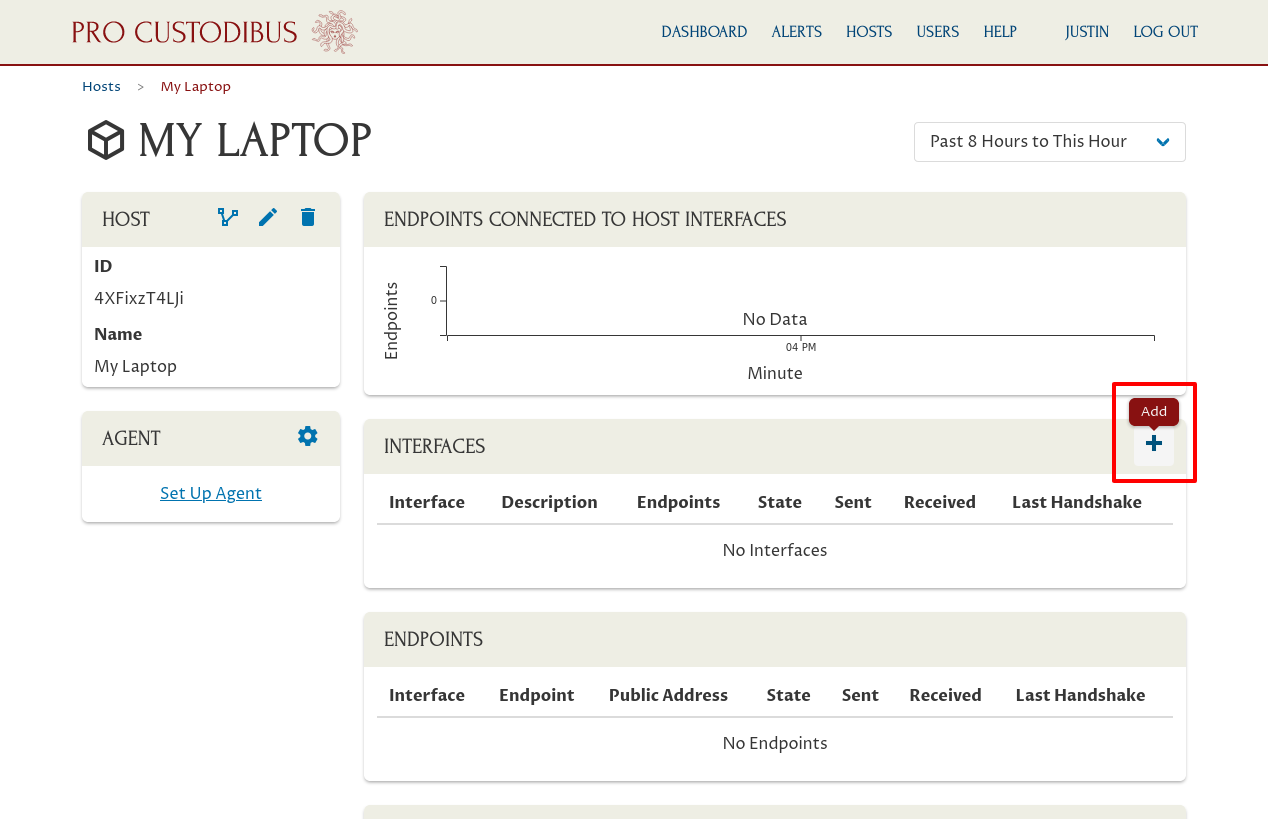
We’ll do the agent setup later; so click the My Laptop link in the breadcrumbs of the “Set Up” page to get to the main page for the new host:
Click the Add icon in the Interfaces panel to add a new WireGuard interface to the host:
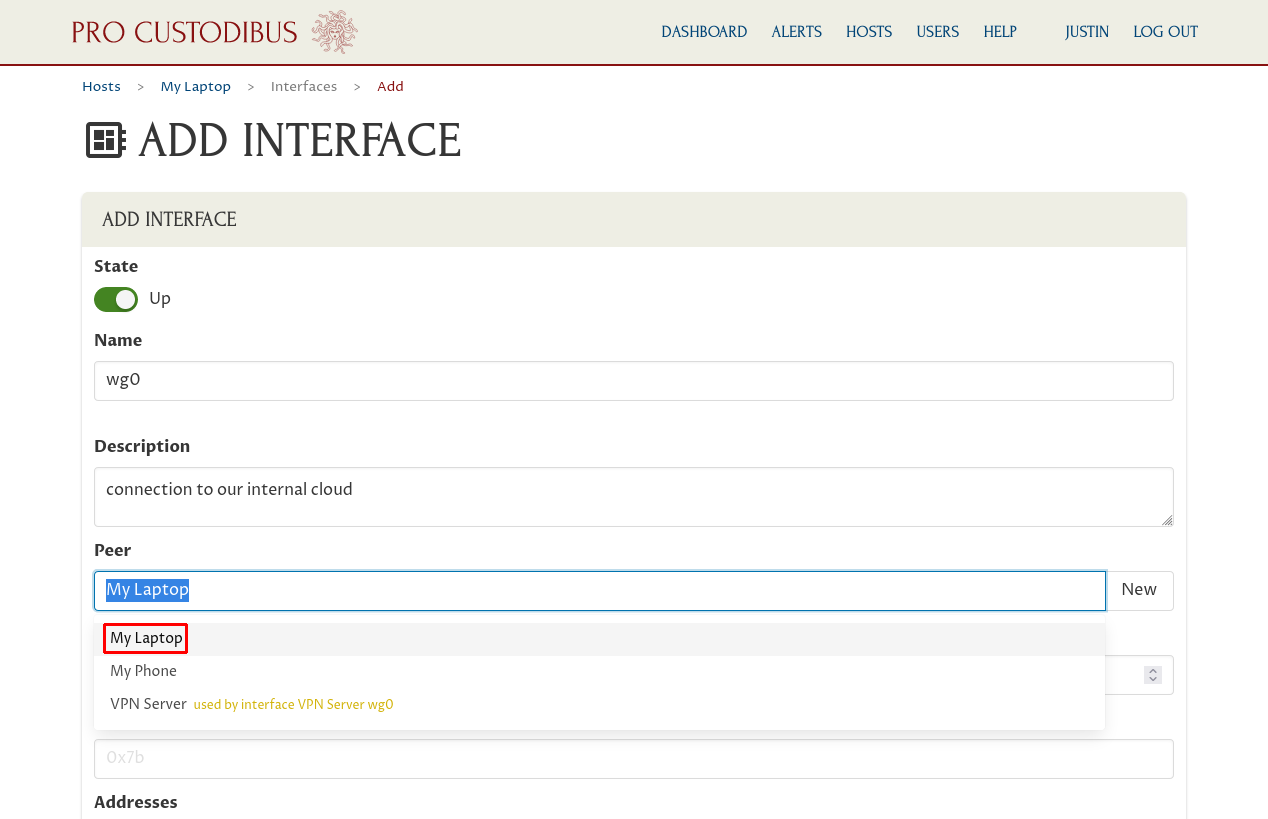
On the “Add Interface” page, enter a basic interface name like “wg0” into the Name field; and optionally enter a description like “connection to our internal cloud” into the Description field.
Then for the Peer field, select the “My Laptop” peer we created when we set up the endpoint to My Laptop on the VPN Server:
Next, enter the private IP address or addresses that the interface will use within the WireGuard network, like “10.0.0.2”, into the Addresses field:
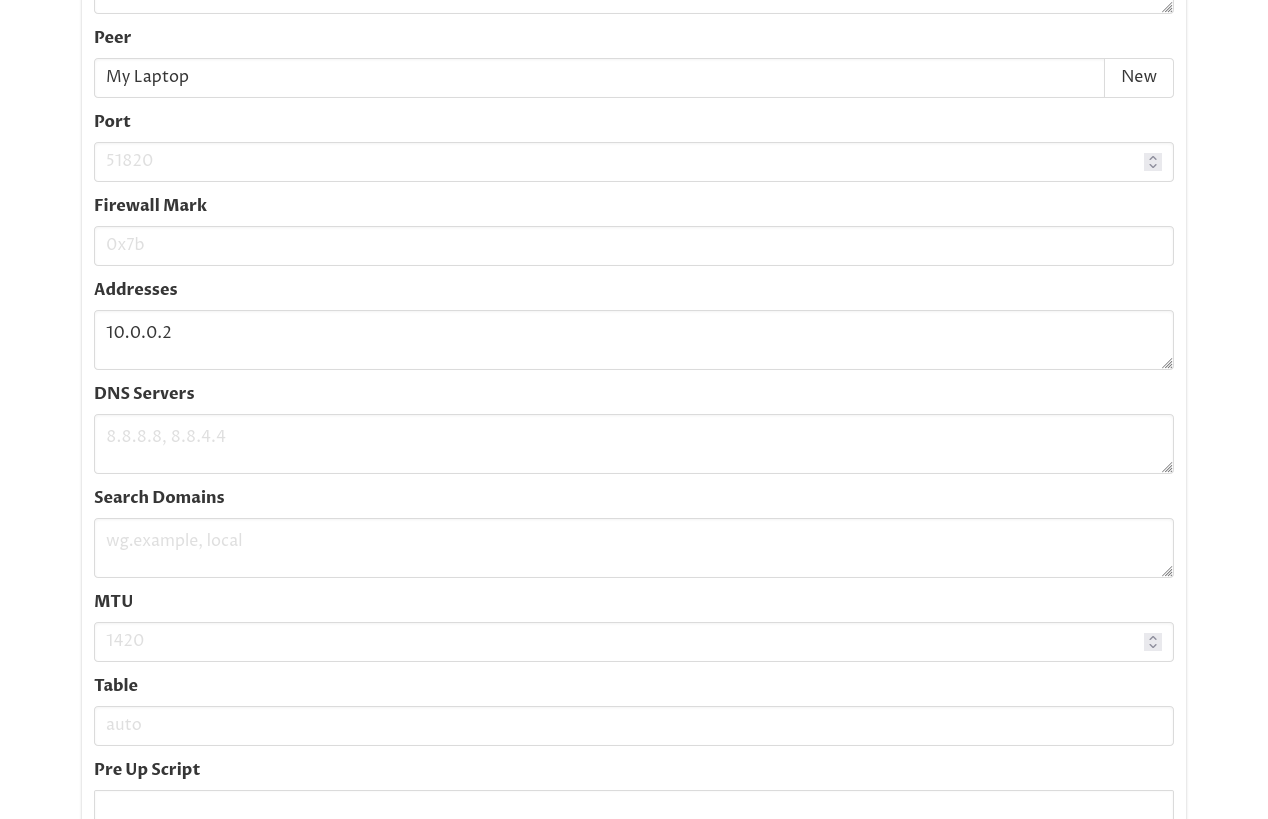
Finally, scroll down to the bottom of the page and click the Add button:
This will queue the new WireGuard interface for creation. It will be applied when we install the Pro Custodibus agent on My Laptop.
For more details about the “Add Interface” form, see the Add an Interface docs.
Add an Endpoint to the VPN Server on My Laptop
To complete the connection between My Laptop the VPN Server, we need to add an endpoint to the VPN Server on My Laptop.
On the main page of the new interface for My Laptop, click the Add icon in the Endpoints panel:
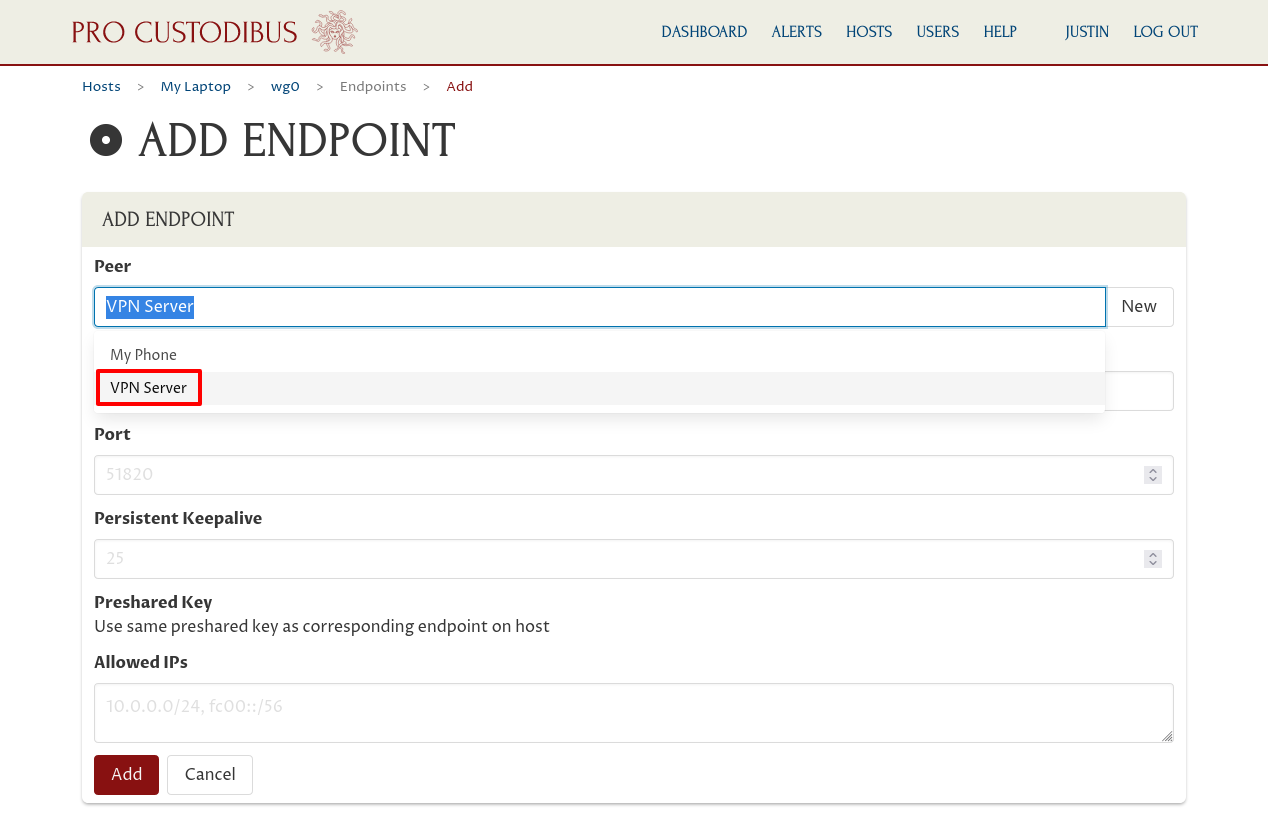
Then for the Peer field, select the “VPN Server” peer we created when we set up the WireGuard interface on the VPN Server:
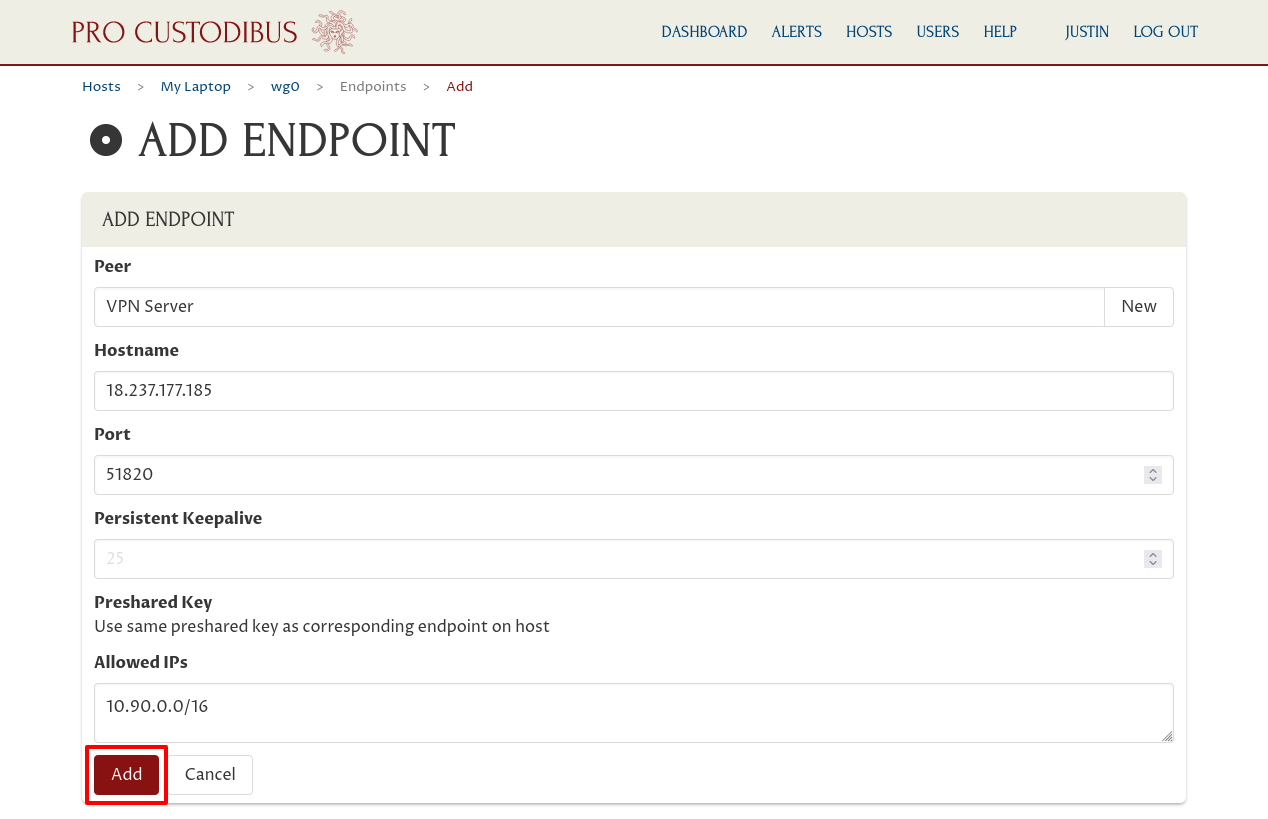
Next, enter the public IP address (or DNS name, if you’ve set up a DNS entry for it) of the VPN server, like “18.237.177.185”, into the Hostname field. This is the address at which My Laptop will connect to the VPN server over the Internet (specifically, it’s the public-facing IP address of the publicly-accessible UDP port you set up when you provisioned the VPN Server).
Then enter “51820” into the Port field (or whatever publicly-accessible UDP port you set up when you provisioned the VPN Server — Pro Custodibus will fill in this field automatically based on the VPN Server’s interface settings when you select the VPN Server peer).
Then enter the private IP blocks of the cloud site to which the VPN Server will provide My Laptop access into the Allowed IPs field. For this example scenario, it’s 10.90.0.0/16 (a range which includes the private 10.90.1.89 IP address of our example Internal App host).
Then click the Add button at the bottom of the form:
This will queue the endpoint to be added to the interface on My Laptop. It will be applied when we install the Pro Custodibus agent on My Laptop.
For more details about the “Add Endpoint” form, see the Add an Endpoint docs.
Deploy the Agent to My Laptop
Now the pending WireGuard interface on My Laptop is fully configured in Pro Custodibus — we just need to install the Pro Custodibus agent on My Laptop, and the agent will apply the configuration automatically.
First, make sure WireGuard is installed on My Laptop. In our example, My Laptop is running Fedora 34, so you just need to log into it and run the following:
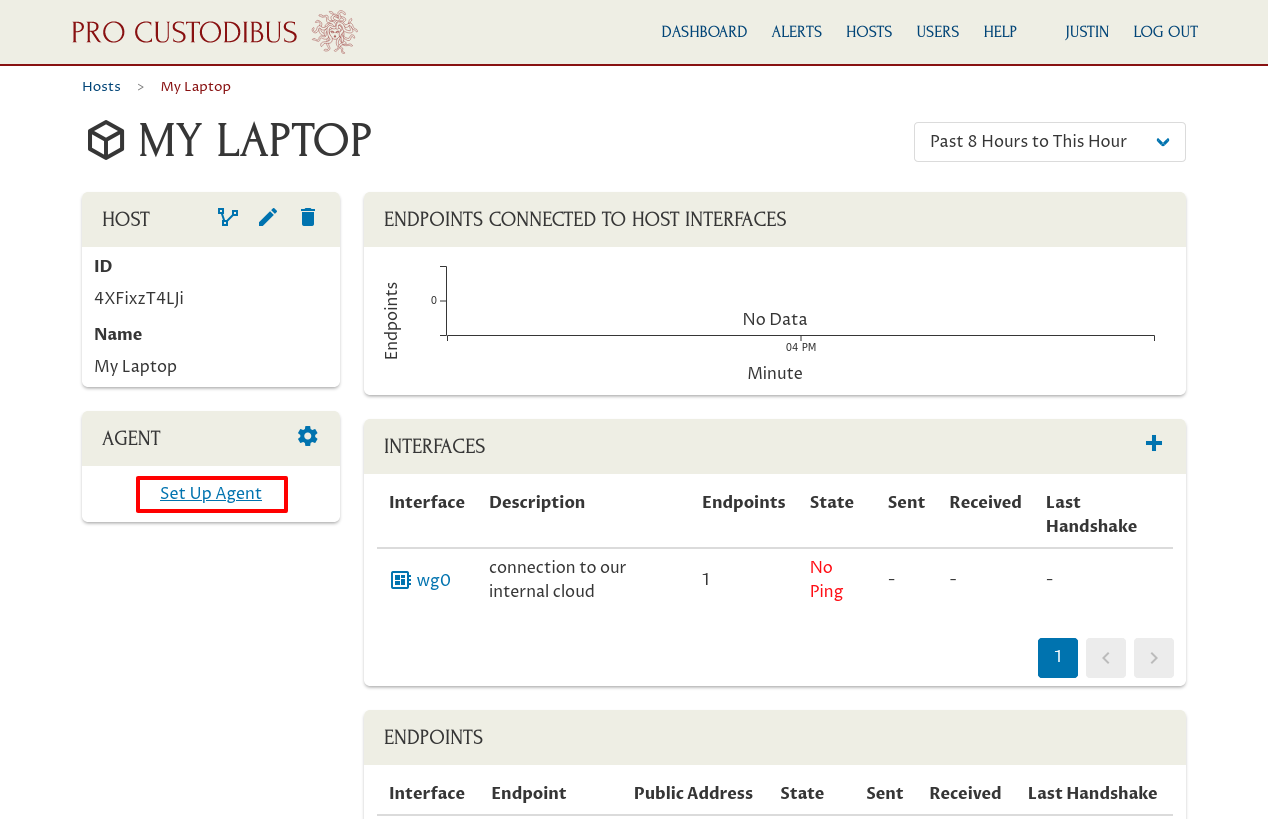
$ sudo dnf install wireguard-toolsNext, go back to the main page for My Laptop in Pro Custodibus, by clicking the My Laptop link in the breadcrumbs of page for the endpoint we just created (My Laptop’s VPN Server endpoint):
Then click the Set Up Agent link in the Agent panel:
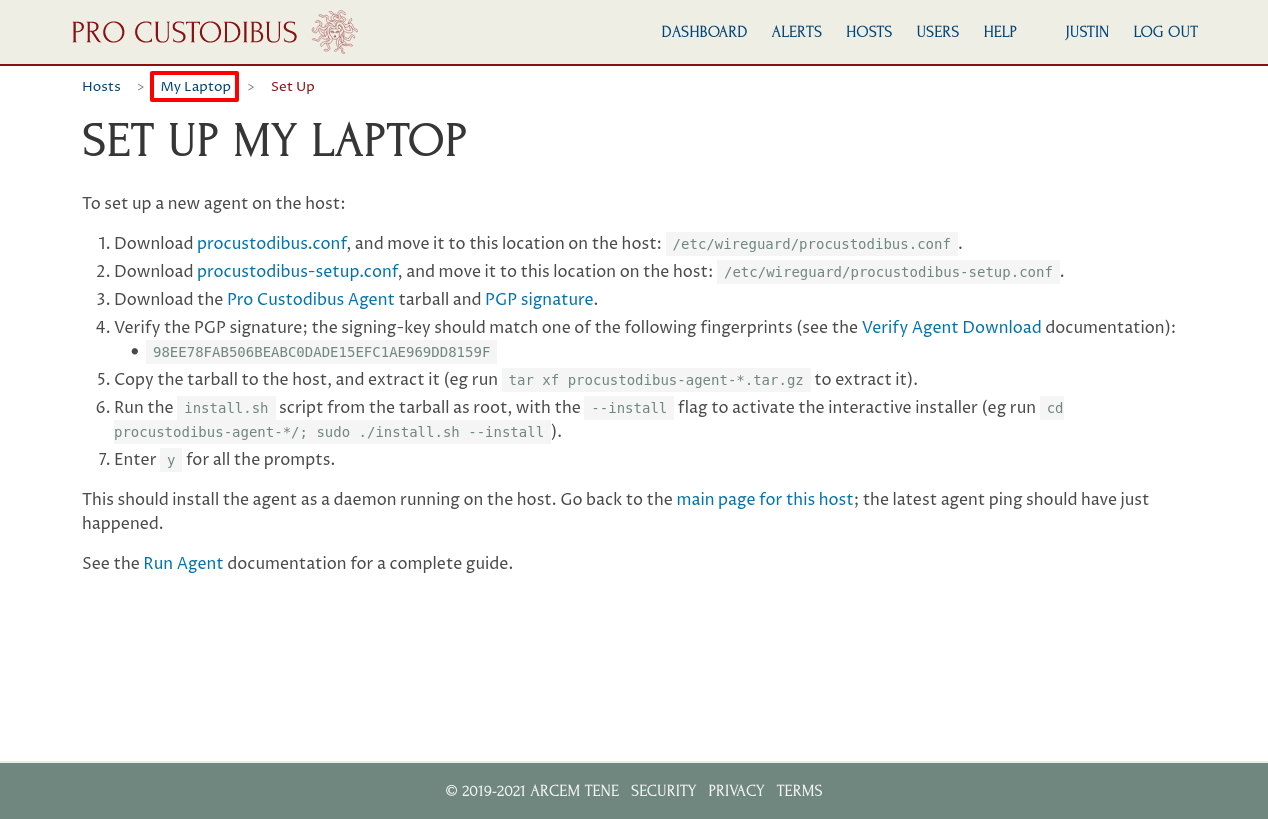
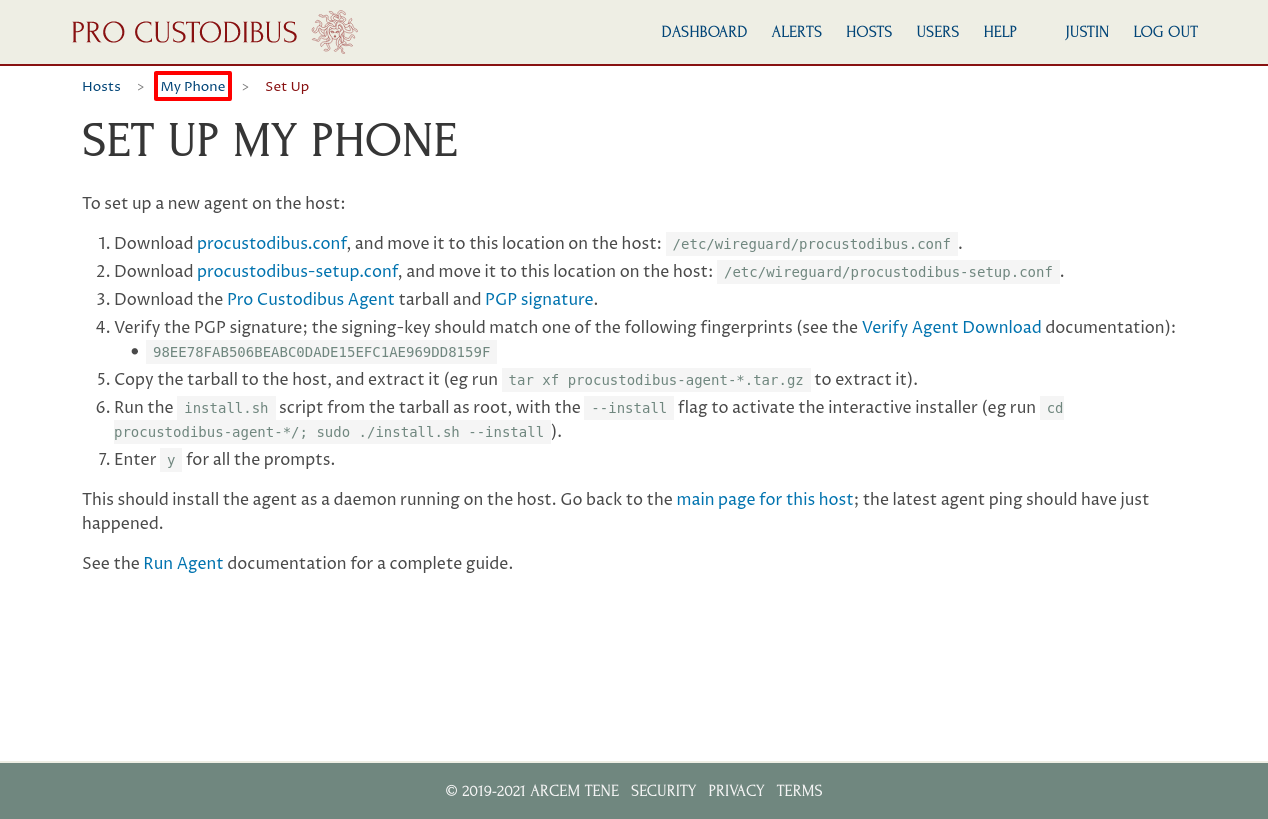
And download the procustodibus.conf and procustodibus-setup.conf files from the “Set Up” page:
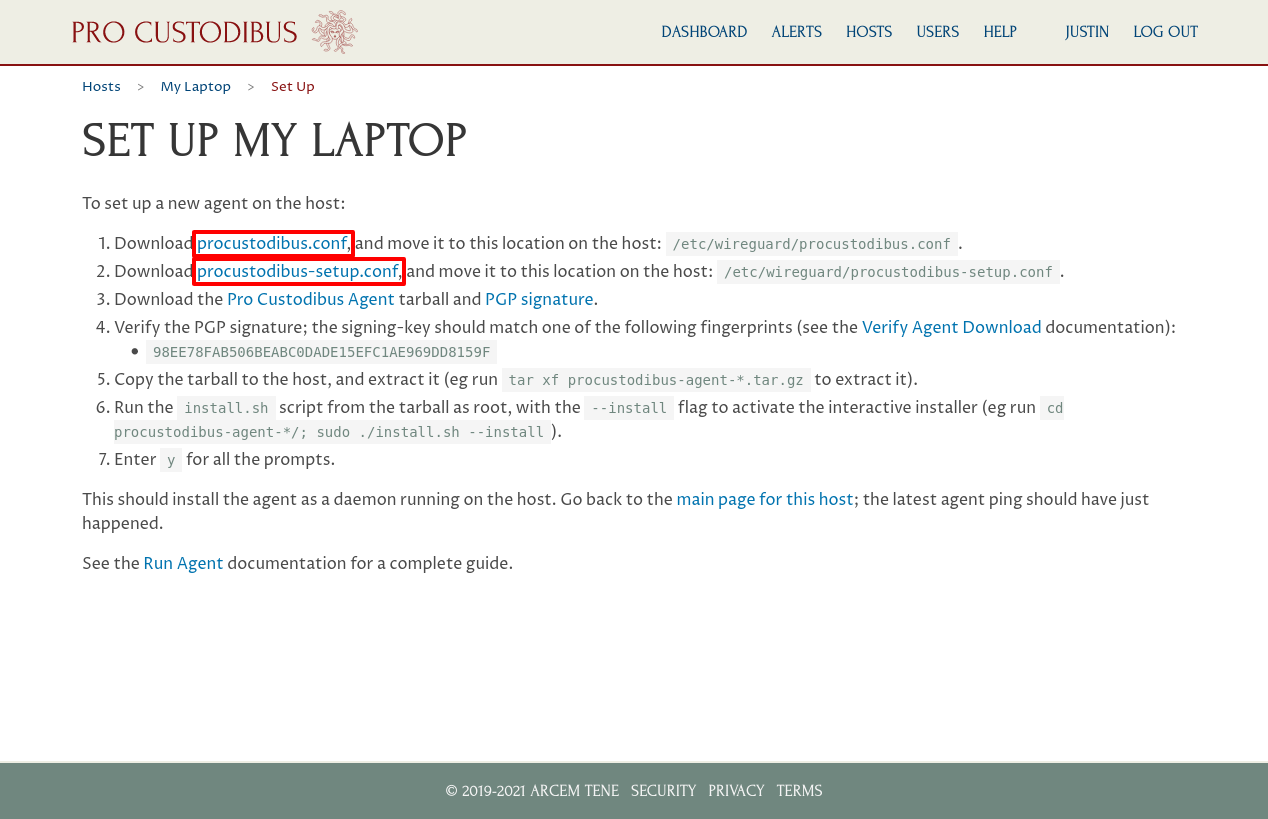
Then follow the Deploy the Pro Custodibus Agent section of the Getting Started guide to download and install the agent onto My Laptop (or just follow the instructions in the Download the Agent and Install the Agent docs).
Once the agent is installed, we can access internal apps, like our example Internal App, through the VPN Server from My Laptop. For example, you can run the following curl command on My Laptop to access our example Internal App:
$ curl -I 10.90.1.89
HTTP/1.0 200 OK
Server: SimpleHTTP/0.6 Python/3.8.5
Date: Wed, 11 Aug 2021 02:15:42 GMT
Content-type: text/html; charset=utf-8
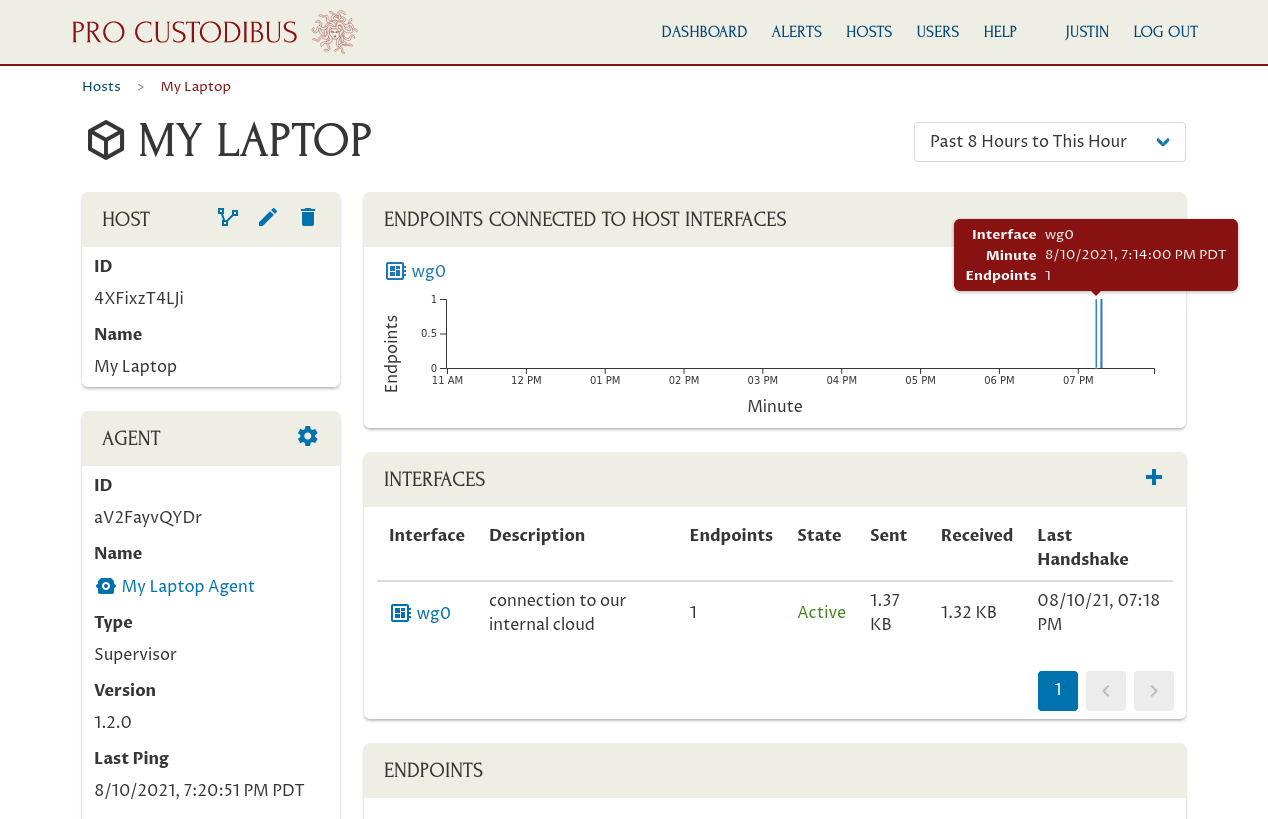
Content-Length: 338If you go back to the main page for My Laptop in Pro Custodibus, you’ll see some recent activity for the new WireGuard interface we just set up:
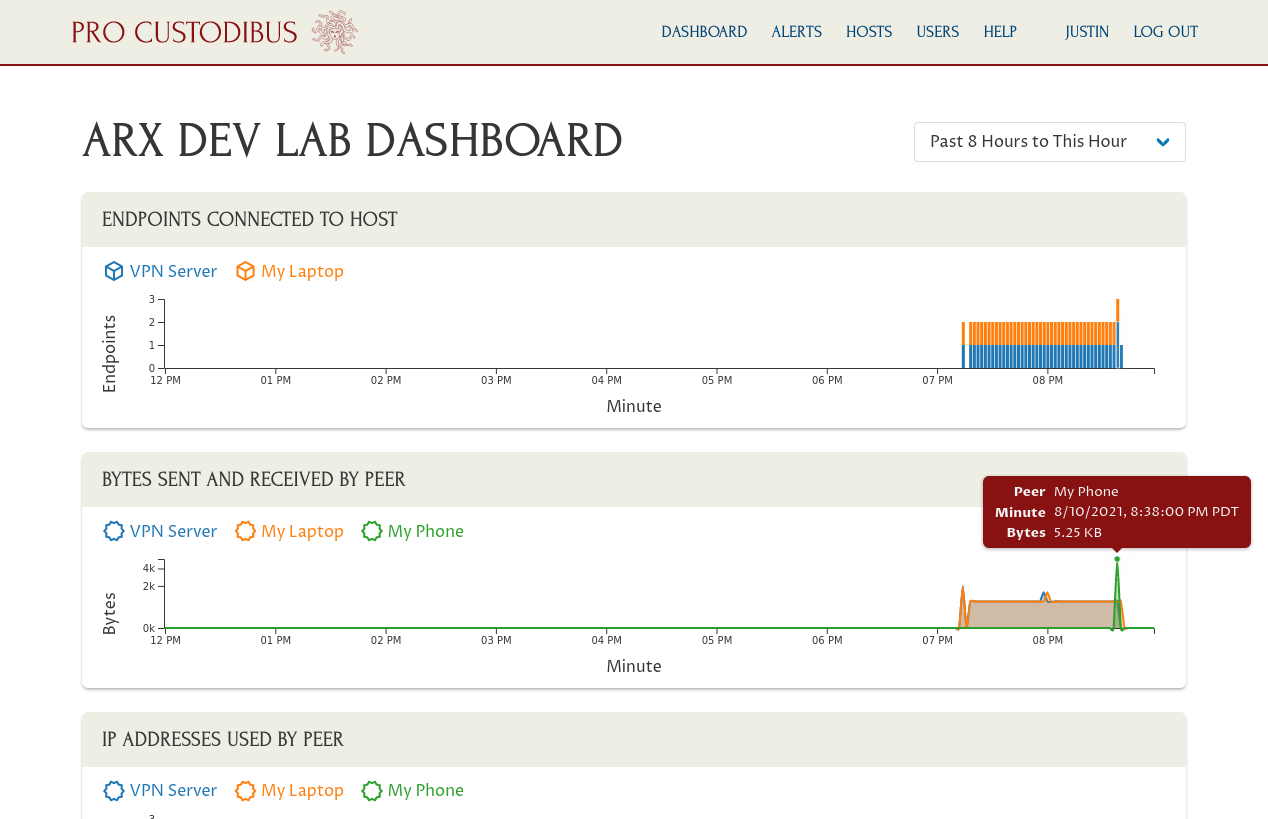
As you will if you navigate to the Pro Custodibus dashboard:
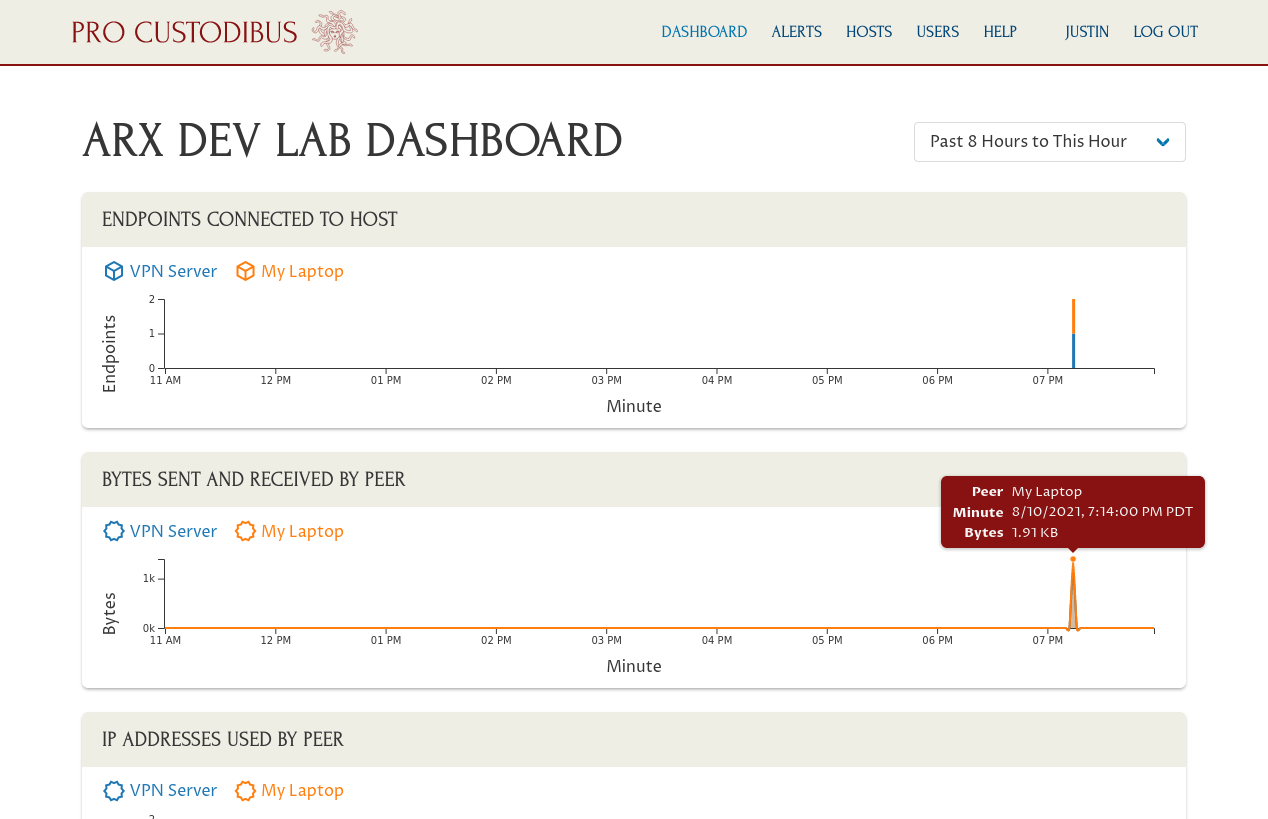
Add a WireGuard Interface for My Phone
Now we’ll configure My Phone just like we did My Laptop. We first need to create a host entry for it in Pro Custodibus; then we can add a WireGuard interface to it.
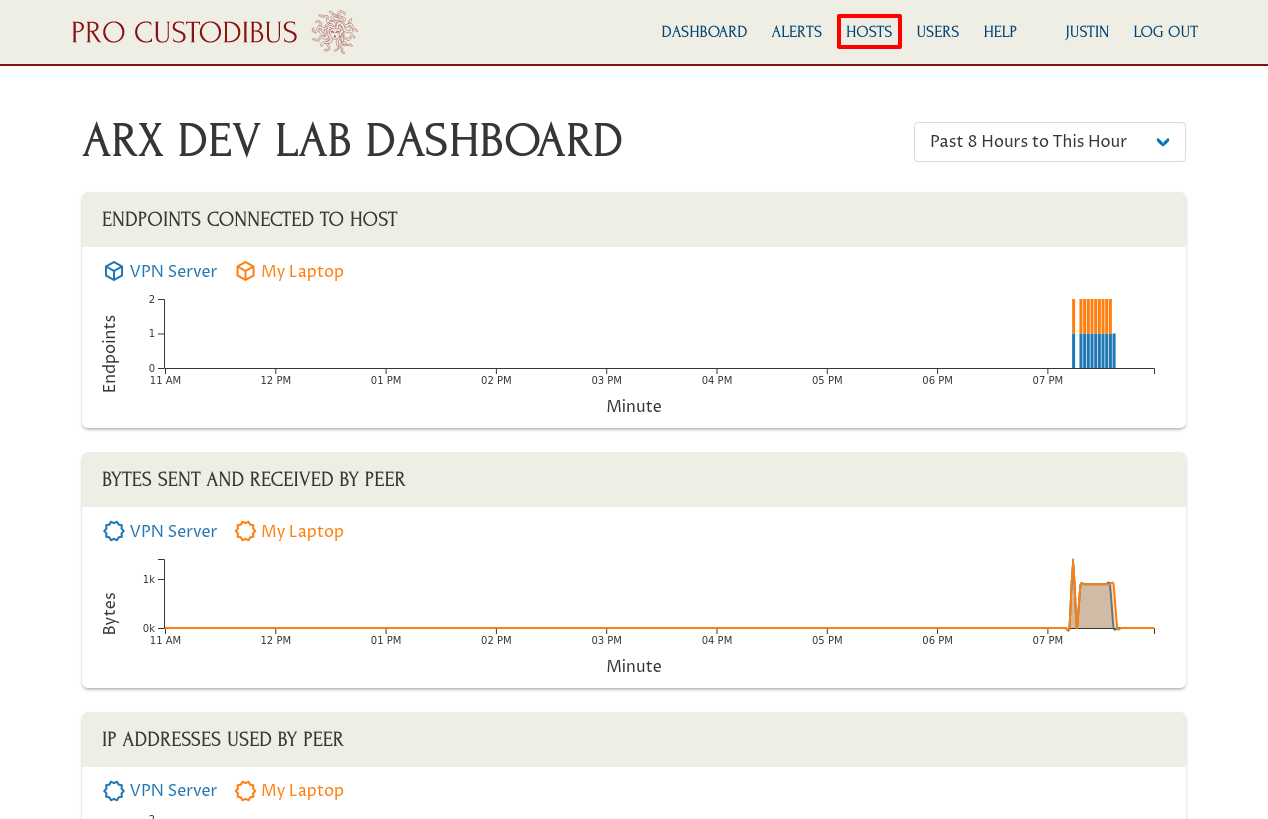
Click the Hosts link in the navigation bar at the top of the page to navigate to the main hosts list:
Then click the Add icon in the Hosts panel:
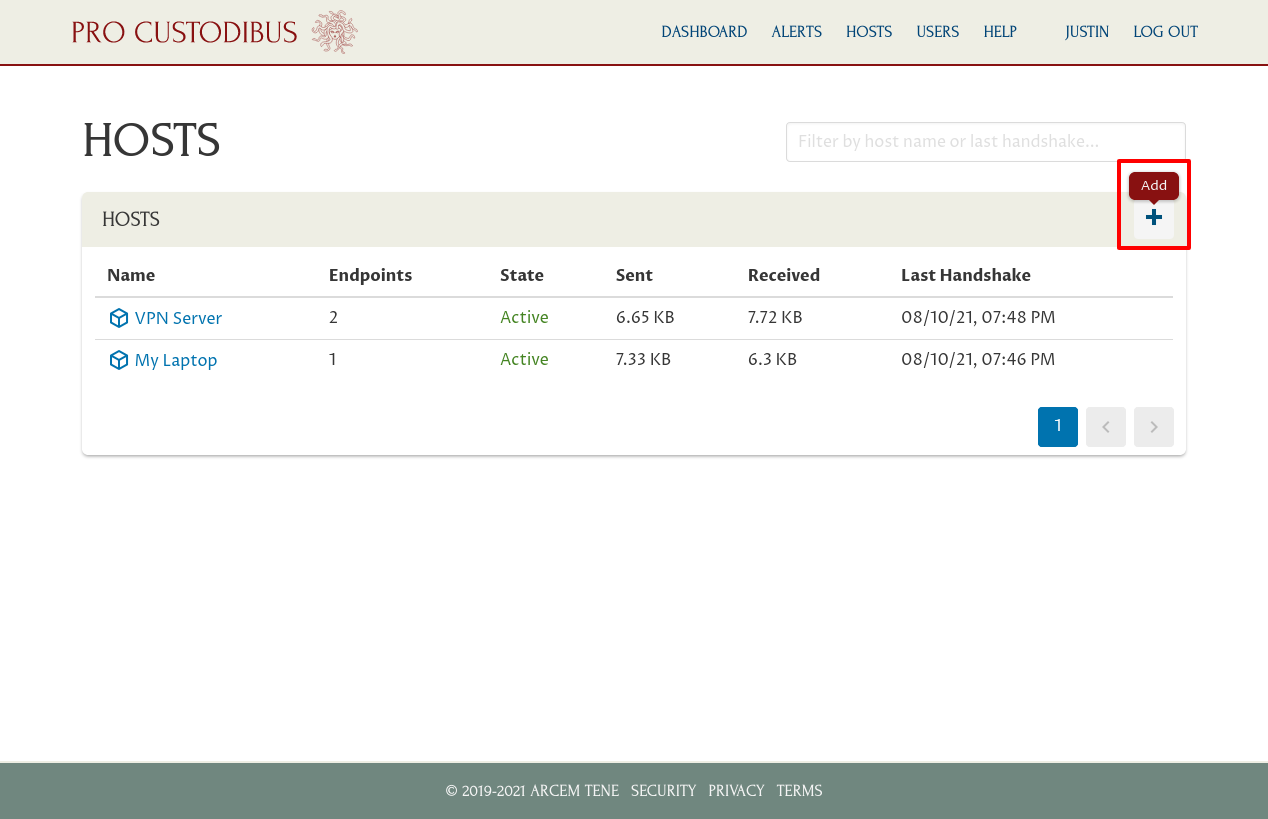
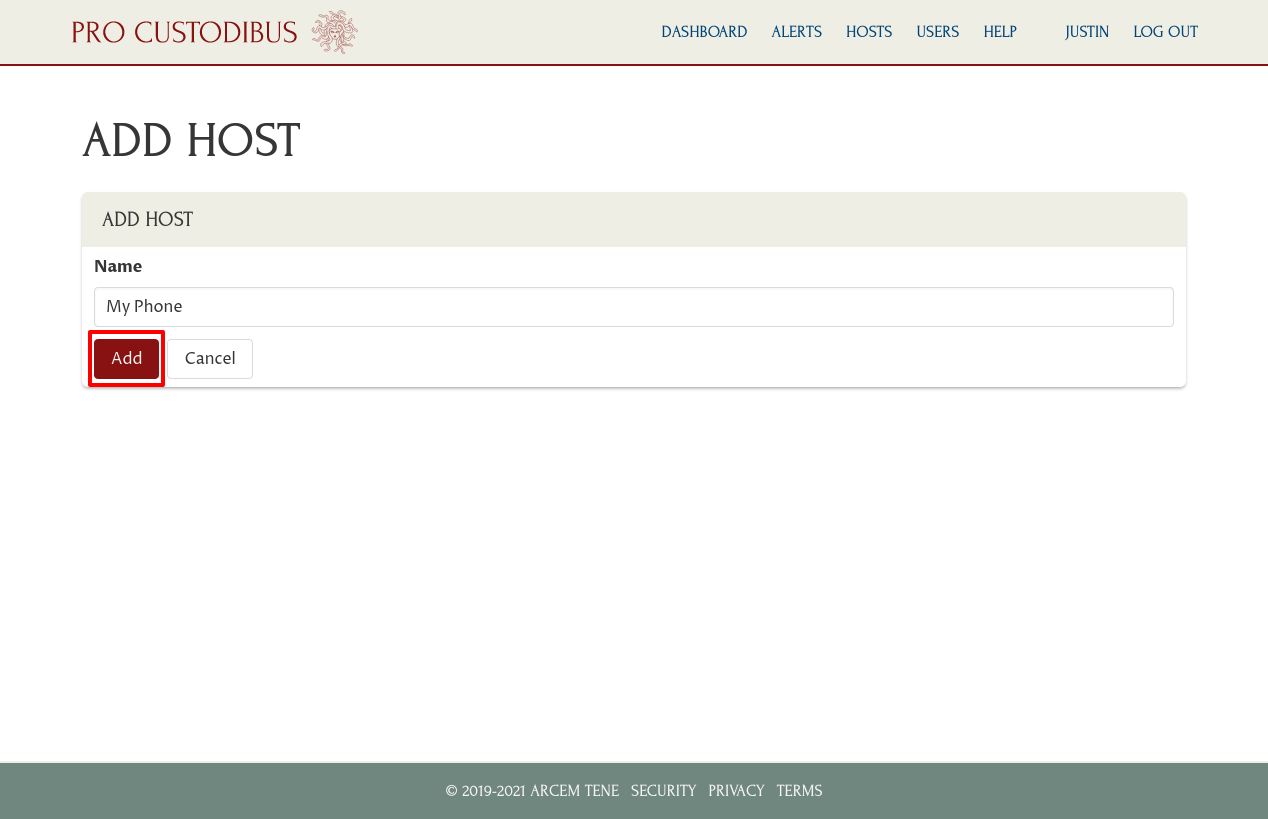
Then enter a name for the host, like “My Phone”, in the Name field; and click the Add button:
We aren’t going to set up the Pro Custodibus agent on My Phone, however, so just click the My Phone link in the breadcrumbs of the “Set Up” page to navigate to the main page for the new host:
Click the Add icon in the Interfaces panel to add a new WireGuard interface to the host:

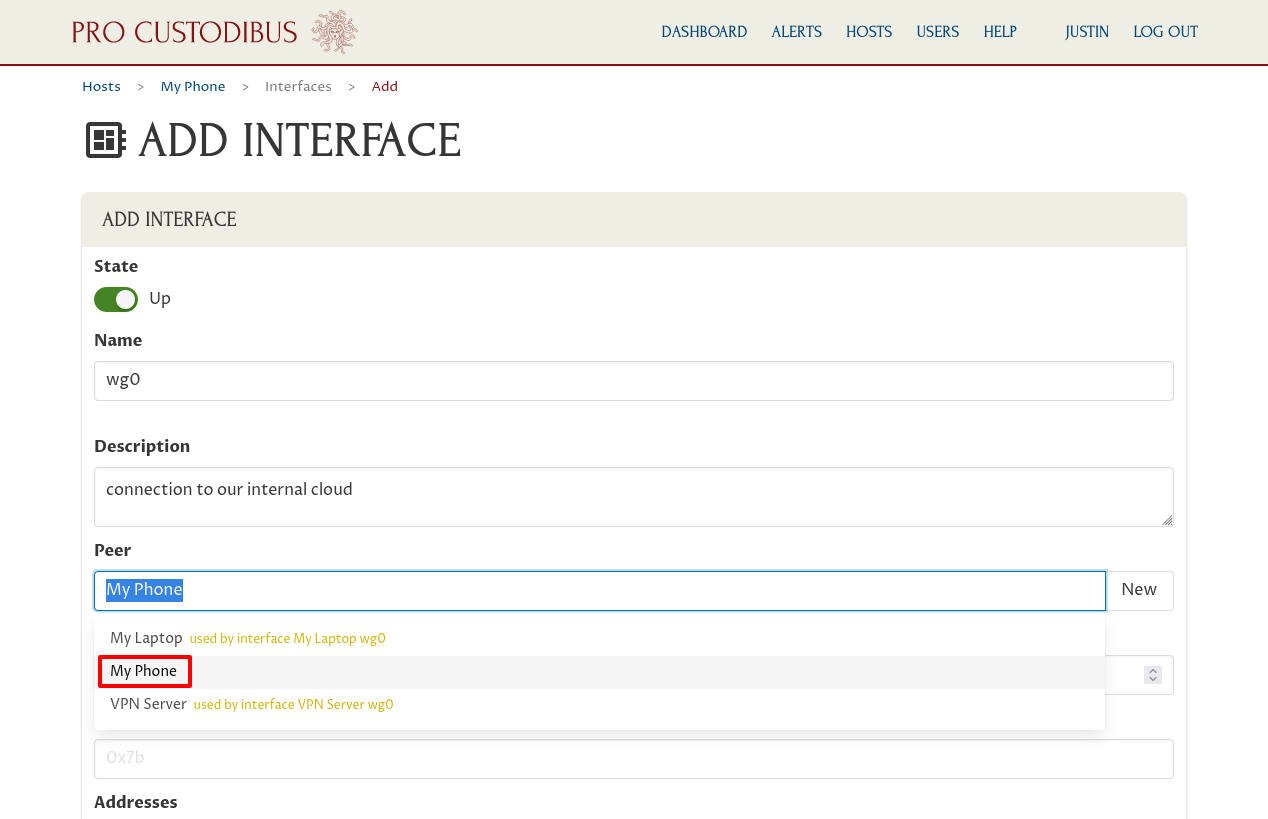
On the “Add Interface” page, enter a basic interface name like “wg0” into the Name field; and optionally enter a description like “connection to our internal cloud” into the Description field.
Then for the Peer field, select the “My Phone” peer we created when we set up the endpoint to My Phone on the VPN Server:
Next, enter the private IP address or addresses that the interface will use within the WireGuard network, like “10.0.0.3”, into the Addresses field:
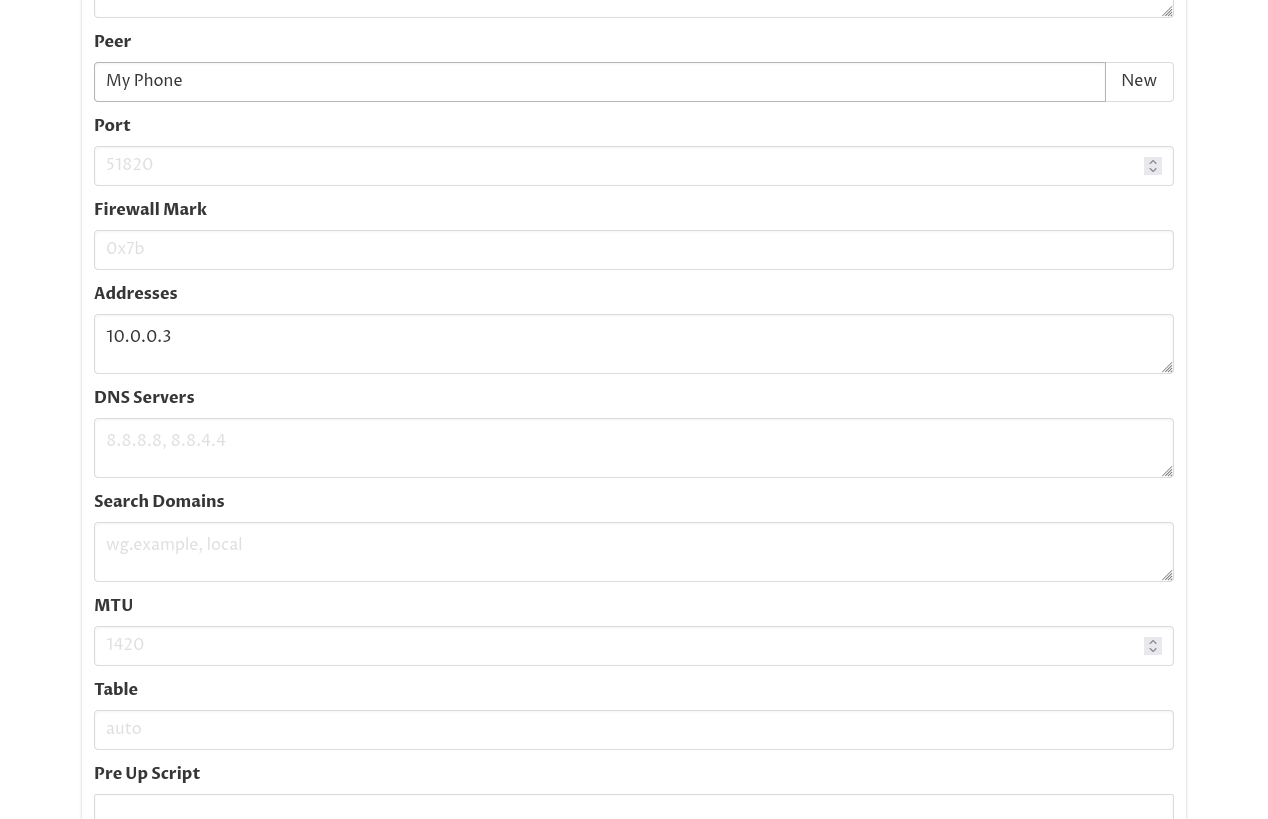
Finally, scroll down to the bottom of the page and click the Add button:

This will queue the new WireGuard interface for creation.
For more details about the “Add Interface” form, see the Add an Interface docs.
Add an Endpoint to the VPN Server on My Phone
To complete the connection between My Phone the VPN Server, we need to add an endpoint to the VPN Server on My Phone.
On the main page of the new interface for My Phone, click the Add icon in the Endpoints panel:

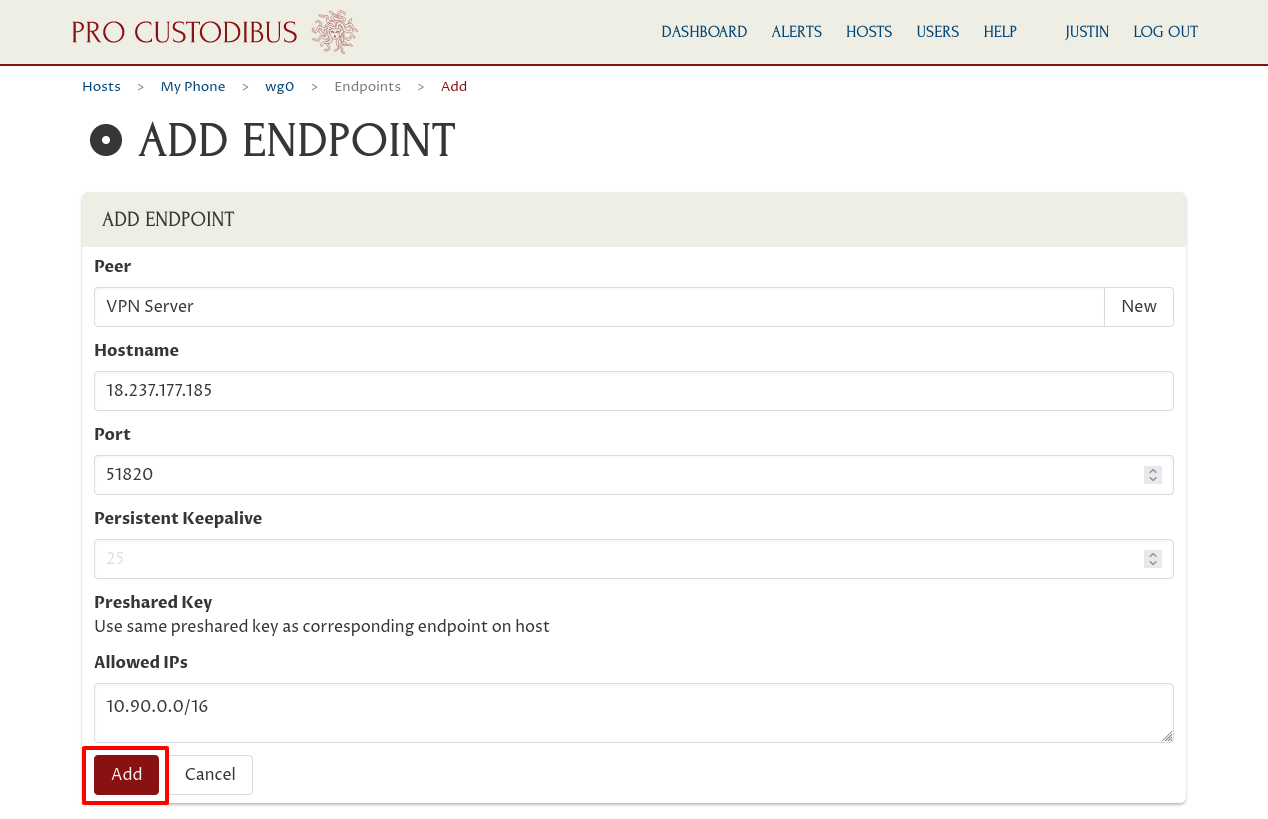
Then for the Peer field, select the “VPN Server” peer we created when we set up the WireGuard interface on the VPN Server:
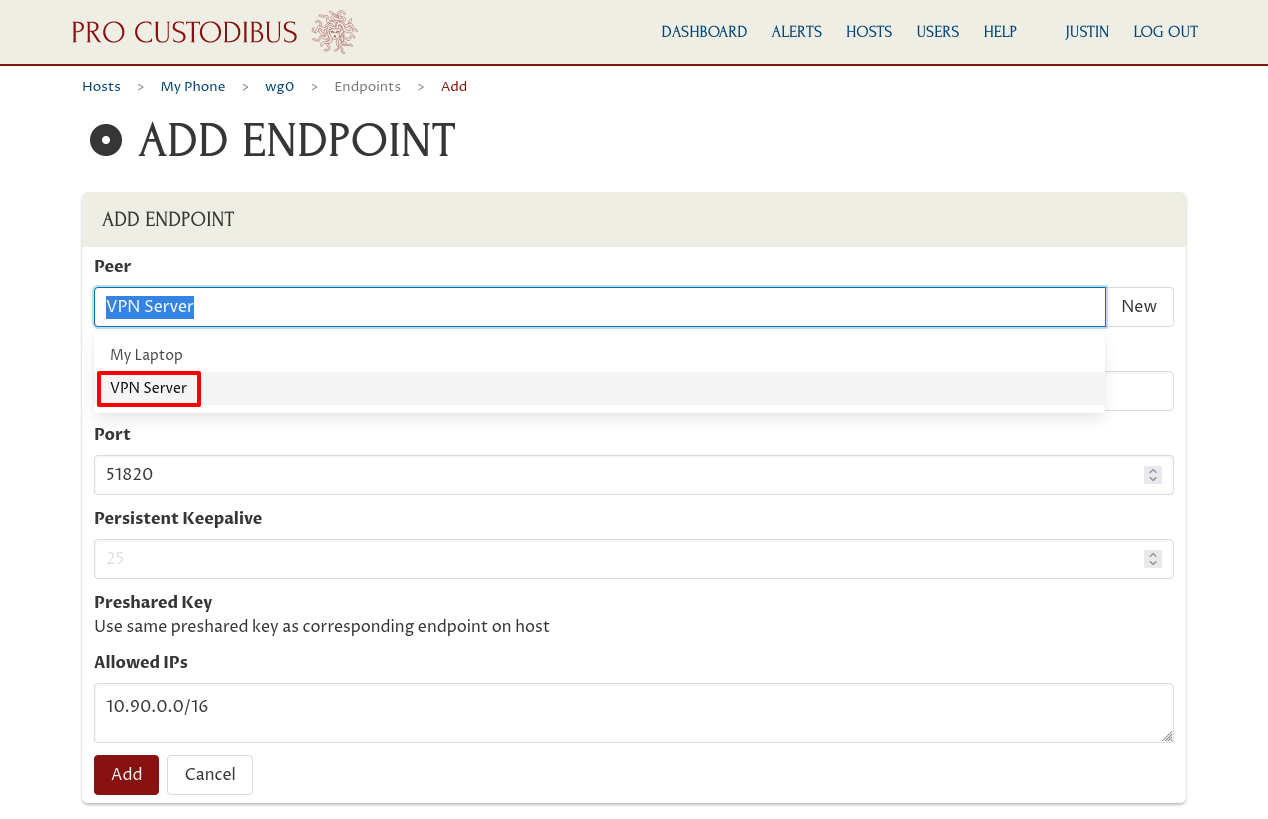
Pro Custodibus will automatically fill in the Hostname, Port, and Allowed IPs fields using the settings from the last endpoint created for the same peer (which was the endpoint we added to the VPN Server on My Laptop). All these settings are exactly what we want for My Phone, so we don’t need to adjust any of the pre-filled settings.
Just click the Add button at the bottom of the form:
This will queue the endpoint to be added to the interface for My Phone.
For more details about the “Add Endpoint” form, see the Add an Endpoint docs.
Scan the Configuration QR Code on My Phone
Now since we aren’t going to run the Pro Custodibus agent on My Phone, we need to manually copy over the configuration we’ve set up in the Pro Custodibus UI to My Phone. The easiest way to do that is scan the configuration QR code that Pro Custodibus generates for the interface with the WireGuard app on My Phone.
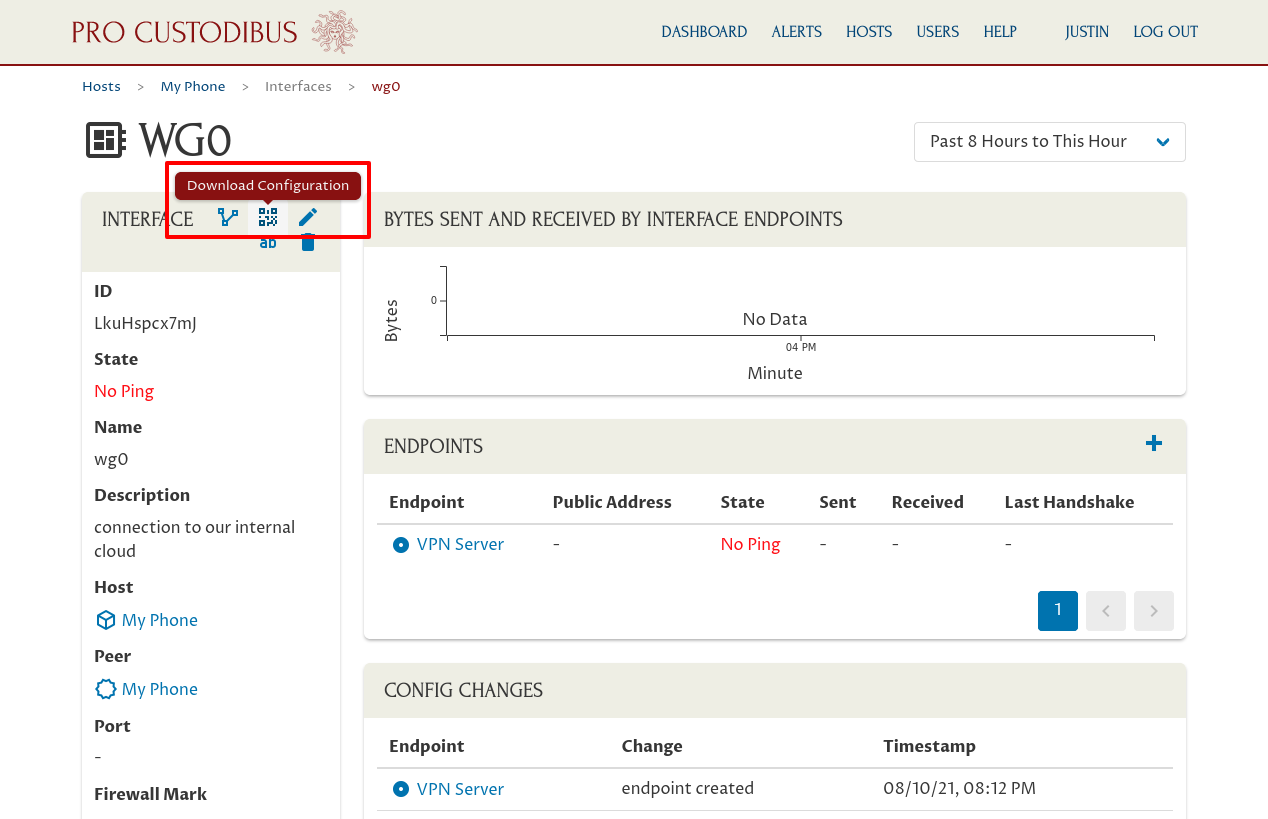
So go back to the main page for “wg0” interface of My Phone, by clicking the wg0 link in the breadcrumbs of the page for the endpoint we just created (the VPN Server endpoint):
Then click the Download Configuration icon in the Interface panel:
This will present you with a page containing a QR code you can scan, as well as a WireGuard configuration file you can copy or download:
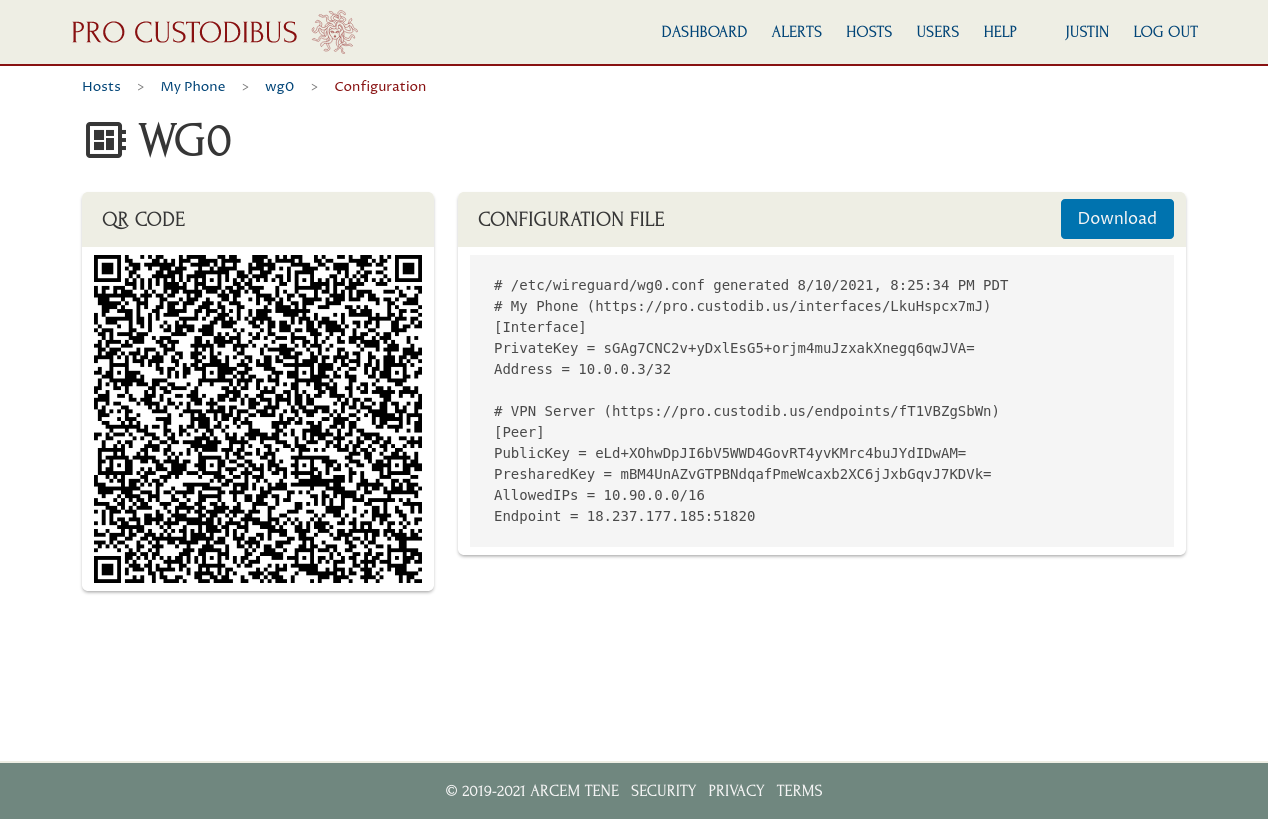
You can also right-click the QR code to save it as a GIF file, to scan it later.
|
Caution
|
The configuration file and QR code both contain the private key for the interface (as well as the preshared key for any endpoints that have been configured with a preshared key) — so if you download one or both as a file, make sure you keep the file secret. If you send the file via email or other messaging service, make sure you encrypt the file first, or send it over a secure channel. |
Now if you open the WireGuard app on My Phone, tap its Add Interface button, select the Scan From QR Code option, and point its camera at the QR code generated by Pro Custodibus, the WireGuard app will create a new interface on My Phone with the configuration from Pro Custodibus.
Then if you start up that interface on My Phone, open up a browser, and access an internal app at the cloud site — like for our example, enter http://10.90.1.89/ into the browser URL bar to access our example Internal App — you’ll be able to connect to that web app.
And if you go back to the Pro Custodibus dashboard, you’ll see some recent activity for My Phone:
Monitoring My Phone
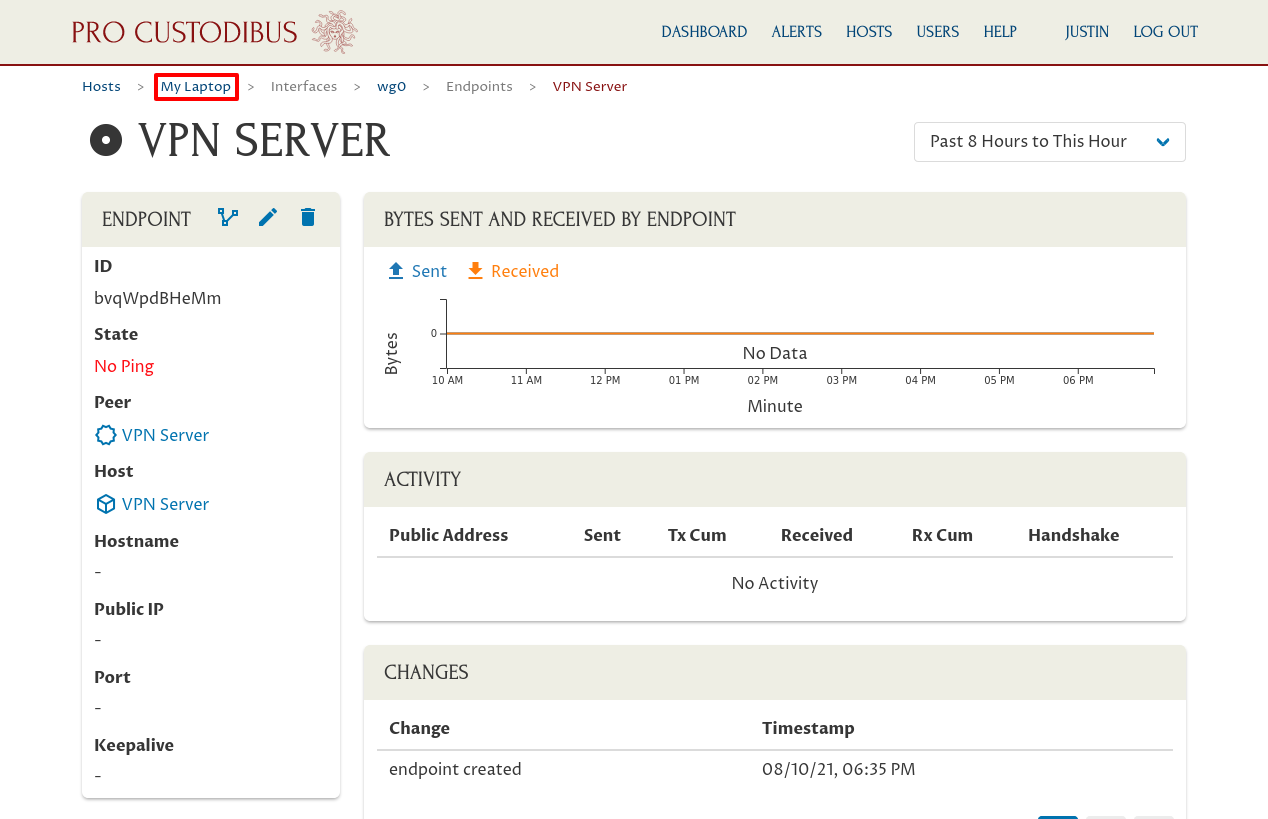
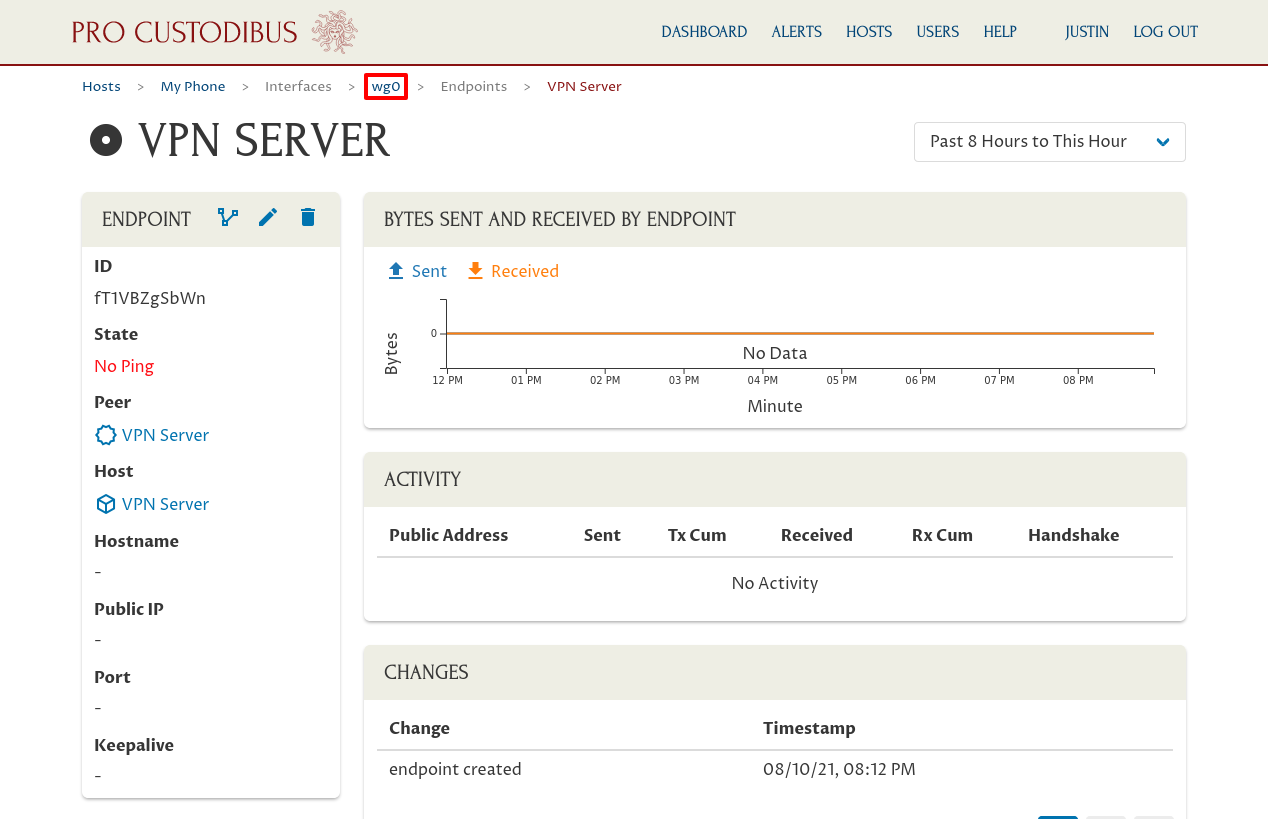
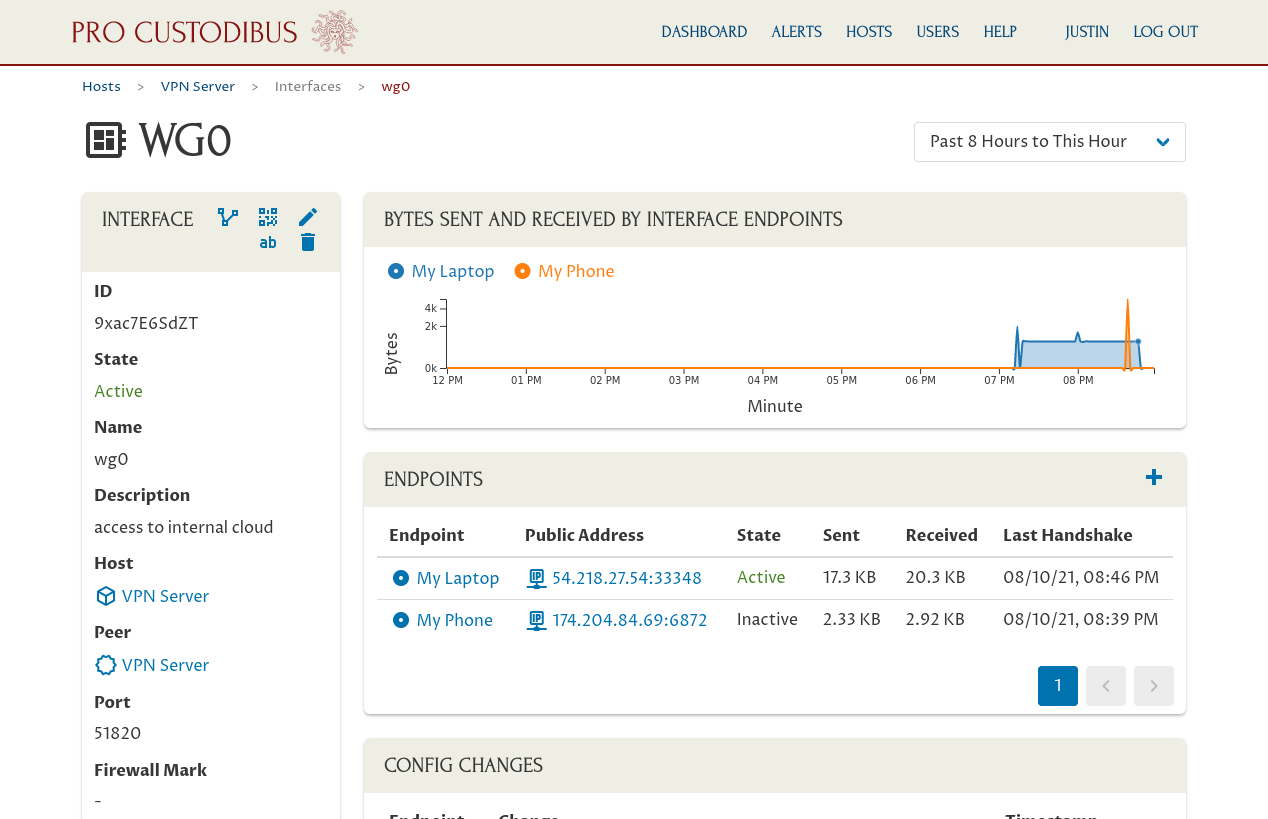
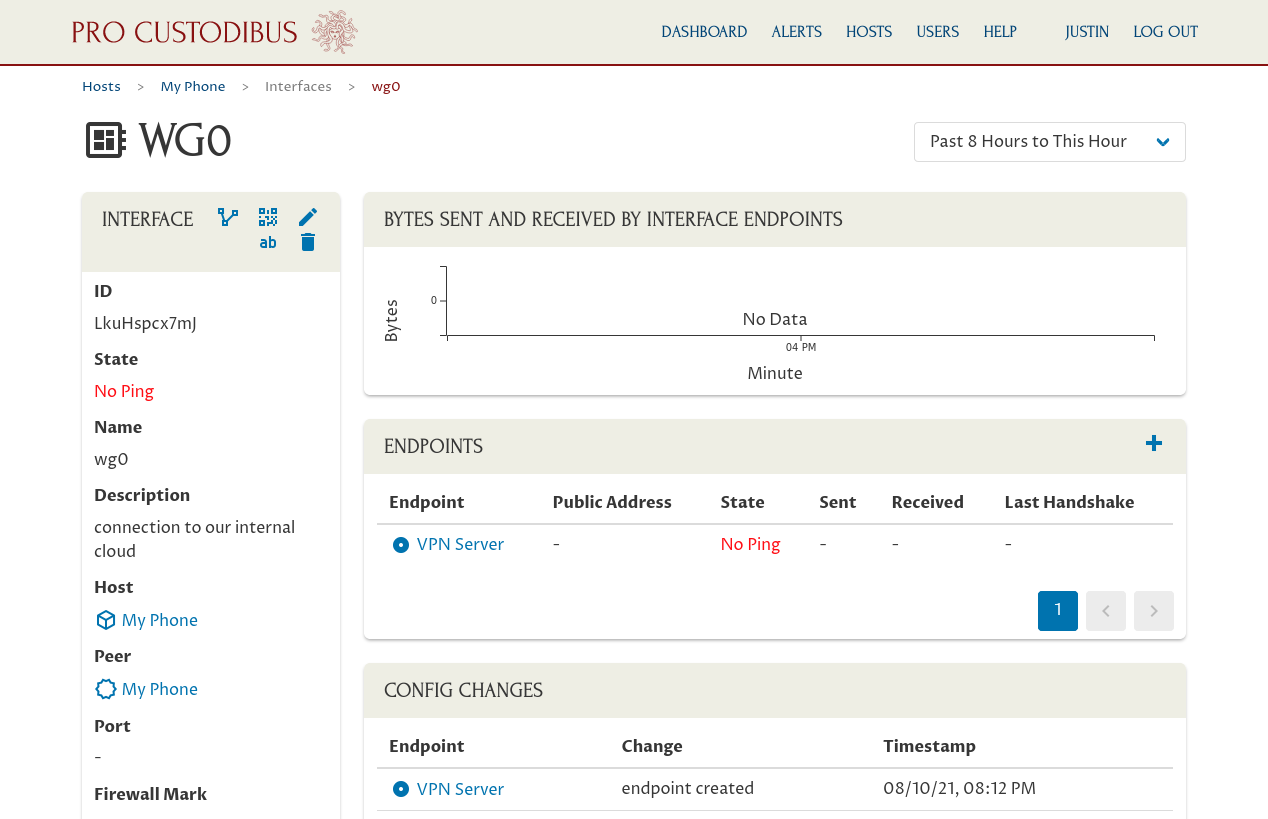
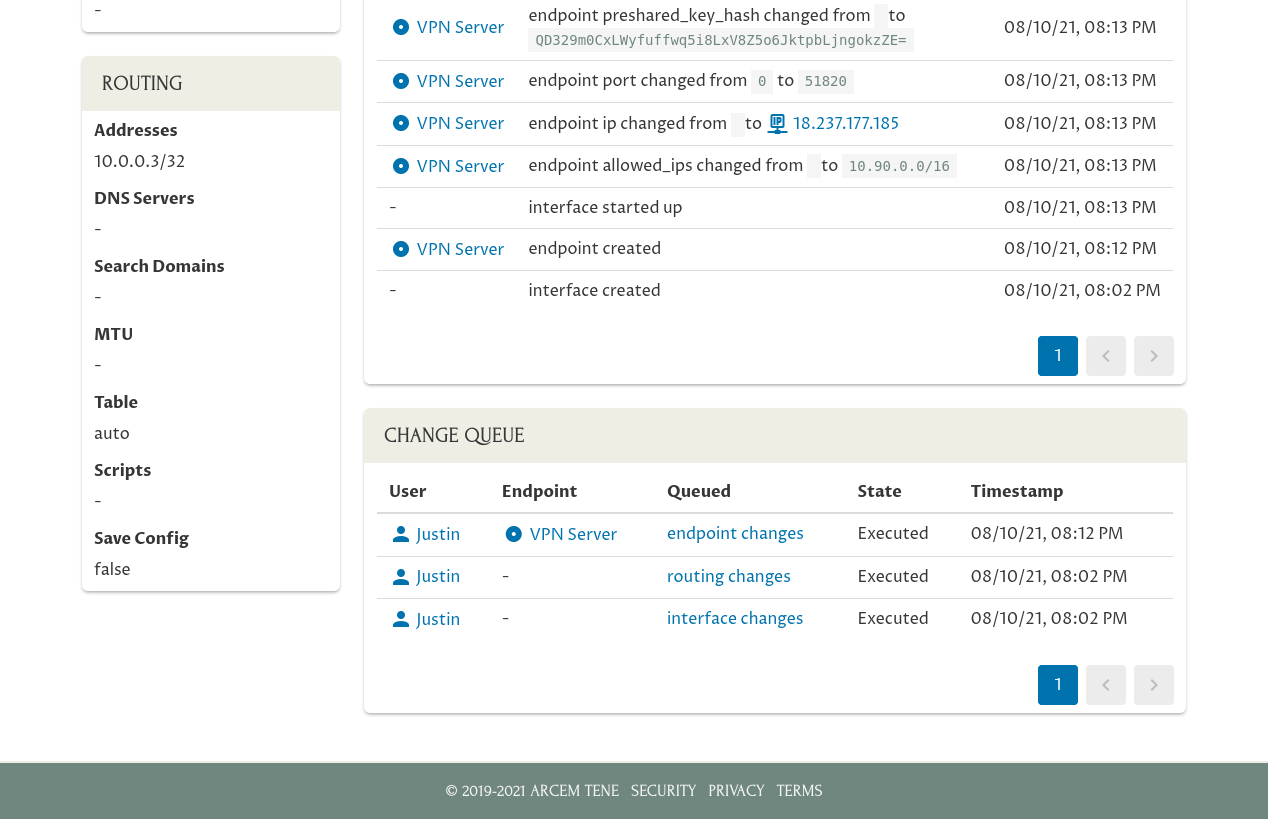
Because we haven’t installed the Pro Custodibus agent on My Phone, we won’t be able to monitor activity for My Phone directly — we’ll only see its activity through the other hosts we’re monitoring. For example, you can see its activity on the main page for the VPN Server’s WireGuard interface:
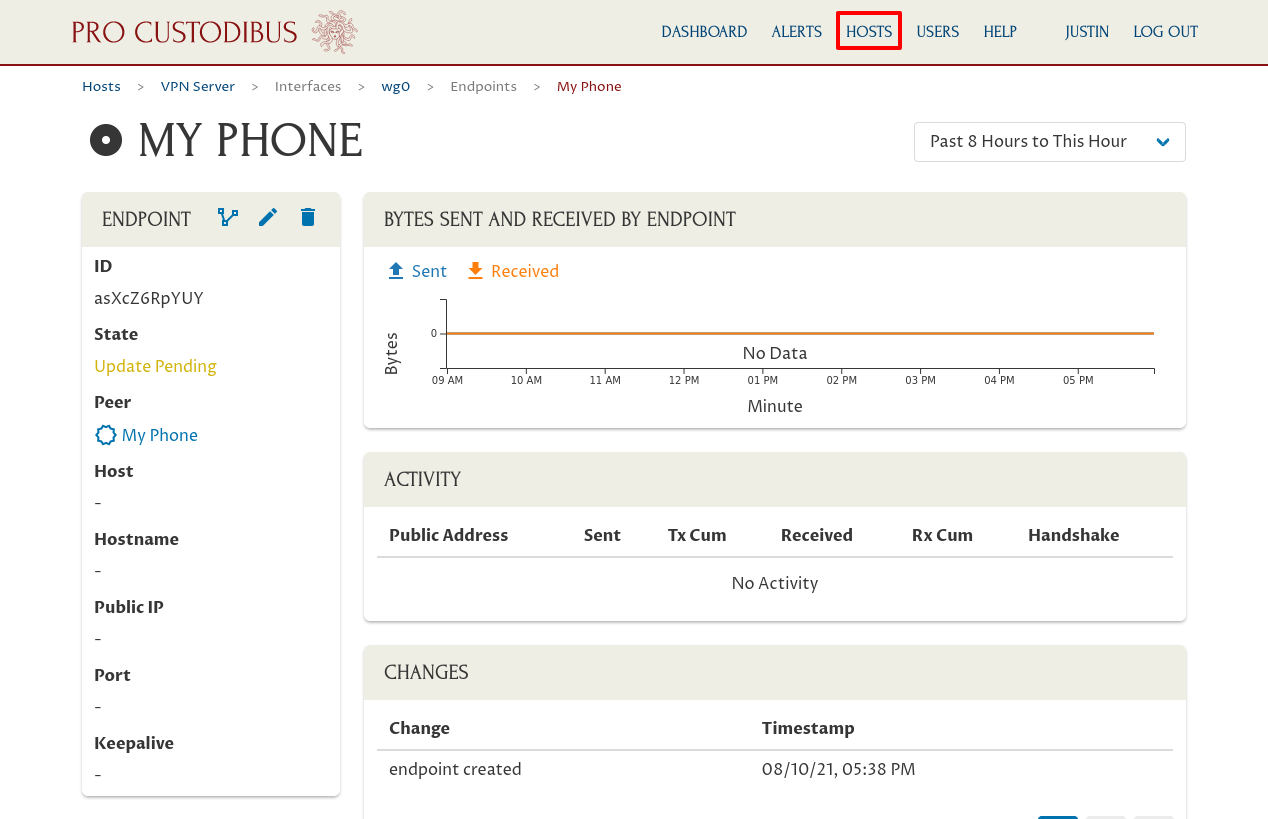
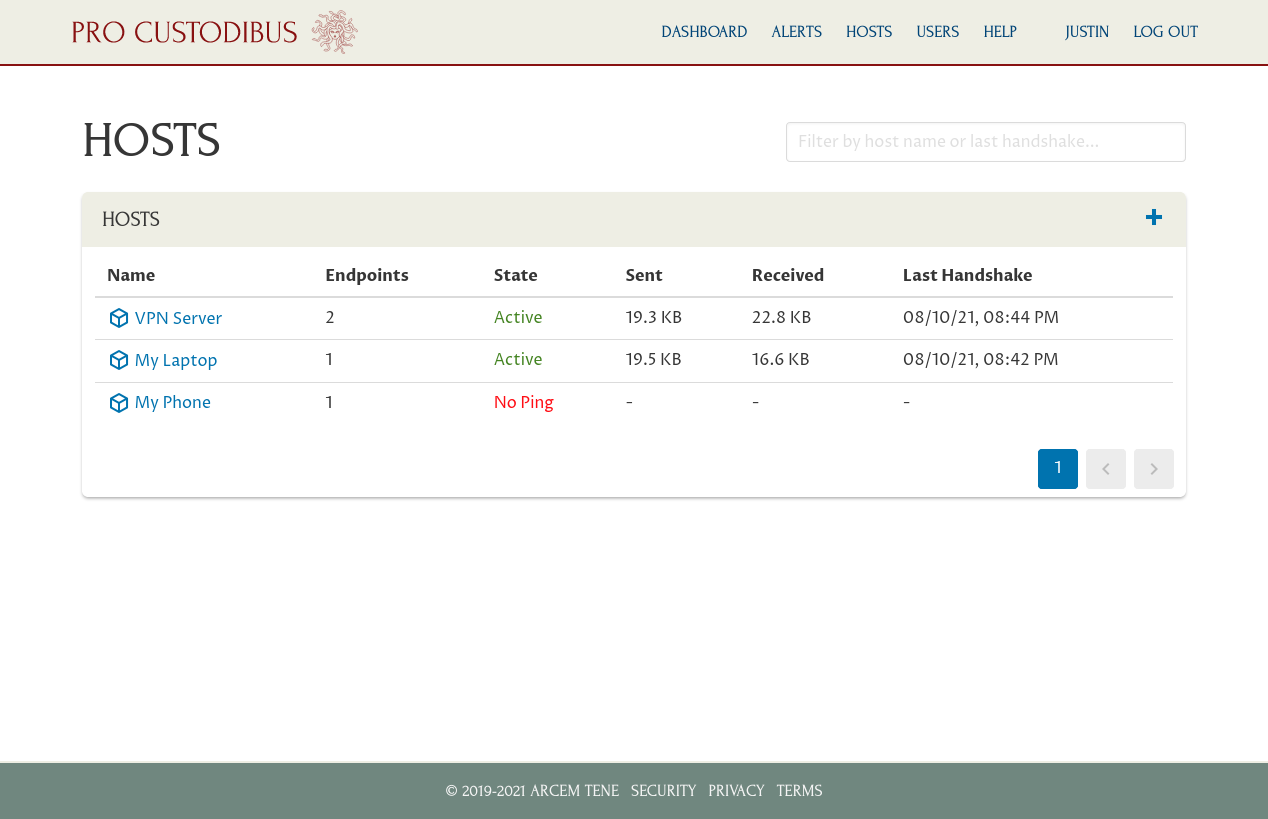
But if you navigate to the top-level hosts list, you’ll see no activity listed for My Phone:
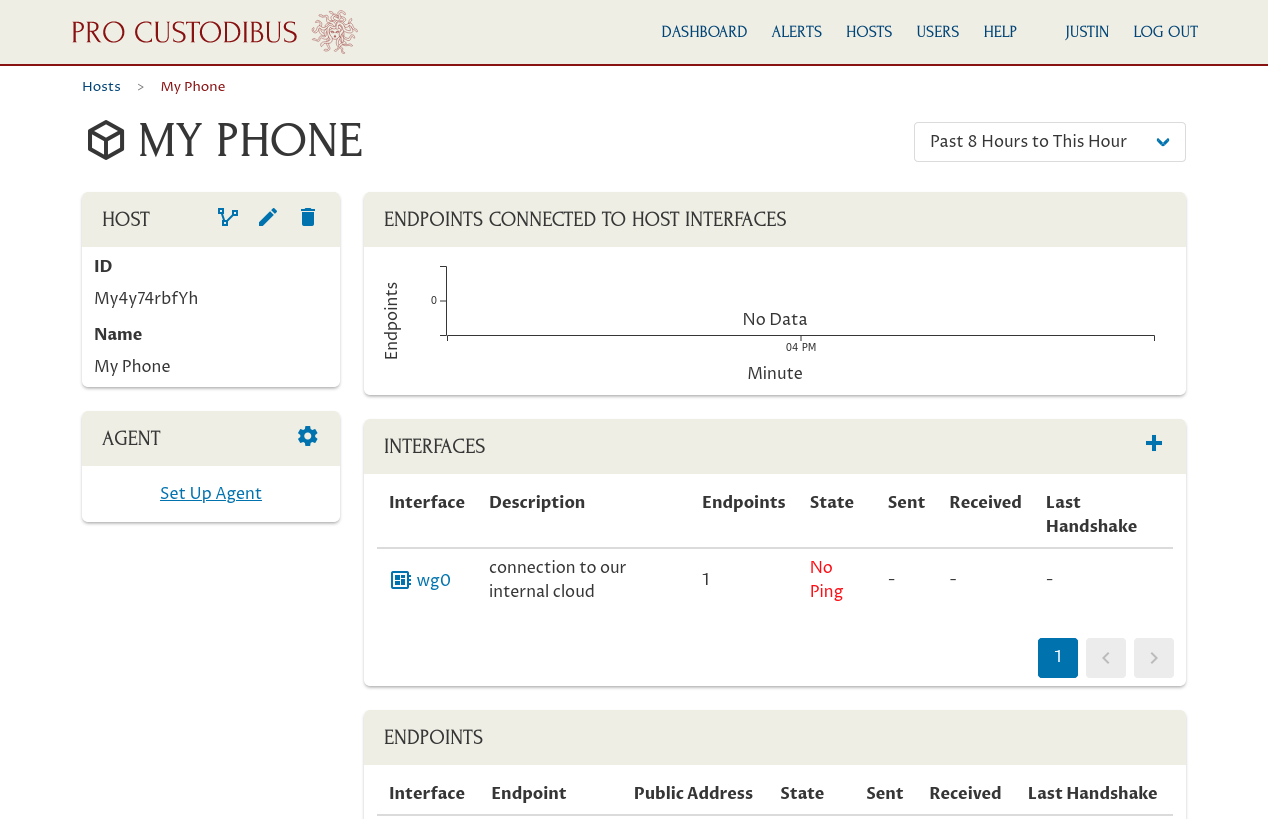
And the same thing on My Phone’s main host page:
And same for the interface we set up for My Phone:
Additionally, the changes we’ve made in the Pro Custodibus UI for My Phone will be listed as “Pending”, rather than “Executed”:
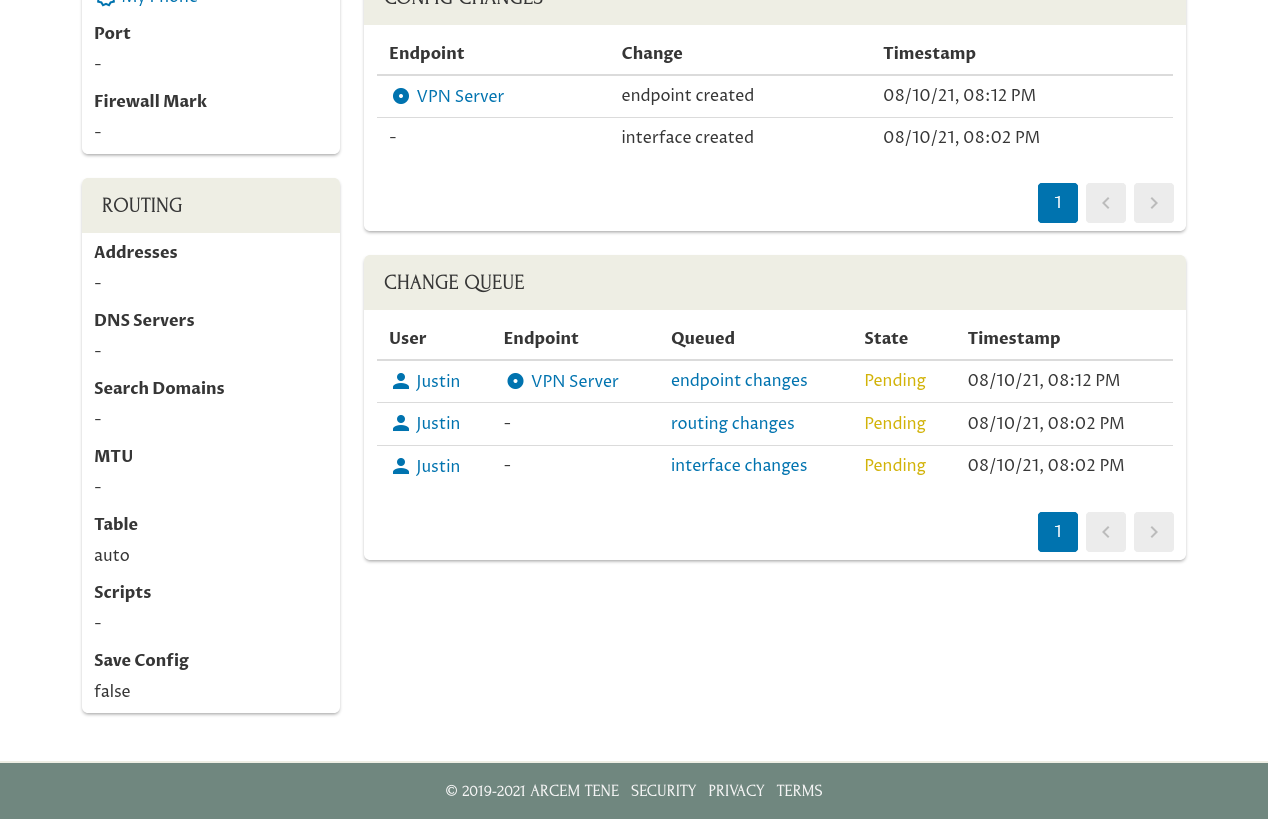
This is because we applied the changes manually when we scanned the QR code on My Phone — not through the Pro Custodibus agent. And since My Phone is not monitored by the agent, Pro Custodibus can’t tell if the changes queued for My Phone have been applied or not.
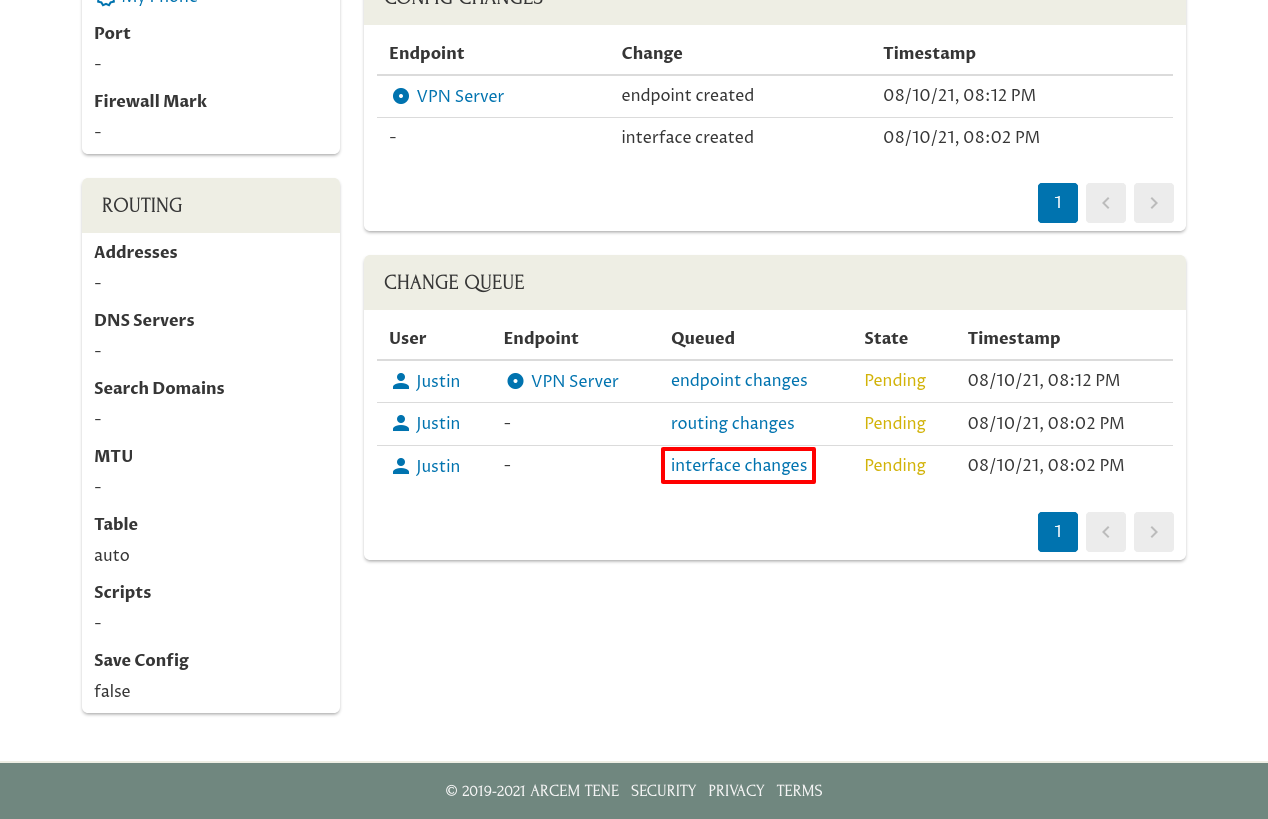
To tell Pro Custodibus that we applied the changes manually, click the link in the “Queued” column for each row:
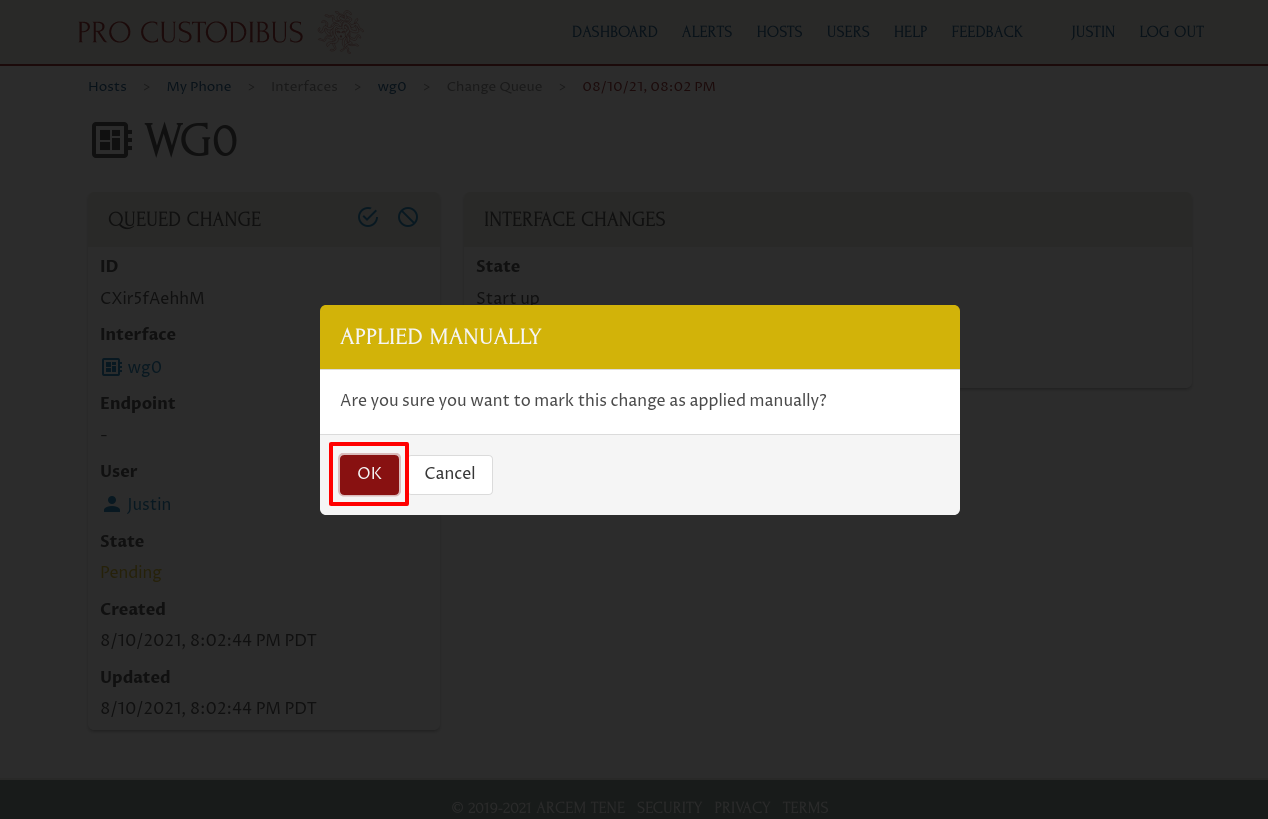
Then click the Applied Manually icon in the Queued Change panel:
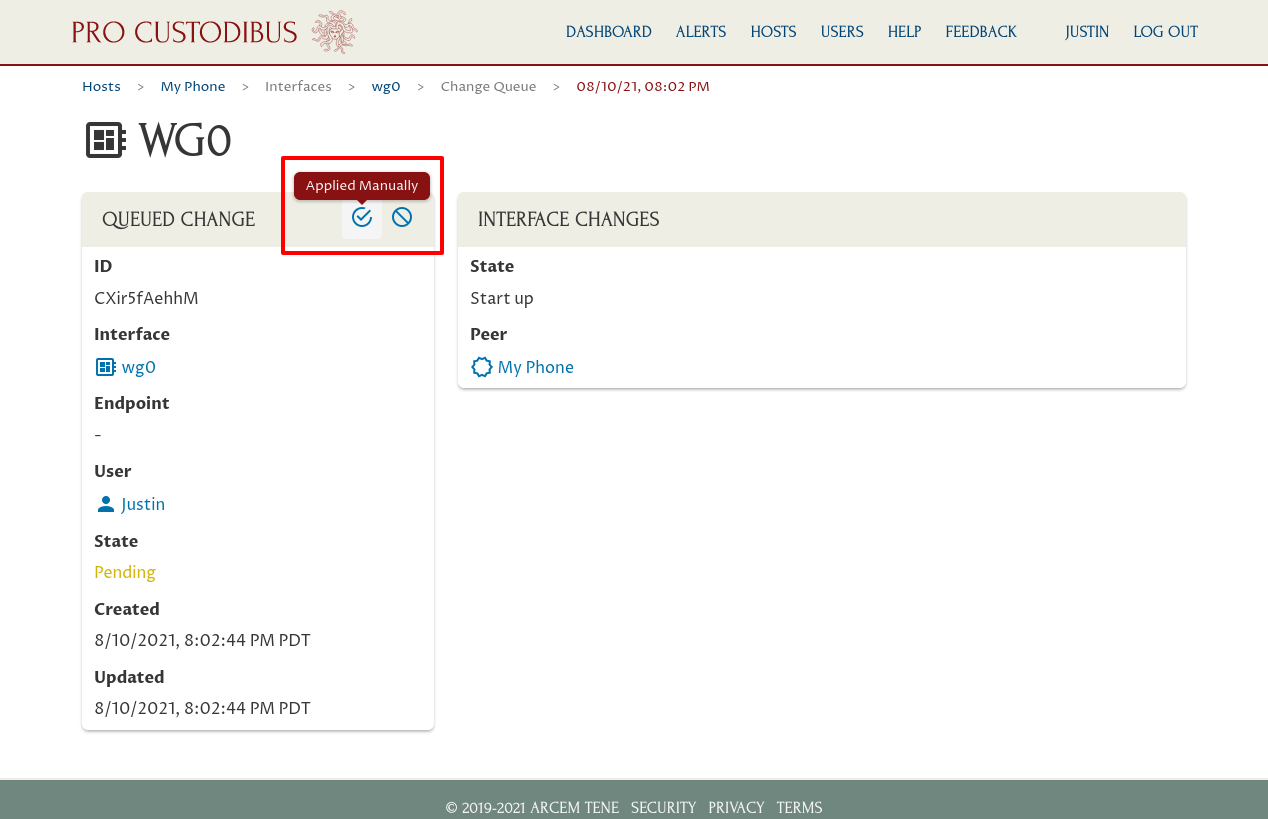
And click the OK button in the resulting confirmation dialog:
Do this for all the queued changes for My Phone, so that the UI shows all the changes you made as “Executed”:
You can continue to make new changes to My Phone’s WireGuard interface through the Pro Custodibus GUI — you’ll just have to continue to apply them manually (like by generating a new QR code for the interface and scanning it with My Phone).
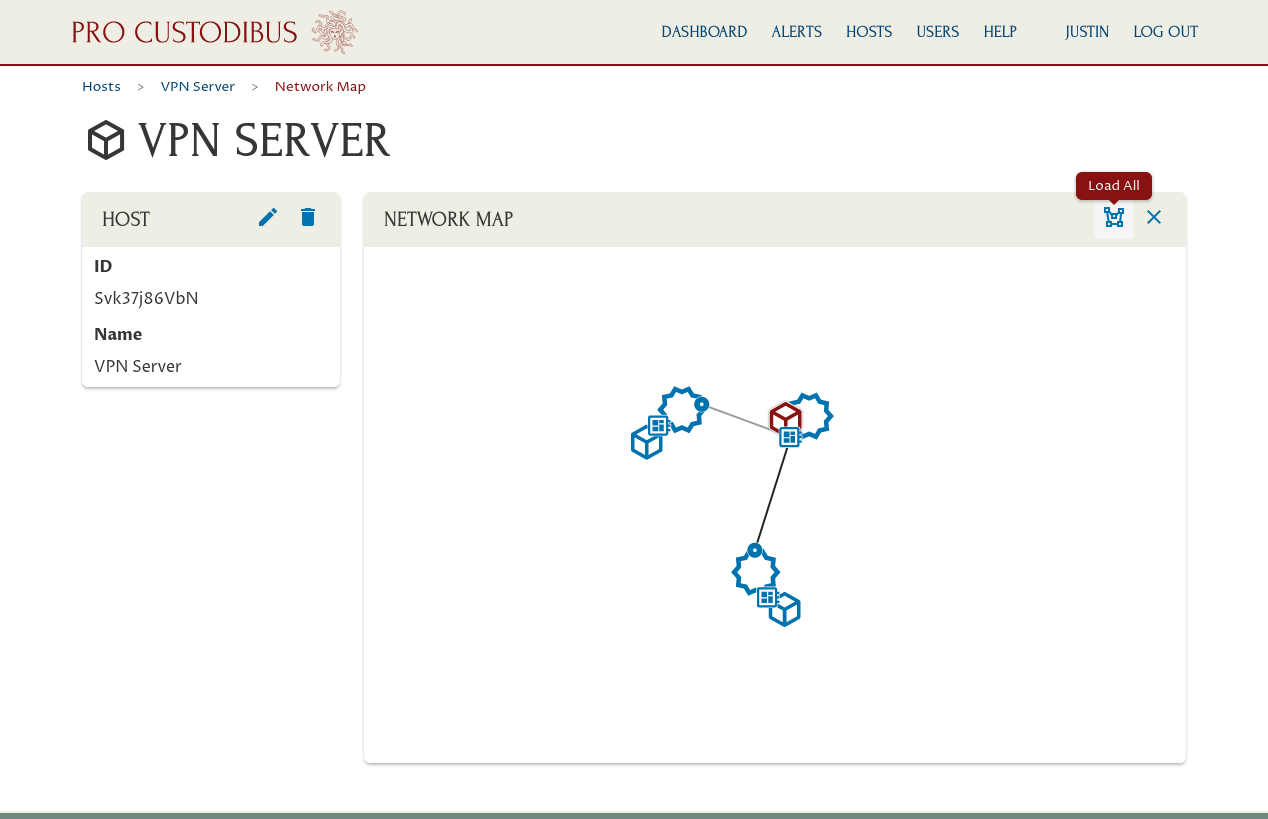
Bonus: WireGuard Network Map
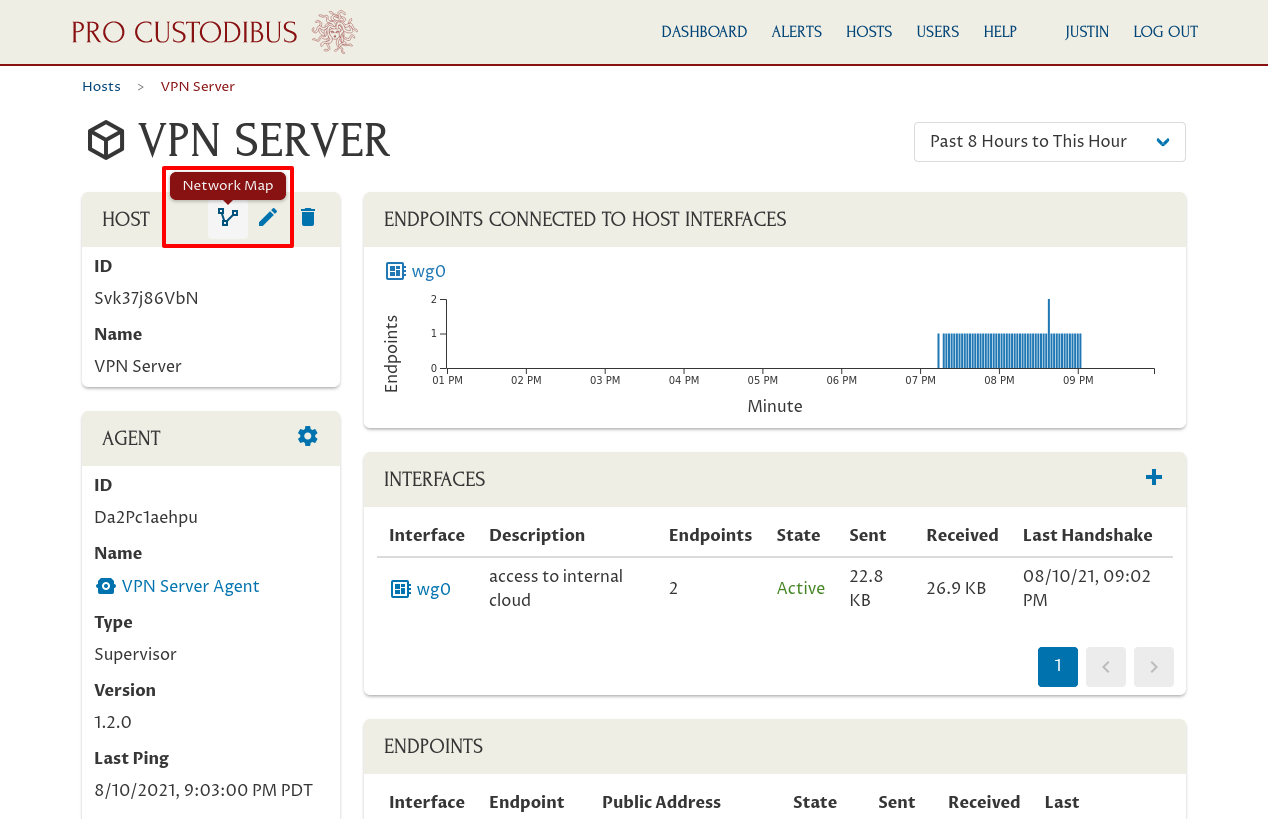
To check out a nice visual representation of the WireGuard VPN we’ve just set up, navigate to the main host page for one of the hosts:
Then click the Network Map icon in the Host panel of that page:
This will display a network map with all the direct connections from the selected node. To load the entire network map, click the Load All icon in the Network Map panel:
This will display the full network map of your WireGuard VPN:
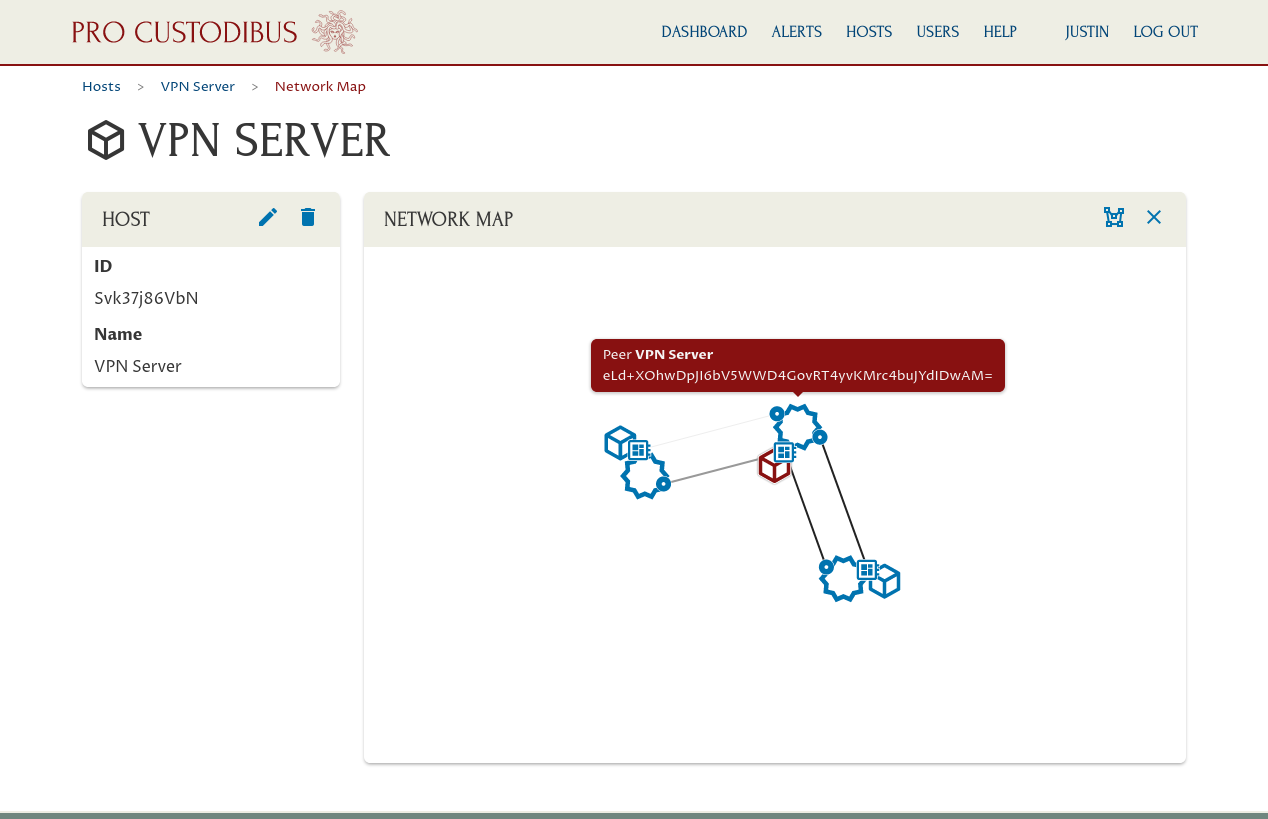
|
Tip
|
Hover your mouse pointer over a node in the network map to view a tooltip with the name and details for the node; or click a node to load its details in the left-side panel. |