Getting Started With Pro Custodibus
This article will show you how quick and easy it is to get started with Pro Custodibus. We’re going to:
- Set Up a Pro Custodibus Account
- Register a WireGuard Host
- Deploy the Pro Custodibus Agent
- View Host Status and History
If you get lost, you can also refer to the Pro Custodibus Getting Started documentation.
Set Up a Pro Custodibus Account
Go to Pro Custodibus, and click the Sign Up link in the top-right of the page:
This will open up a simple sign-up form:
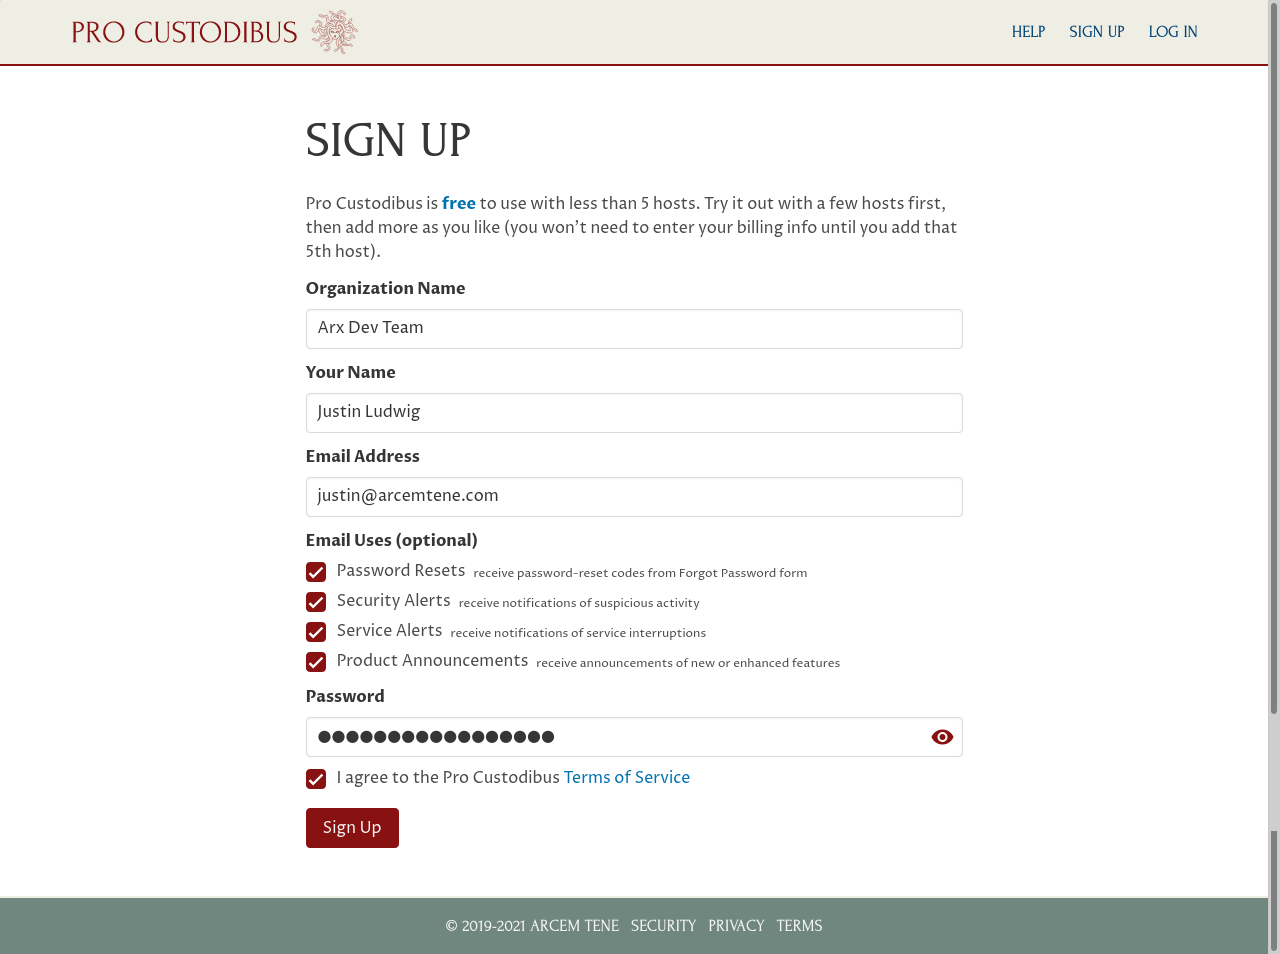
Fill in your organization name, you own name, your email address, and the password you want to use to log in. Optionally, select some uses for your email address. You can change all of these details later.
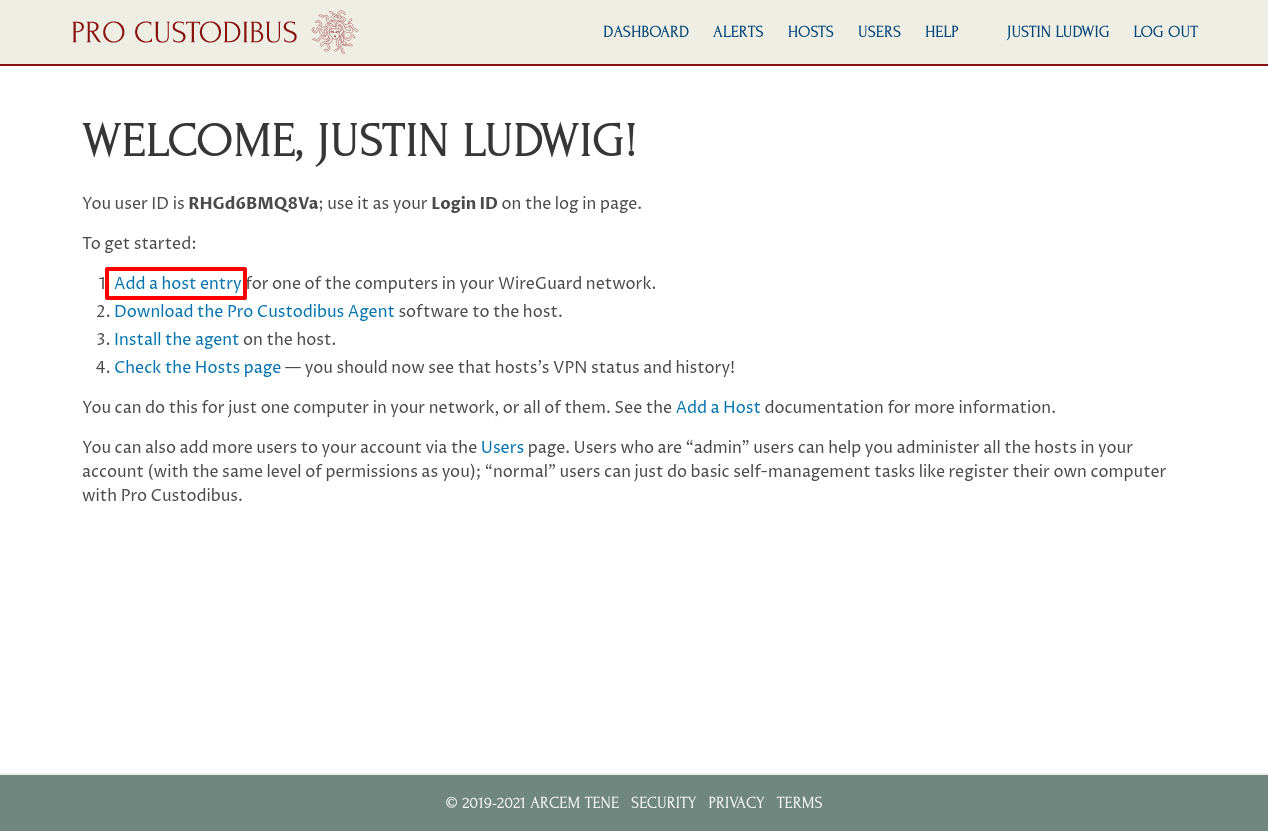
Read through and accept the terms of service, and then click the Submit button. On the resulting welcome page, your new user ID will be displayed (a randomly-generated value like RHGd68MQ8Va) — use this as your Login ID to log in to Pro Custodibus in the future.
Register a WireGuard Host
On the welcome page, you’ll see a checklist of the things you need to do to set up your first WireGuard host. Click the Add a host entry link:
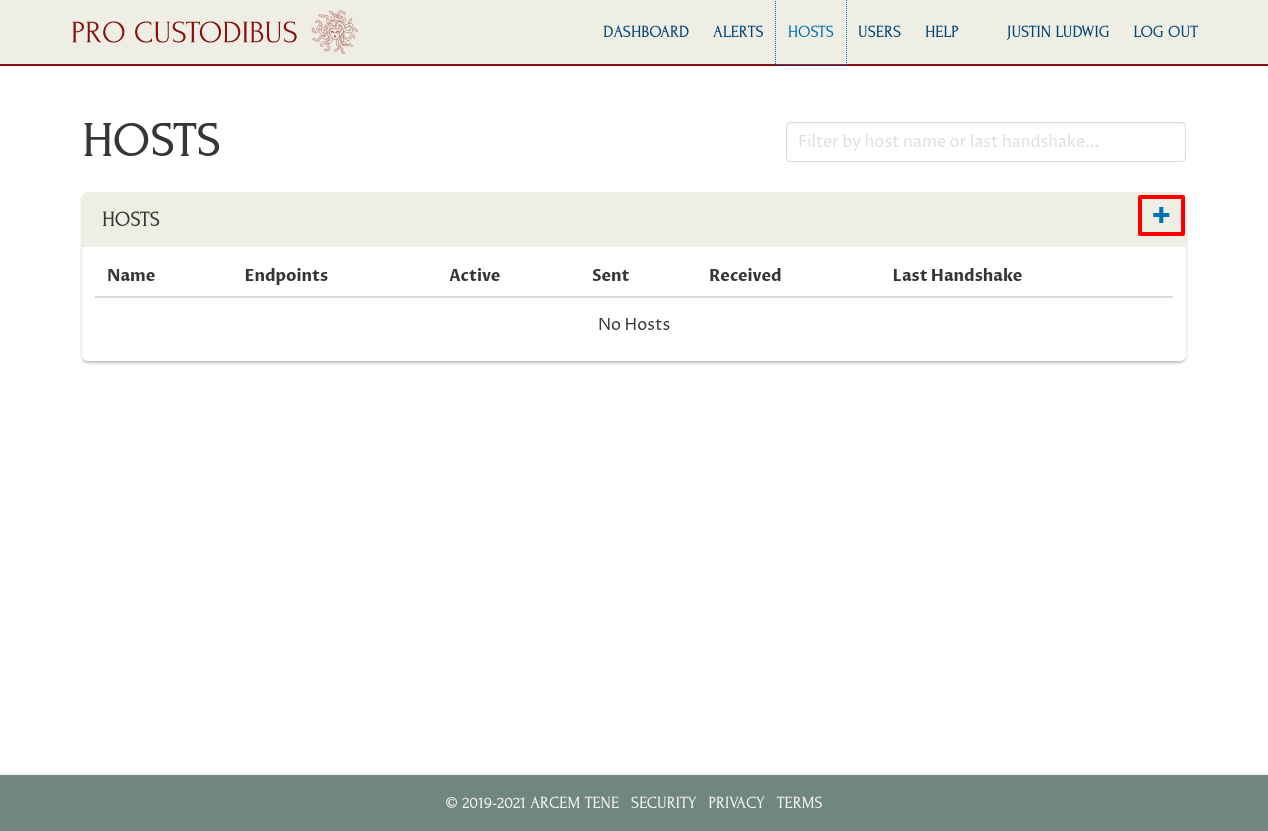
Alternately, if you navigate to the Hosts page, you can also click the plus icon to add a host:
On the Add Host page, enter a name for the host (you can always change it later), and click the Add button:
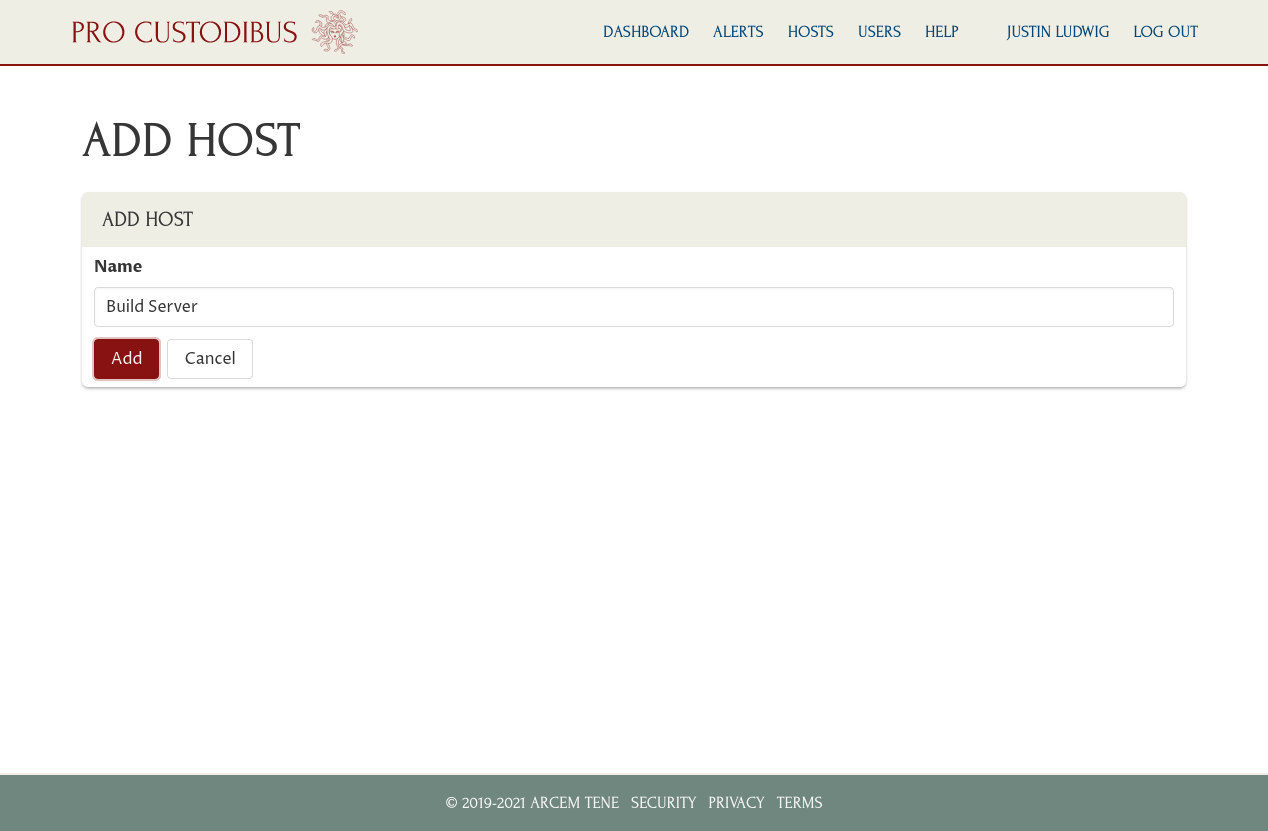
In this example, we’ve registered our build server.
Update 2023-12-18
With our new Connection Wizard, we now have a Configuration option on the Add Host page. Select the “Pull existing WireGuard configuration from host (or configure later)” radio button to continue on with this tutorial.
Deploy the Pro Custodibus Agent
Once the host has been registered, it will display the set-up instructions for the host:
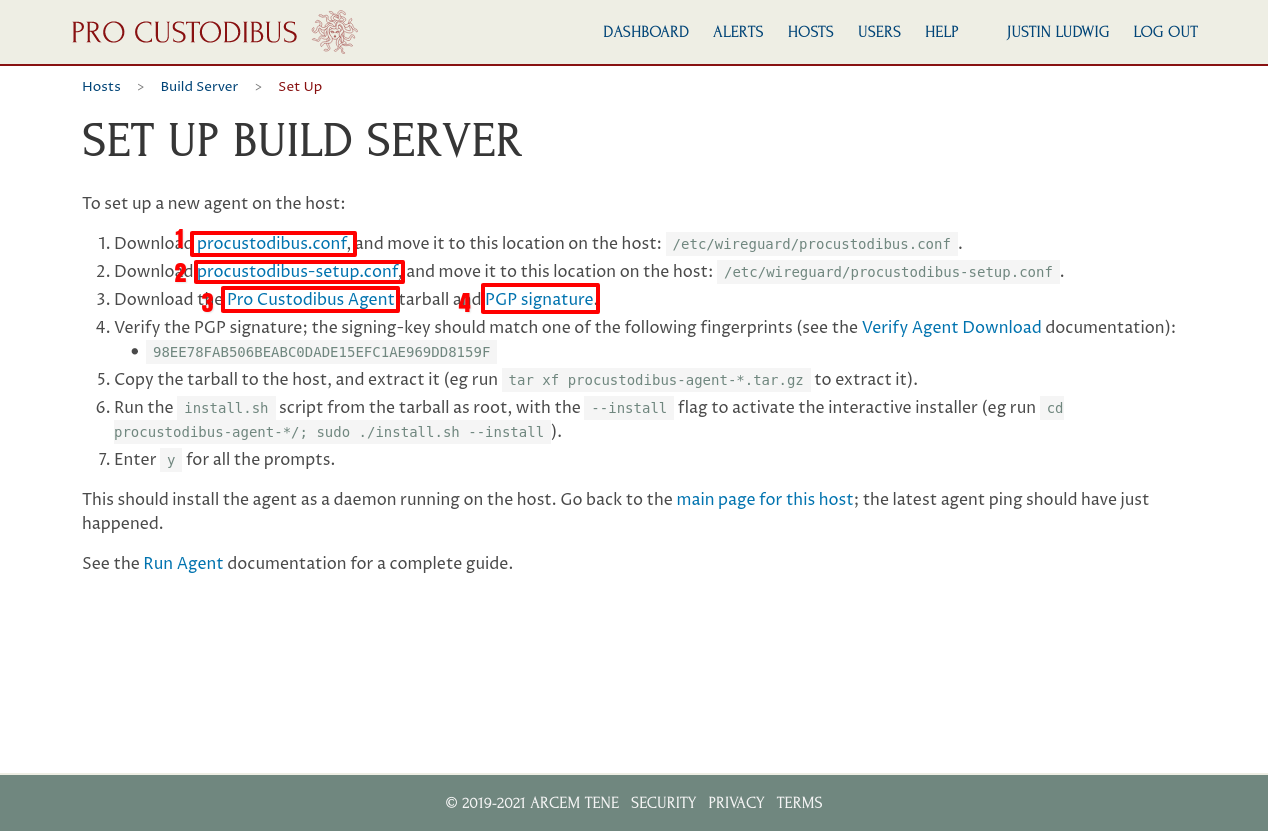
Download these files from the set-up page:
- procustodibus.conf
- procustodibus-setup.conf
- Pro Custodibus Agent (procustodibus-agent-latest.tar.gz)
- PGP Signature (procustodibus-agent-latest.tar.gz.sig)
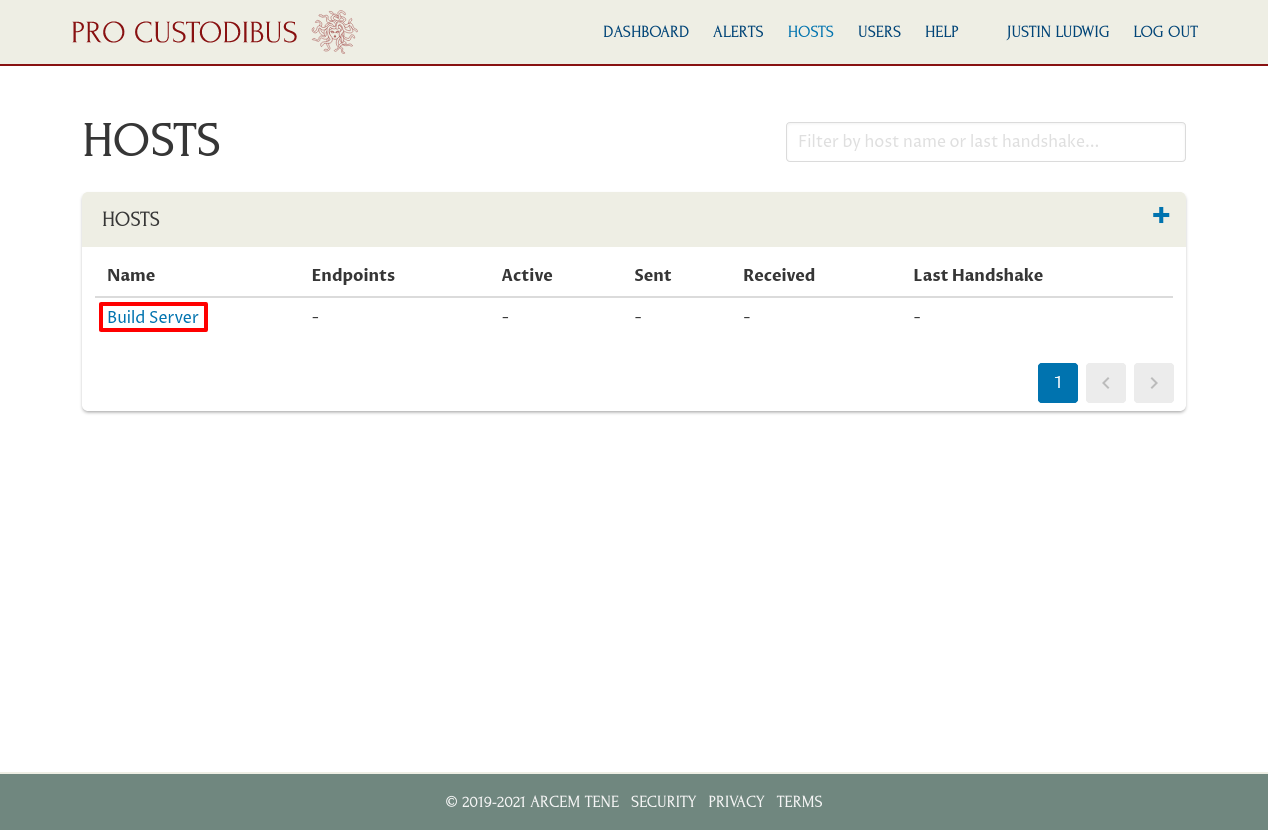
Note that you can also access these instructions later by navigating to the Hosts page and clicking the host’s name in the list of hosts:
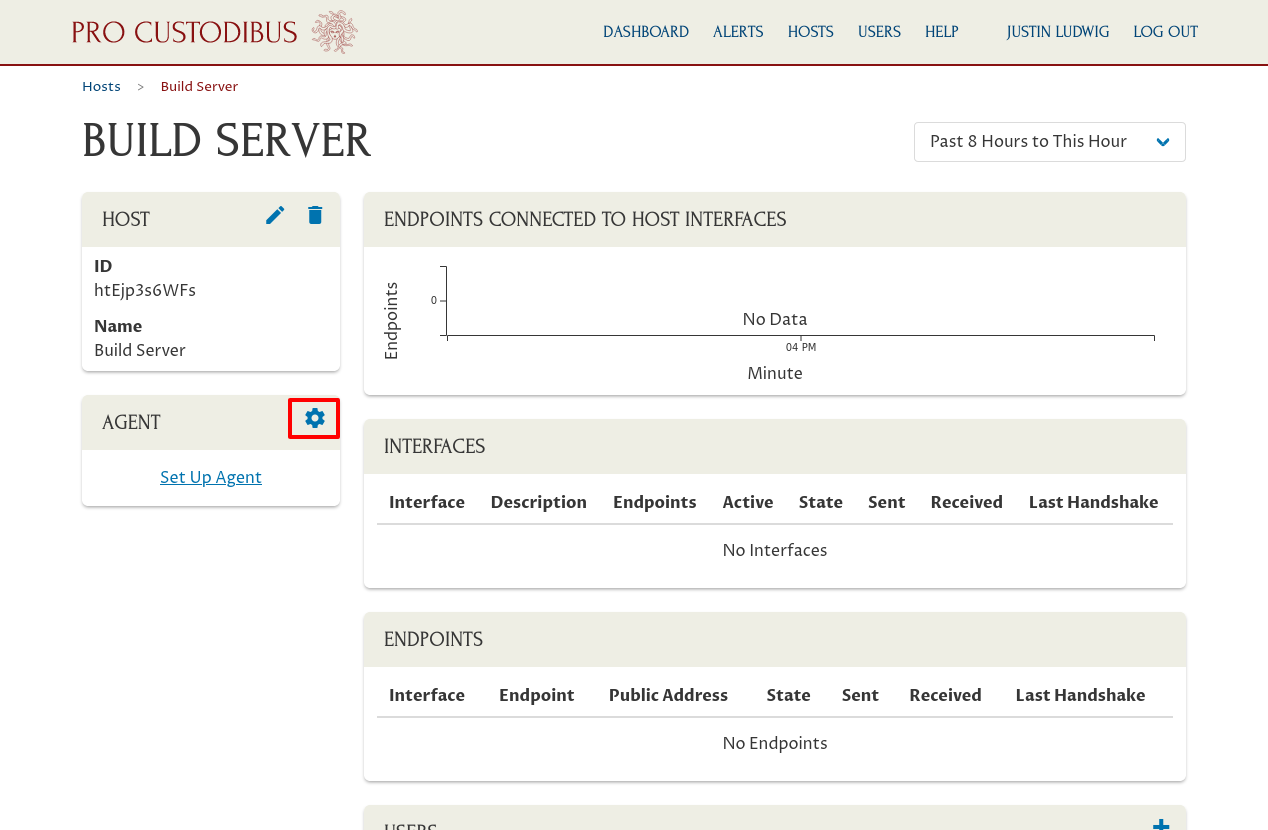
And then click the gear icon on the Agent panel of the host’s page:
After downloading those four files above, you should see them in your browser downloads directory:
justin@jws:~$ ls
procustodibus-agent-latest.tar.gz      procustodibus-setup.conf
procustodibus-agent-latest.tar.gz.sig  procustodibus.conf
Use GPG to verify the agent tarball:
justin@jws:~$ gpg --verify procustodibus-agent-latest.tar.gz.sig procustodibus-agent-latest.tar.gz
gpg: Signature made Wed 18 Nov 2020 02:17:24 AM UTC
gpg:                using RSA key 98EE78FAB506BEABC0DADE15EFC1AE969DD8159F
gpg: Can't check signature: No public key
While you probably won’t have the Pro Custodibus signing key in your keyring, you should at least see the fingerprint of the key that signed the agent tarball (98EE78FAB506BEABC0DADE15EFC1AE969DD8159F). Compare it to the fingerprint listed on the set-up page; if it matches, you can safely proceed.
SCP the agent tarball and the configuration files to your host (build in this example):
justin@jws:~$ scp procustodibus* build:.
procustodibus-agent-latest.tar.gz          100%   33KB  22.3MB/s   00:00
procustodibus-agent-latest.tar.gz.sig      100%  659     1.0MB/s   00:00
procustodibus-setup.conf                   100%  176   197.4KB/s   00:00
procustodibus.conf                         100%  181   284.5KB/s   00:00
You can actually discard the .sig file at this stage, but I’ve used procustodibus* to copy all the files out of sheer laziness.
SSH into the host, and move the two configuration files into the /etc/wireguard directory of the host:
justin@jws:~$ ssh build
justin@build:~$ ls
procustodibus-agent-latest.tar.gz      procustodibus-setup.conf
procustodibus-agent-latest.tar.gz.sig  procustodibus.conf
justin@build:~$ sudo mv procustodibus*.conf /etc/wireguard/.
Extract the agent tarball on the host, and navigate into the extracted directory:
justin@build:~$ tar xf procustodibus-agent-latest.tar.gz
justin@build:~$ ls
procustodibus-agent-1.0.3          procustodibus-agent-latest.tar.gz.sig
procustodibus-agent-latest.tar.gz
justin@build:~$ cd procustodibus-agent-1.0.3/
justin@build:~/procustodibus-agent-1.0.3$ ls
LICENSE     etc                  pyproject.toml    setup.cfg  test_install
README.md   install.sh           requirements      setup.py   tox.ini
coveragerc  procustodibus_agent  requirements.txt  test       whitelist.txt
Run the install.sh script without options (or with the --help option) to view the installer help:
justin@build:~/procustodibus-agent-1.0.3$ ./install.sh
Pro Custodibus Agent installer.

Installs the Pro Custodibus Agent as a daemon in a python virtualenv.

Usage:
  install.sh --help
  install.sh --dryrun [--install | --remove]
  install.sh --install [--force]
  install.sh --remove [--force]
  install.sh --version

Options:
  -h --help     Show this help
  -d --dryrun   Run all installer checks without installing/removing anything
  -f --force    Automatically answer yes to all prompts
  -i --install  Install the agent
  -r --remove   Remove the agent
  -v --version  Show version number

Environment variables:
  INSTALL_LOG       Path to installer log ('/var/log/procustodibus-install.log')
  INSTALL_PYTHON    Path to python executable ('python3')
  INSTALL_SRC       Path to agent source code ('/home/justin/procustodibus-agent-1.0.3')
  INSTALL_VENV      Path to agent virtualenv ('/opt/venvs/procustodibus-agent')
To install the agent, run the install.sh script as root with the --install flag (you can optionally add the --force flag to automatically answer y to all the prompts):
justin@build:~/procustodibus-agent-1.0.3$ sudo ./install.sh --install
running as root
install 1.0.3
agent configuration found at /etc/wireguard/procustodibus.conf
agent setup found at /etc/wireguard/procustodibus-setup.conf
/etc/wireguard/procustodibus.conf mode ok (-rw-rw----)
WARNING /etc/wireguard/procustodibus.conf owner should be root
fix owner? ([y]es, [n]o): y
OK will fix owner
fixed owner
WARNING /etc/wireguard/procustodibus.conf group should be root
fix group? ([y]es, [n]o): y
OK will fix group
fixed group
/etc/wireguard/procustodibus-setup.conf mode ok (-rw-rw----)
WARNING /etc/wireguard/procustodibus-setup.conf owner should be root
fix owner? ([y]es, [n]o): y
OK will fix owner
fixed owner
WARNING /etc/wireguard/procustodibus-setup.conf group should be root
fix group? ([y]es, [n]o): y
OK will fix group
fixed group
libsodium found at /lib/x86_64-linux-gnu/libsodium.so.23
python 3.8.5 found at /usr/bin/python3
python includes all packages needed for venv
WARNING python virtualenv not found at /opt/venvs/procustodibus-agent
create virtualenv? ([y]es, [q]uit): y
OK will create virtualenv
created virtualenv
WARNING agent package not installed
install agent from /home/justin/procustodibus-agent-1.0.3? ([y]es, [q]uit): y
OK will install agent
Processing /home/justin/procustodibus-agent-1.0.3
  Installing build dependencies ... done
  Getting requirements to build wheel ... done
    Preparing wheel metadata ... done
Collecting docopt
  Using cached docopt-0.6.2.tar.gz (25 kB)
Collecting inflection
  Using cached inflection-0.5.1-py2.py3-none-any.whl (9.5 kB)
Collecting pynacl
  Using cached PyNaCl-1.4.0-cp35-abi3-manylinux1_x86_64.whl (961 kB)
Collecting requests
  Using cached requests-2.25.1-py2.py3-none-any.whl (61 kB)
Collecting cffi>=1.4.1
  Using cached cffi-1.14.4-cp38-cp38-manylinux1_x86_64.whl (411 kB)
Collecting six
  Using cached six-1.15.0-py2.py3-none-any.whl (10 kB)
Collecting urllib3<1.27,>=1.21.1
  Using cached urllib3-1.26.2-py2.py3-none-any.whl (136 kB)
Collecting chardet<5,>=3.0.2
  Using cached chardet-4.0.0-py2.py3-none-any.whl (178 kB)
Collecting idna<3,>=2.5
  Using cached idna-2.10-py2.py3-none-any.whl (58 kB)
Collecting certifi>=2017.4.17
  Using cached certifi-2020.12.5-py2.py3-none-any.whl (147 kB)
Collecting pycparser
  Using cached pycparser-2.20-py2.py3-none-any.whl (112 kB)
Building wheels for collected packages: procustodibus-agent, docopt
  Building wheel for procustodibus-agent (PEP 517) ... done
  Created wheel for procustodibus-agent: filename=procustodibus_agent-1.0.3-py3-none-any.whl size=13763 sha256=cba2f690885d2549b980c5d0f25b2a2d2f7f450c60c4b90b914a59ff7e7071a5
  Stored in directory: /root/.cache/pip/wheels/12/29/98/cc6dfc871fb3041684dd787d4acae8fc0310feb74b450d2103
  Building wheel for docopt (setup.py) ... error
  ERROR: Command errored out with exit status 1:
   command: /opt/venvs/procustodibus-agent/bin/python3 -u -c 'import sys, setuptools, tokenize; sys.argv[0] = '"'"'/tmp/pip-install-6l8noaf0/docopt/setup.py'"'"'; __file__='"'"'/tmp/pip-install-6l8noaf0/docopt/setup.py'"'"';f=getattr(tokenize, '"'"'open'"'"', open)(__file__);code=f.read().replace('"'"'\r\n'"'"', '"'"'\n'"'"');f.close();exec(compile(code, __file__, '"'"'exec'"'"'))' bdist_wheel -d /tmp/pip-wheel-b8az13le
       cwd: /tmp/pip-install-6l8noaf0/docopt/
  Complete output (6 lines):
  usage: setup.py [global_opts] cmd1 [cmd1_opts] [cmd2 [cmd2_opts] ...]
     or: setup.py --help [cmd1 cmd2 ...]
     or: setup.py --help-commands
     or: setup.py cmd --help

  error: invalid command 'bdist_wheel'
  ----------------------------------------
  ERROR: Failed building wheel for docopt
  Running setup.py clean for docopt
Successfully built procustodibus-agent
Failed to build docopt
Installing collected packages: docopt, inflection, pycparser, cffi, six, pynacl, urllib3, chardet, idna, certifi, requests, procustodibus-agent
    Running setup.py install for docopt ... done
Successfully installed certifi-2020.12.5 cffi-1.14.4 chardet-4.0.0 docopt-0.6.2 idna-2.10 inflection-0.5.1 procustodibus-agent-1.0.3 pycparser-2.20 pynacl-1.4.0 requests-2.25.1 six-1.15.0 urllib3-1.26.2
installed agent
WARNING systemd daemon not found at /etc/systemd/system/procustodibus-agent.service
install daemon? ([y]es, [q]uit): y
OK will install daemon
installed daemon
WARNING daemon dead
start daemon? ([y]es, [q]uit): y
OK will start daemon
Created symlink /etc/systemd/system/default.target.wants/procustodibus-agent.service → /etc/systemd/system/procustodibus-agent.service.
started daemon
install SUCCESS
If you see install SUCCESS at the end of the install script’s output, the Pro Custodibus agent is up and running on your first host! (Otherwise, consulting the Agent Troubleshooting documentation to determine what went wrong and how to fix it.)
View Host Status and History
Now go back to the Pro Custodibus web UI, and click the main page for this host link:
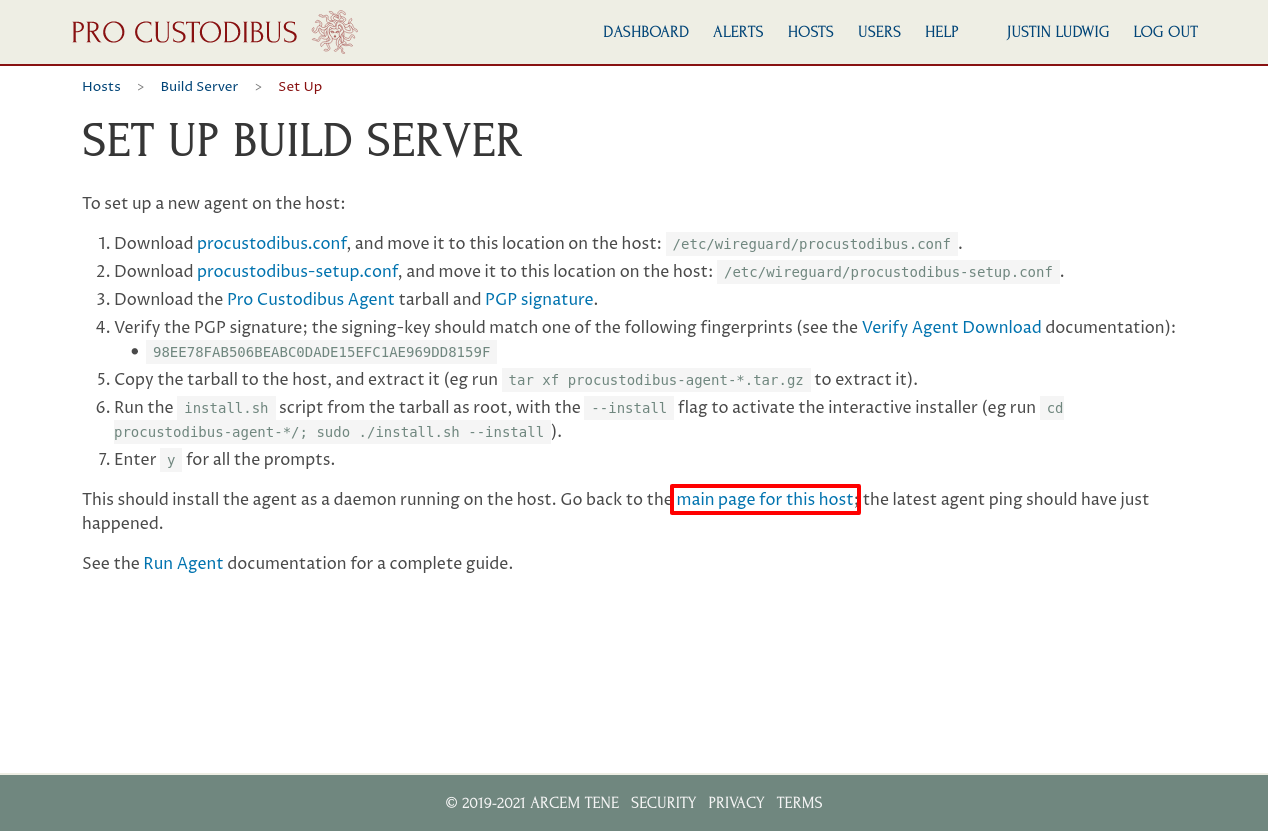
This will bring you to main page for the host (you can also navigate to this page via the Hosts list, as show above). You’ll see that the Pro Custodibus agent automatically discovered the WireGuard interface(s) on the host; and has listed an endpoint for each WireGuard remote peer that can access the host.
Each endpoint initially will be named with the IP address last used to connect to the host (or the endpoint configured for the peer); or if the endpoint had never connected and had no IP address configured for it, the endpoint will be named with its allowed IPs list. To update an endpoint name with something better, click the endpoint name:
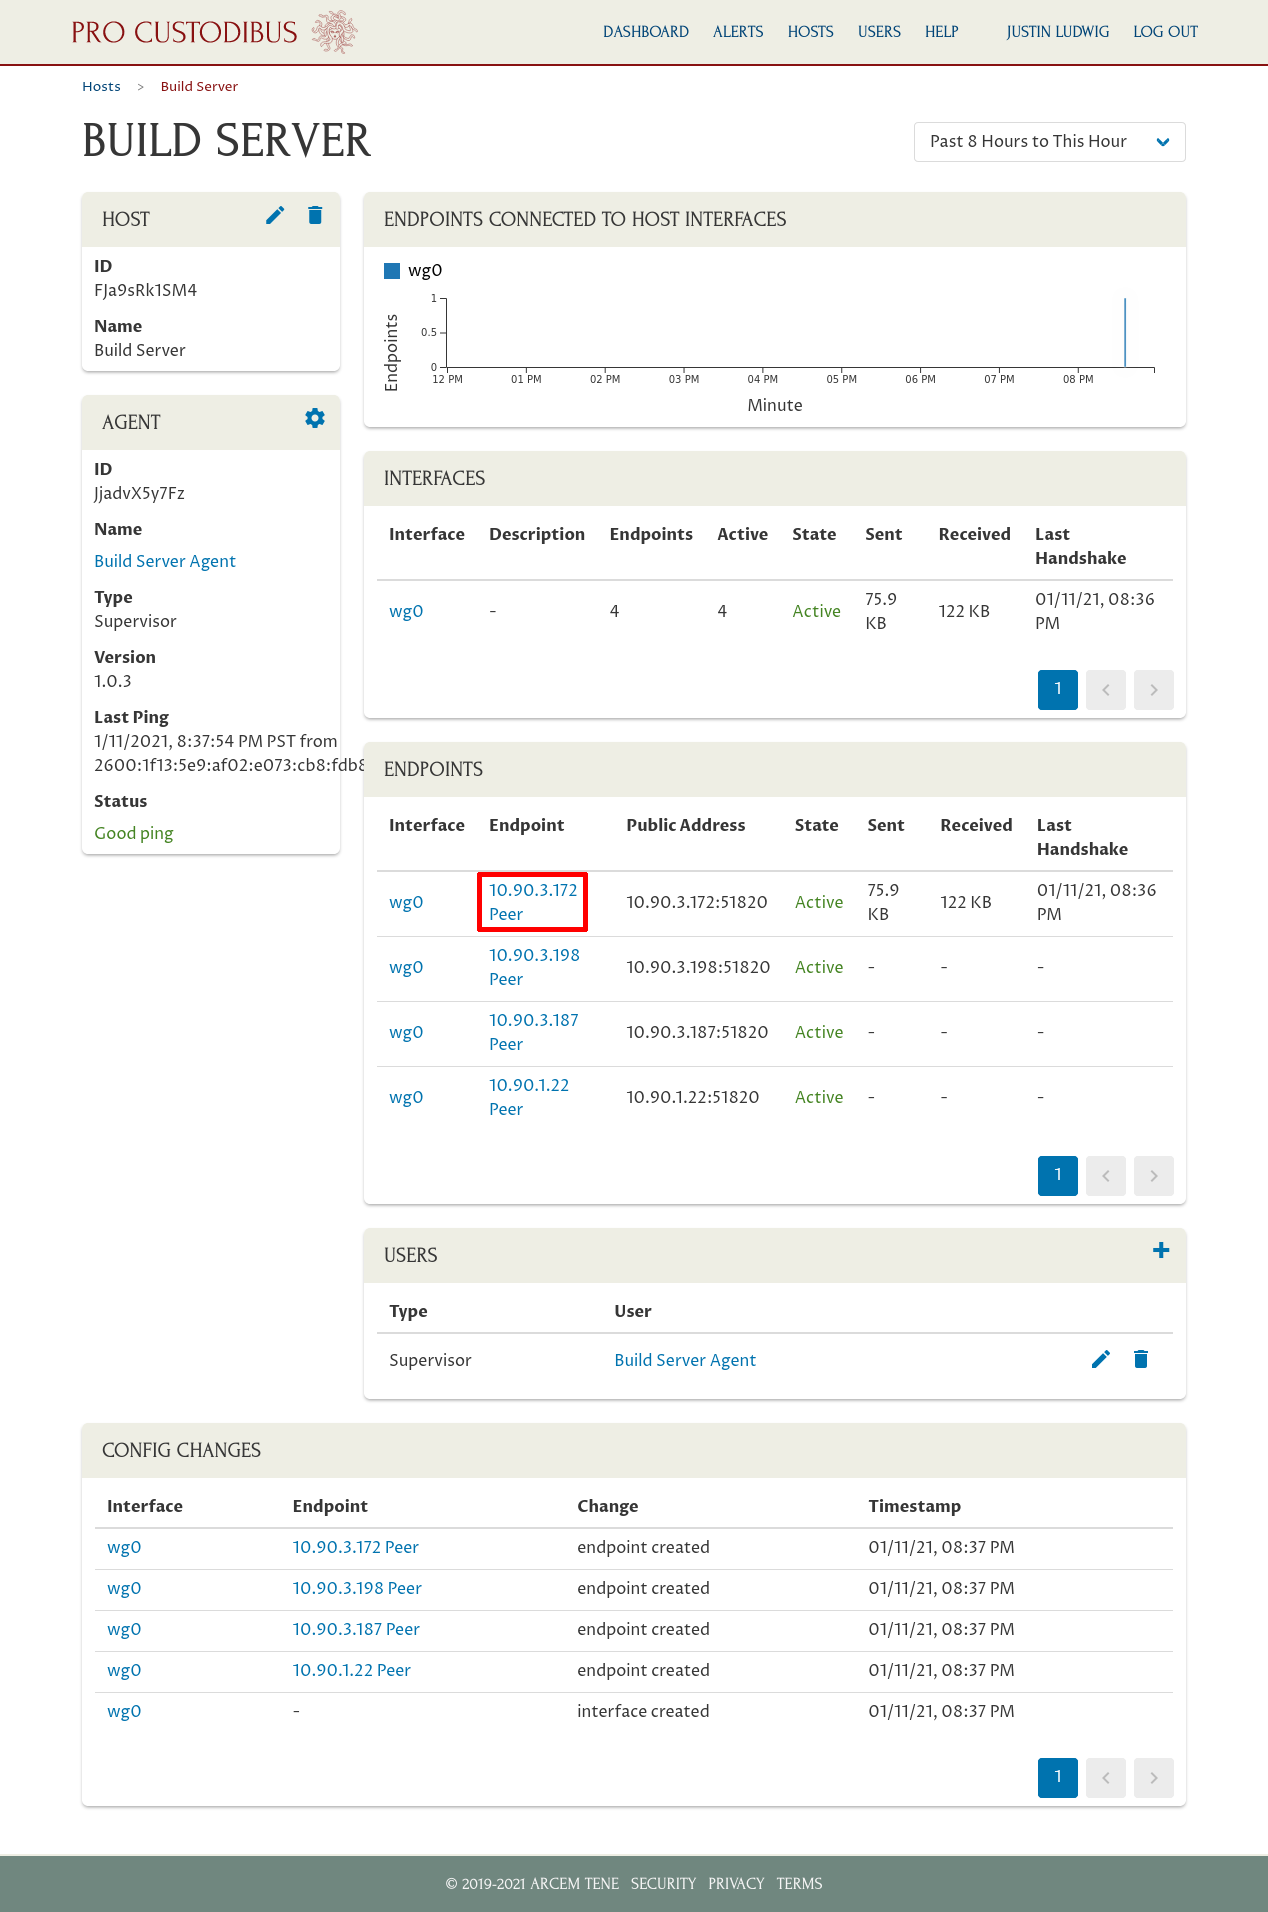
This will take you to the detail page for the endpoint (showing the history of host’s connection to the remote peer through the host’s WireGuard interface). On this page, click the name for the remote peer under the Peer field of the Endpoint panel:
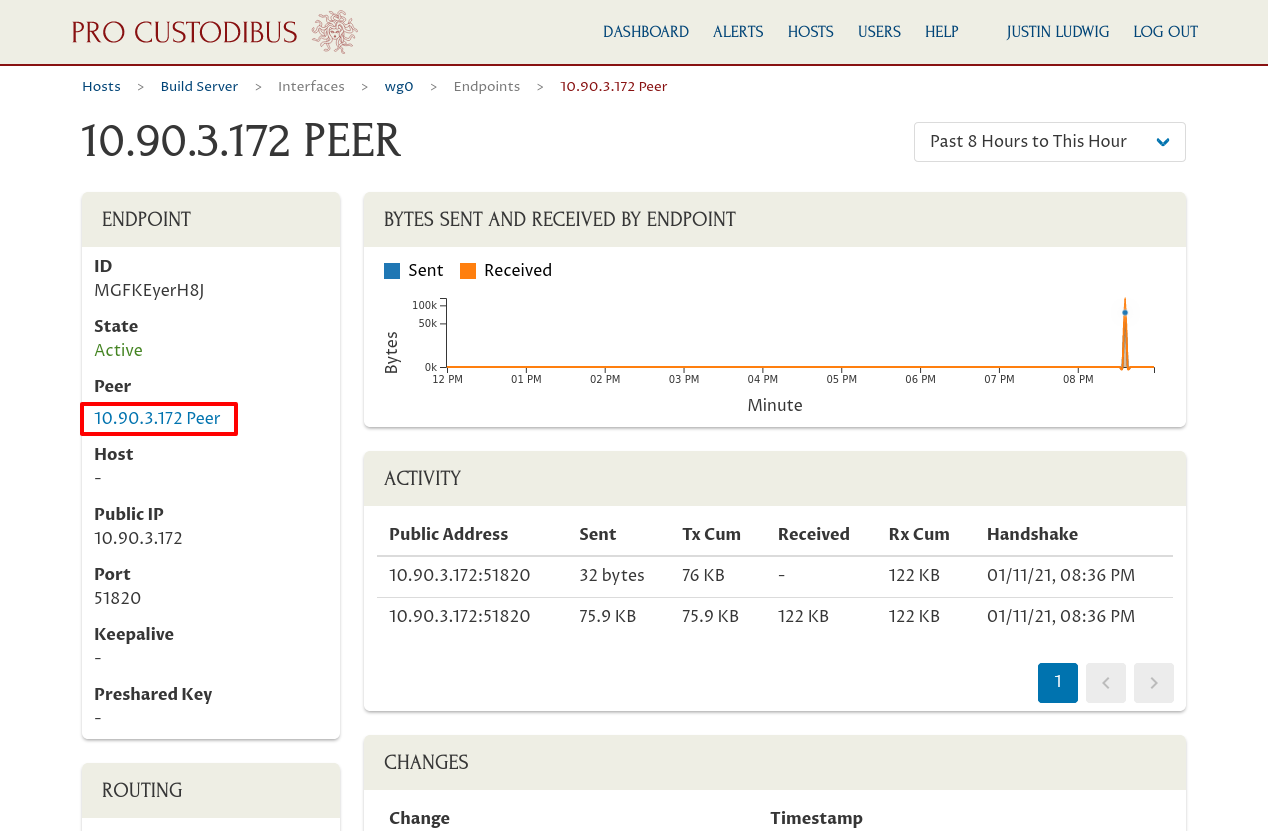
This will take you to the detail page for the remote peer. Click the pencil icon on the Peer panel to edit the peer’s name:
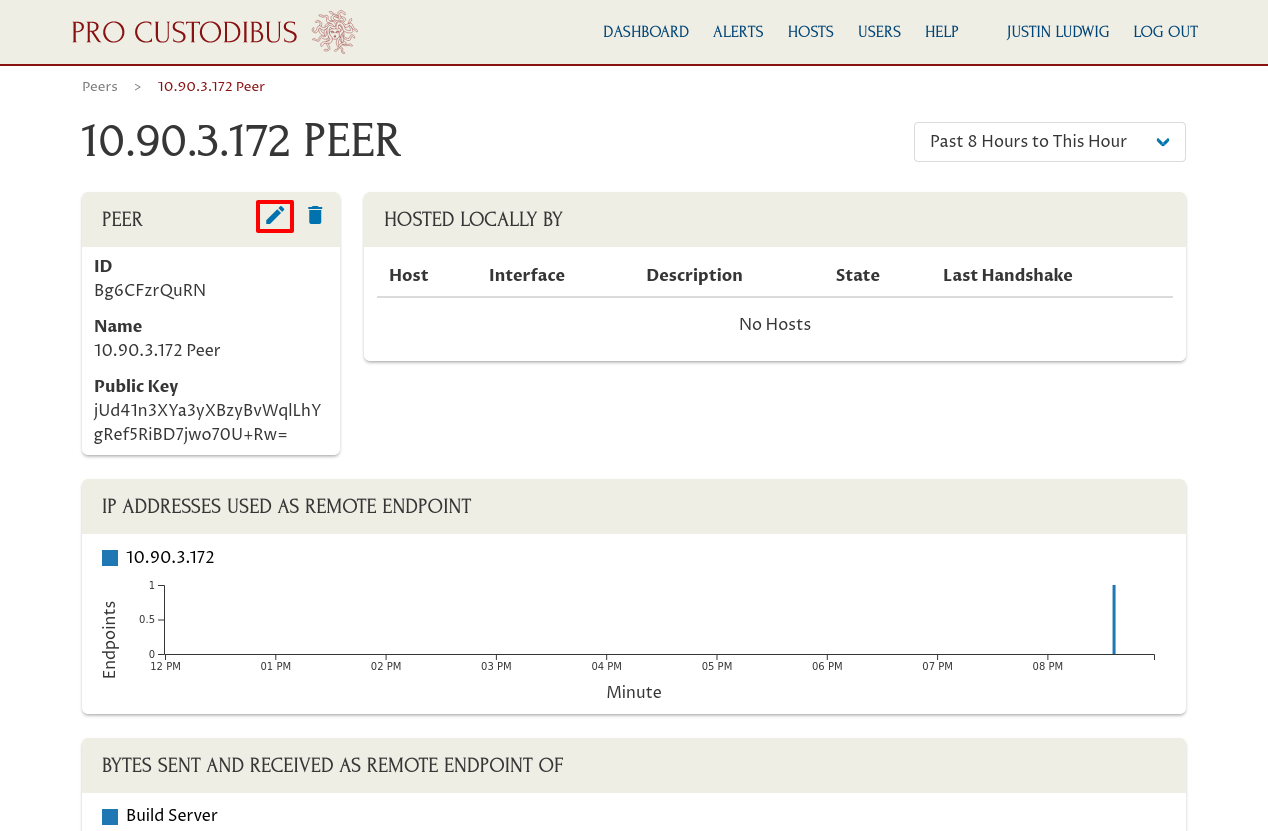
And update the peer’s name to something better (in our example, Justin’s Workstation):
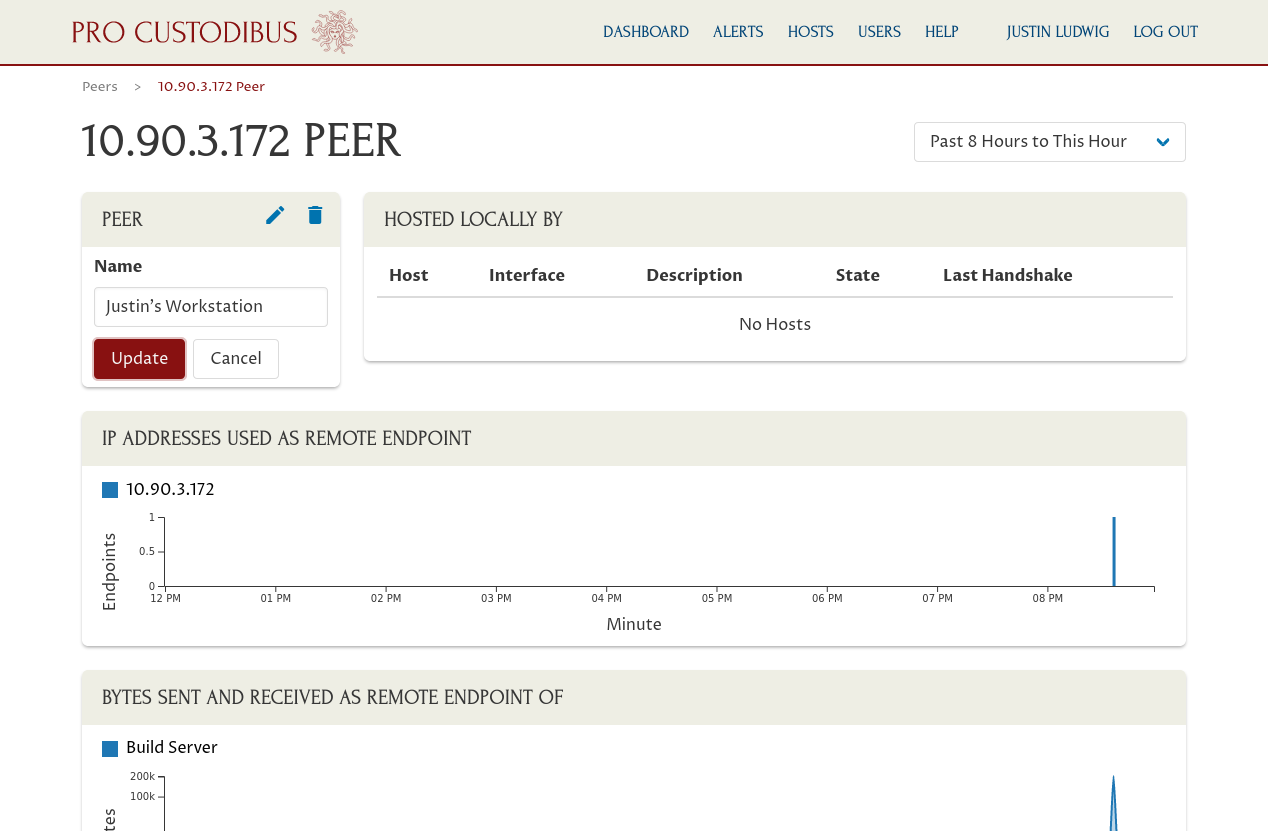
Then click the Update button. Go back to the host page, and do that for all the host’s endpoints.
This gives us nice, friendly names for each WireGuard endpoint that can connect to the host — which makes it easy to read and understand the activity charts and other listings on the host page, and on related pages. To see more detail about the recent activity of the host’s WireGuard interface, click the interface name in the Interface panel:

Whereas the host page displayed a chart of showing the number of endpoints active on the host at a given time, this interface page shows a chart with most recent endpoints that have sent and received data through the WireGuard interface. And like the host page, we can drill into each endpoint individually to see the details for a particular endpoint:
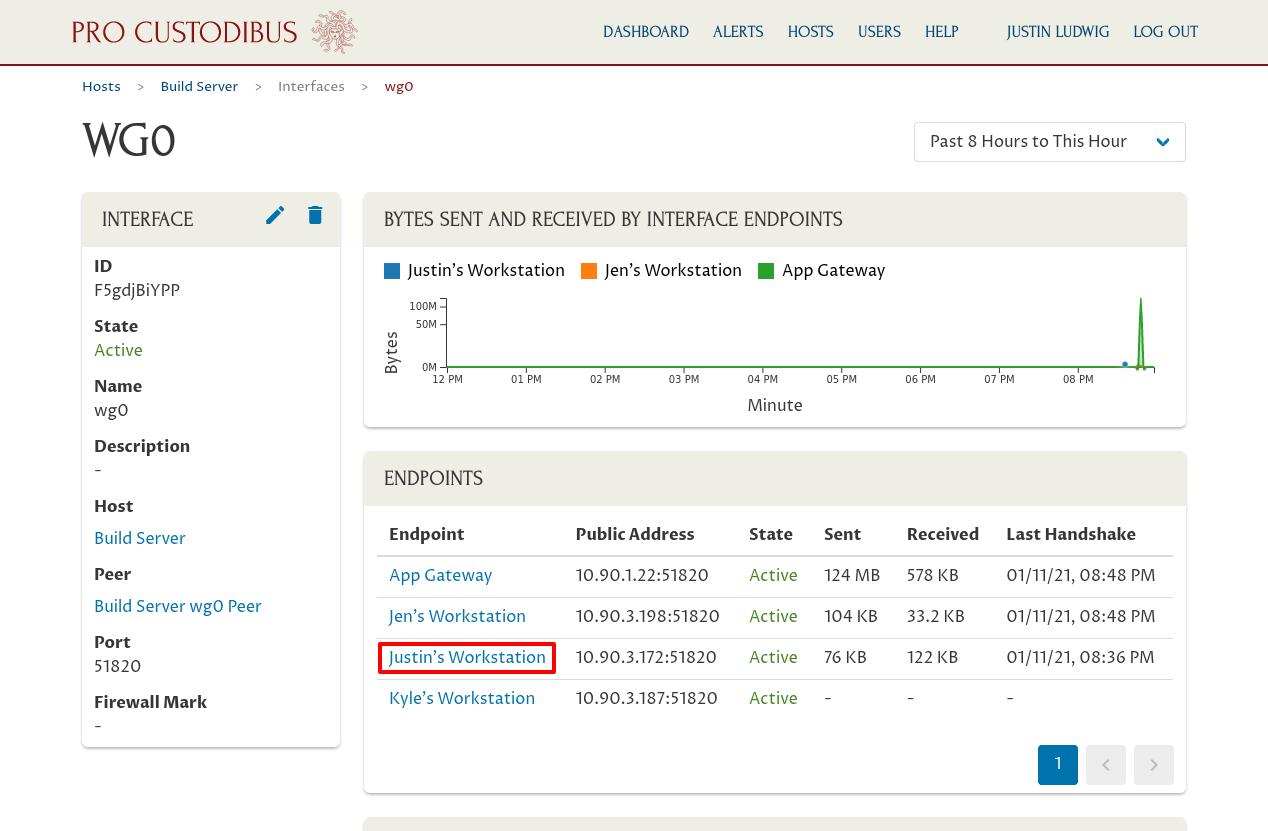
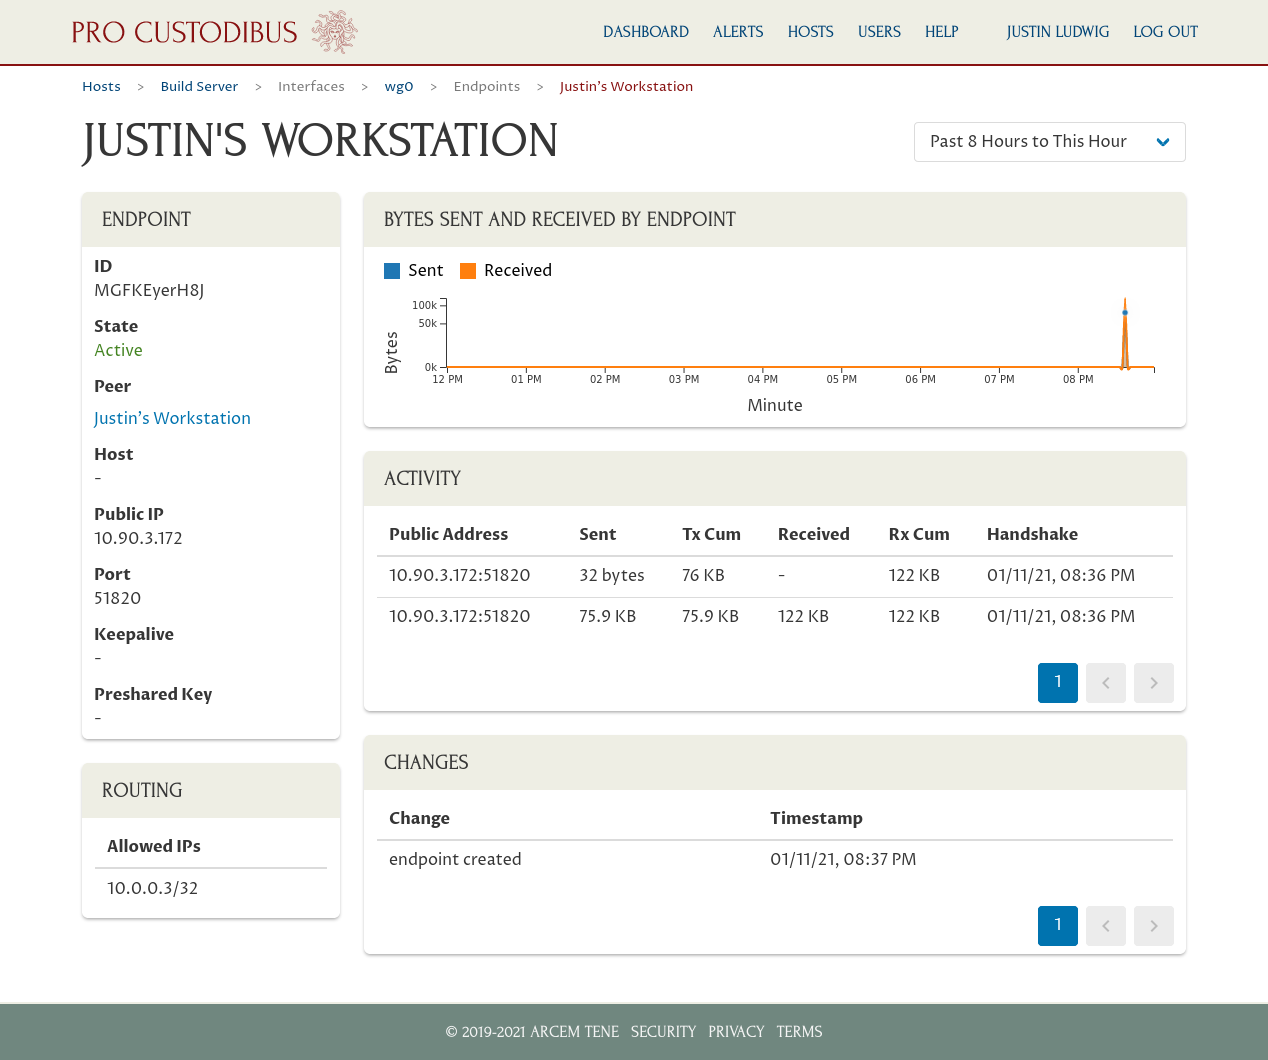
In this example, we clicked the link to Justin’s Workstation to see the current status and past activity between the wg0 interface on our Build Server host and the remote peer for Justin’s Workstation:
Recap
As you can see, it’s quick and easy to get started with Pro Custodibus. And just by setting up a single WireGuard host with Pro Custodibus, you get a wealth of insight into what’s going on in your WireGuard VPN (Virtual Private Network).
Here’s a video walk-through of these steps: