WireGuard Multi-Factor Authentication With Pro Custodibus
This article will explain how WireGuard multi-factor authentication (MFA) works with Pro Custodibus. It will walk you through the steps of how to set it up as an admin user, and then show you how a regular user will go through the flow of multi-factor authentication.
How It Works
WireGuard MFA with Pro Custodibus takes advantage of the optional preshared keys built into the standard WireGuard authentication mechanism. WireGuard uses the Noise protocol framework to authenticate the connection between two WireGuard peers, as well as to establish an ephemeral symmetric encryption key for the connection. This process is called the “handshake”, and with WireGuard it is repeated every two minutes.
The core part of the handshake uses the public-key pair of each of the two peers in a Diffie-Hellman (DH) key exchange. However, a secret symmetric key can be mixed into this process; and if so, it must be a 256-bit value with which both peers have been pre-configured — this is the “preshared key”. If the two peers have not been configured with the same preshared key, the handshake will fail, and the peers will not be able to communicate over the WireGuard connection.
So to use WireGuard MFA with Pro Custodibus, you start with two hosts that have the Pro Custodibus agent installed on them; and a WireGuard connection between the two hosts that uses a preshared key (PSK):

At a configurable interval, Pro Custodibus automatically rotates the preshared key on one end of the connection (the “server” side of the connection, Host C in this example):

This renders the WireGuard tunnel between the two hosts inoperable. In order to synchronize the preshared key on the other host, the user using the other host (the “client” side of the connection, Host A in this example) has to log into Pro Custodibus with her Pro Custodibus credentials:

Once she logs in successfully, Pro Custodibus will update Host A with the new preshared key. With the same preshared key on both sides of the connection, the WireGuard handshake between the two peers will succeed, and the WireGuard tunnel between the two hosts can be re-established:

This constitutes multi-factor authentication, as the WireGuard connection is authenticated firstly with the private key stored on the client device (“something you have”); and secondly by the credentials the user uses to log into Pro Custodibus (“something you know”).
If an adversary steals the WireGuard keys from the user’s device, that adversary will be able to use those keys only until Pro Custodibus next rotates the preshared key. In order to have continued access to the WireGuard connection, that adversary would also have to steal the user’s Pro Custodibus credentials (to gain access to the newly rotated preshared key) — and Pro Custodibus authentication itself can be protected by a separate second factor (such as a TOTP code generated by Google Authenticator, FreeOTP, etc).
How To Set It Up
Admin users can use Pro Custodibus to configure key-rotation policies that control to which WireGuard connections MFA will be applied, and the rotation interval used by each. (When used this way, the rotation interval acts like a “session timeout” setting.)
For example, say we have two overlapping WireGuard networks like the following, where one network (in blue) allows user devices to connect to clusters of servers; and a second network (in green) allows those server clusters to communicate server-to-server:

An admin might want to configure one MFA policy to cover user-device access to certain special “production” servers (we’ll call this policy the “Prod User Devices” policy). She might want another policy to cover user-device access to another set of servers, using a longer rotation interval (ie a longer session timeout), like say for the mail servers (we’ll call this policy the “User Mail” policy). She might want another policy to cover specific user devices the security of which she trusts less (we’ll call this policy the “Risky Devices” policy).
Also, she might want a policy that covers the server-to-server communication of her infrastructure. Because it’s server-to-server, with no human in the loop, it can’t involve MFA, but it can allow the preshared keys used for server-to-server communication to be rotated on a regular basis (we’ll call this policy the “Prod Infra-to-Infra” policy; also see our WireGuard Automatic Key Rotation article for more examples of this).
Create Key Rotation Policies
A Server-Side MFA Policy
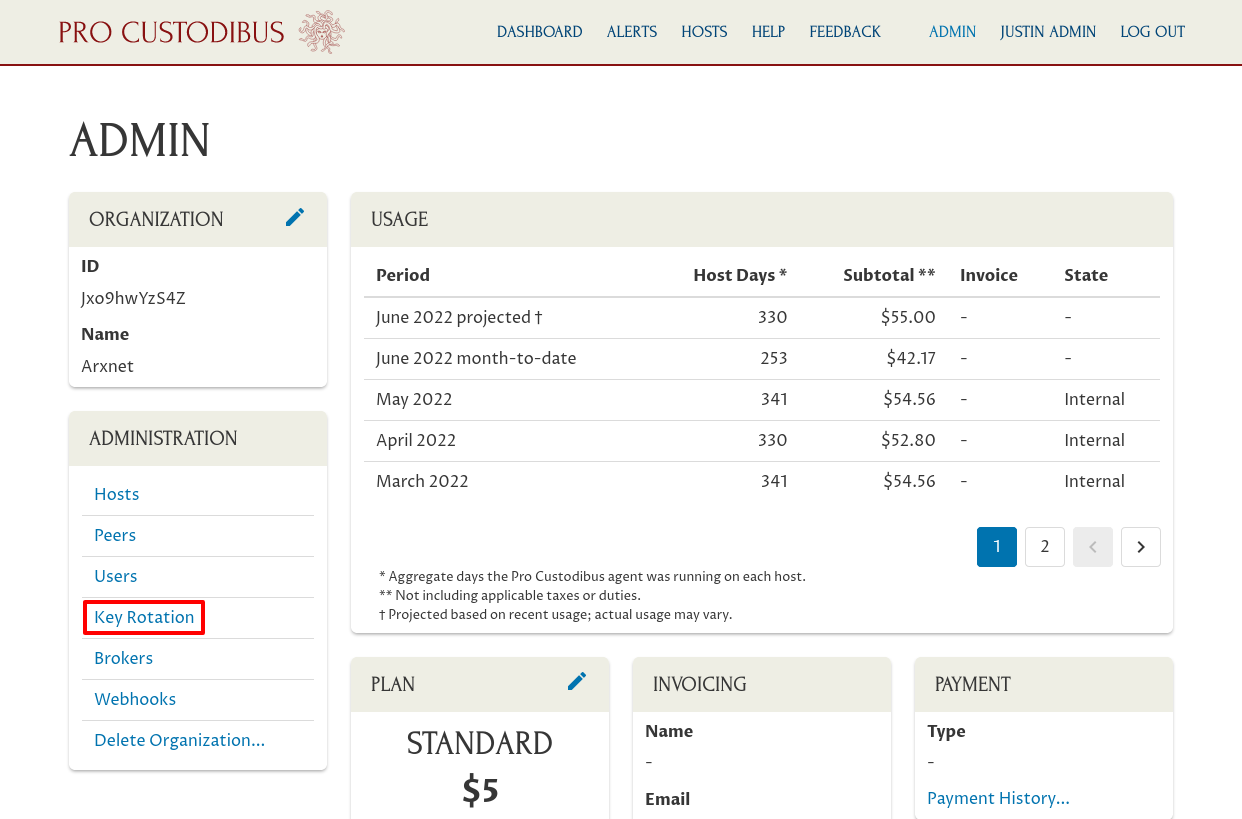
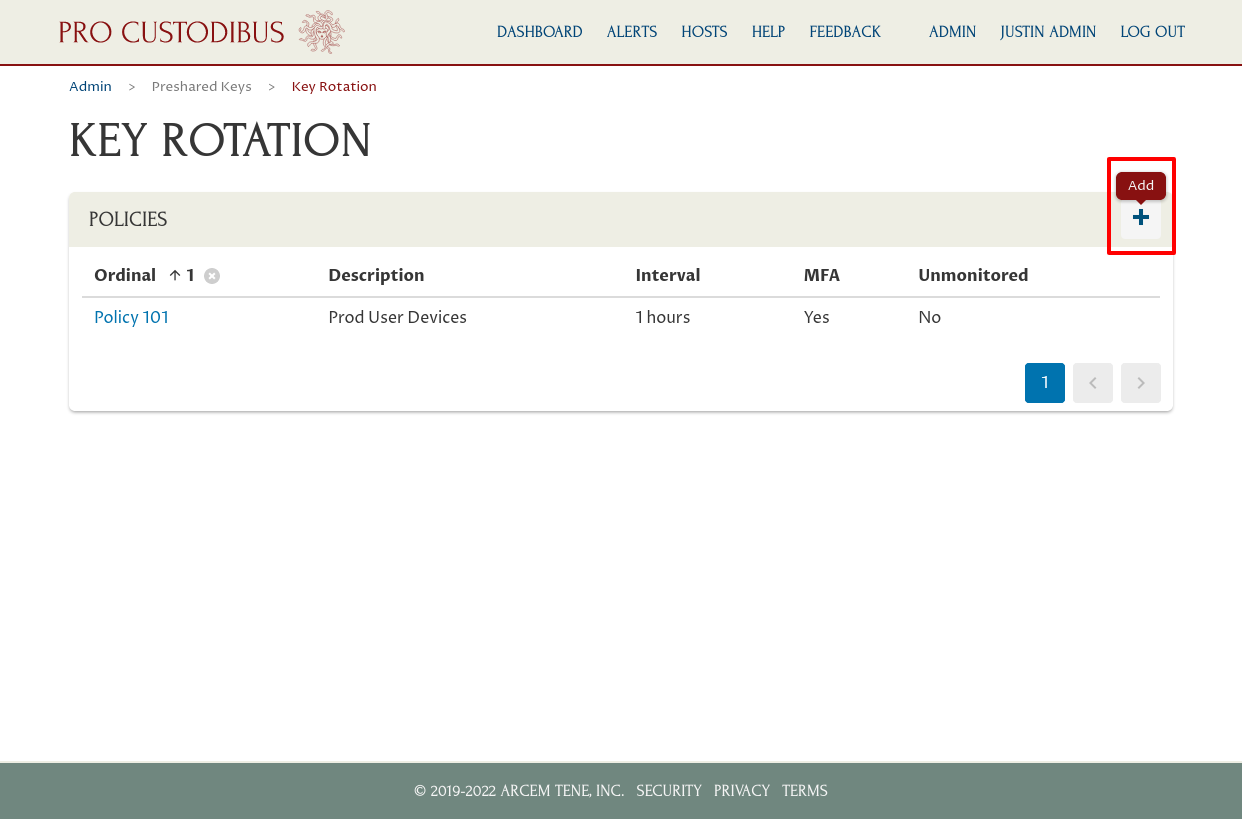
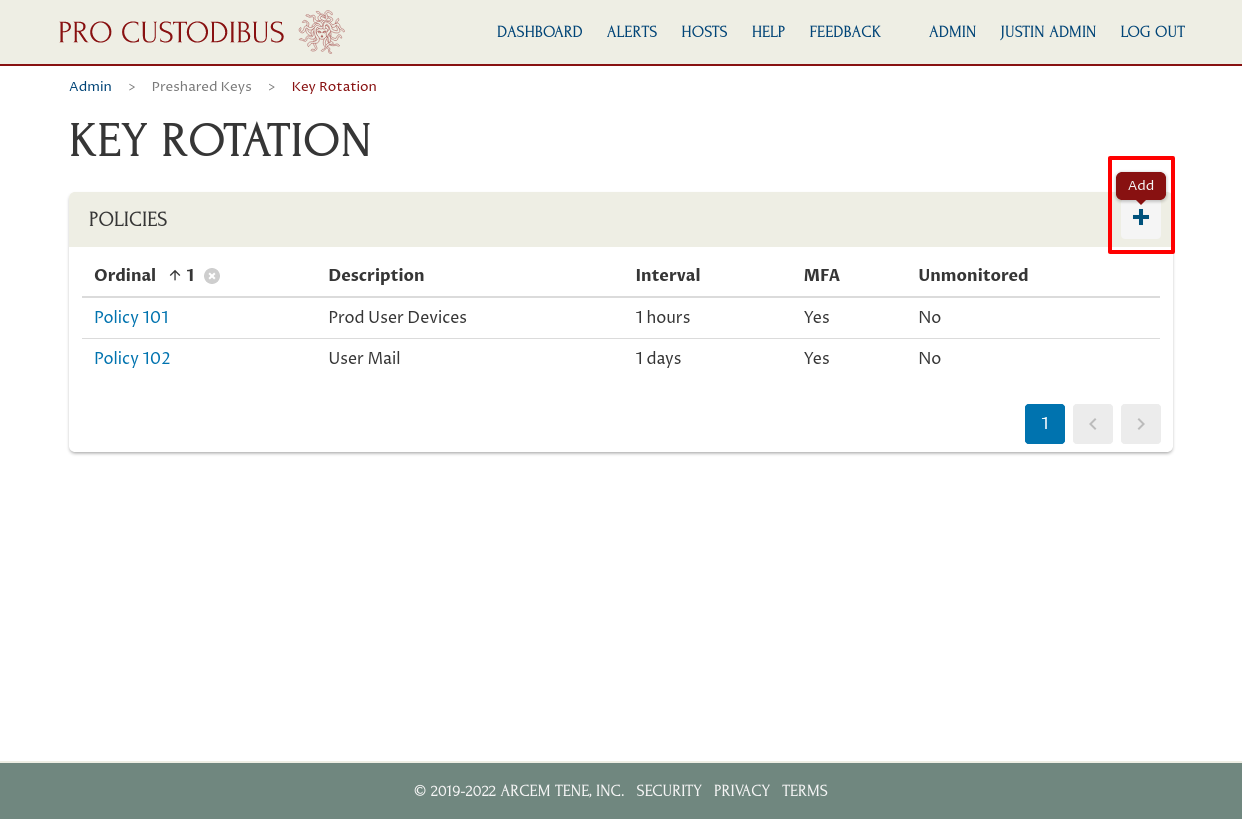
To create the first policy, the “Prod User Devices” policy, we would navigate to the Admin section of the Pro Custodibus UI, and from there to Key Rotation page:
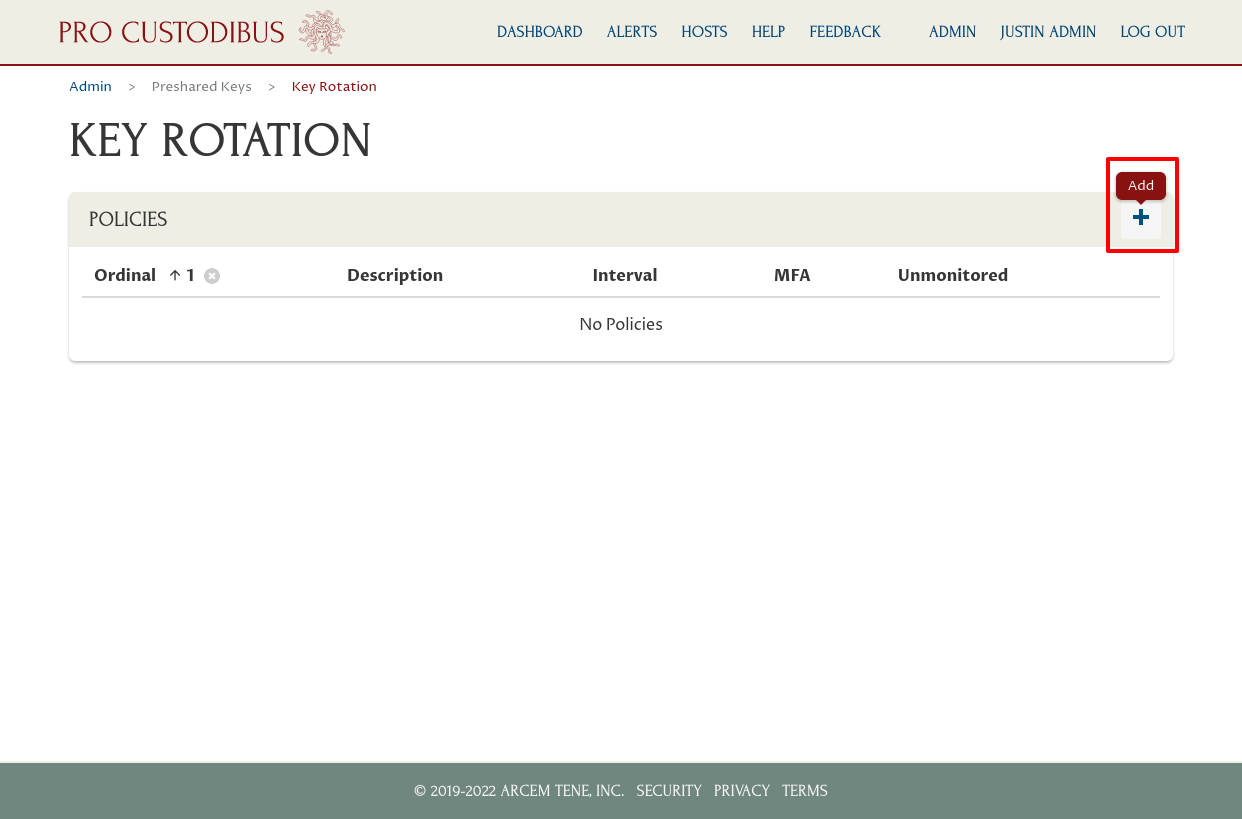
On the Key Rotation page, click the Add (plus) icon to add a new policy:
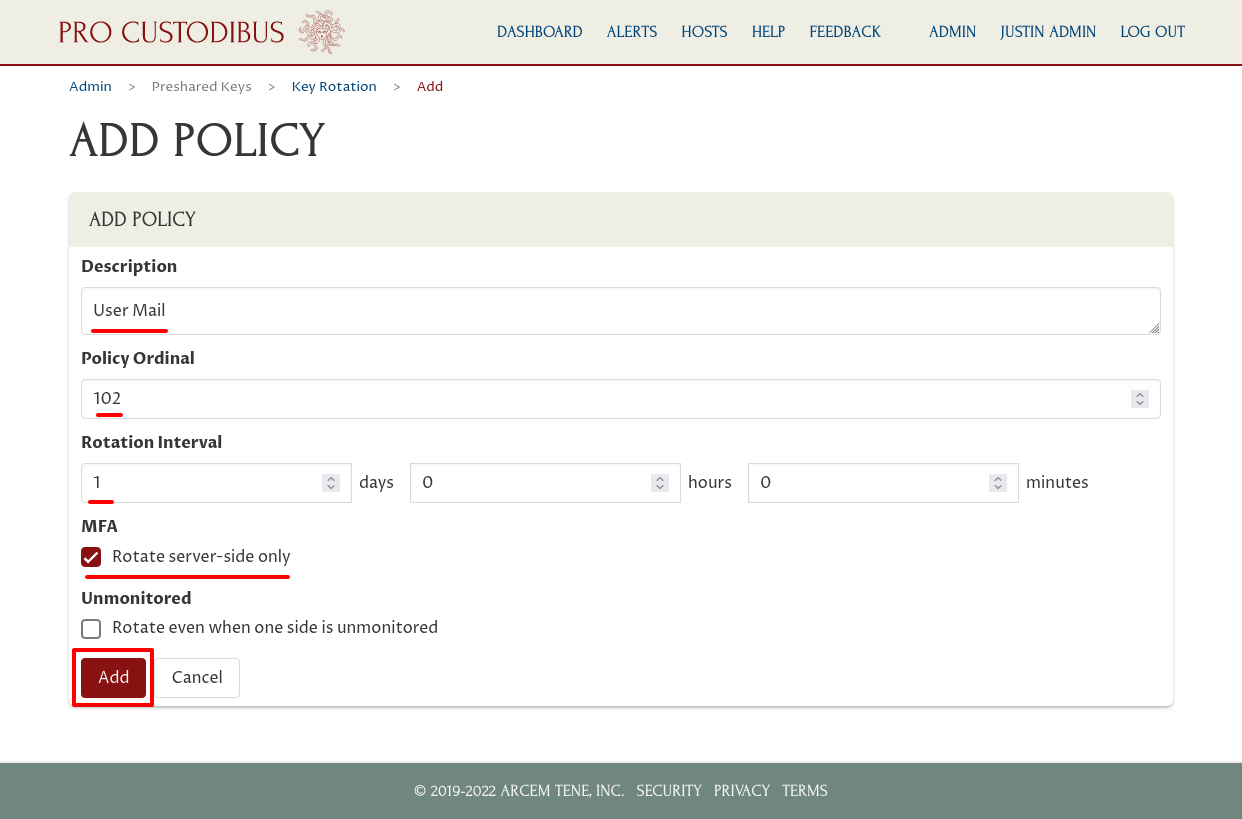
On the Add Policy page, input the following:
-
In the Description field, enter a description that will help explain what this policy is for (like “Prod User Devices”);
-
In the Policy Ordinal field, set an ordinal number (like “101”) — policies with lower ordinals are applied over policies with higher ones (and only one policy is applied to each connection);
-
In the Rotation Interval field, enter the interval at which to rotate the keys (like “1 hour”) — for an MFA policy, this is effectively the MFA session timeout;
-
Select the MFA checkbox (to rotate the keys on just the “server side” of the connection);
-
Do not select the Unmonitored checkbox (to avoid rotating keys for connections that only have the Pro Custodibus agent installed on one side and not the other).
Then click the Add button:

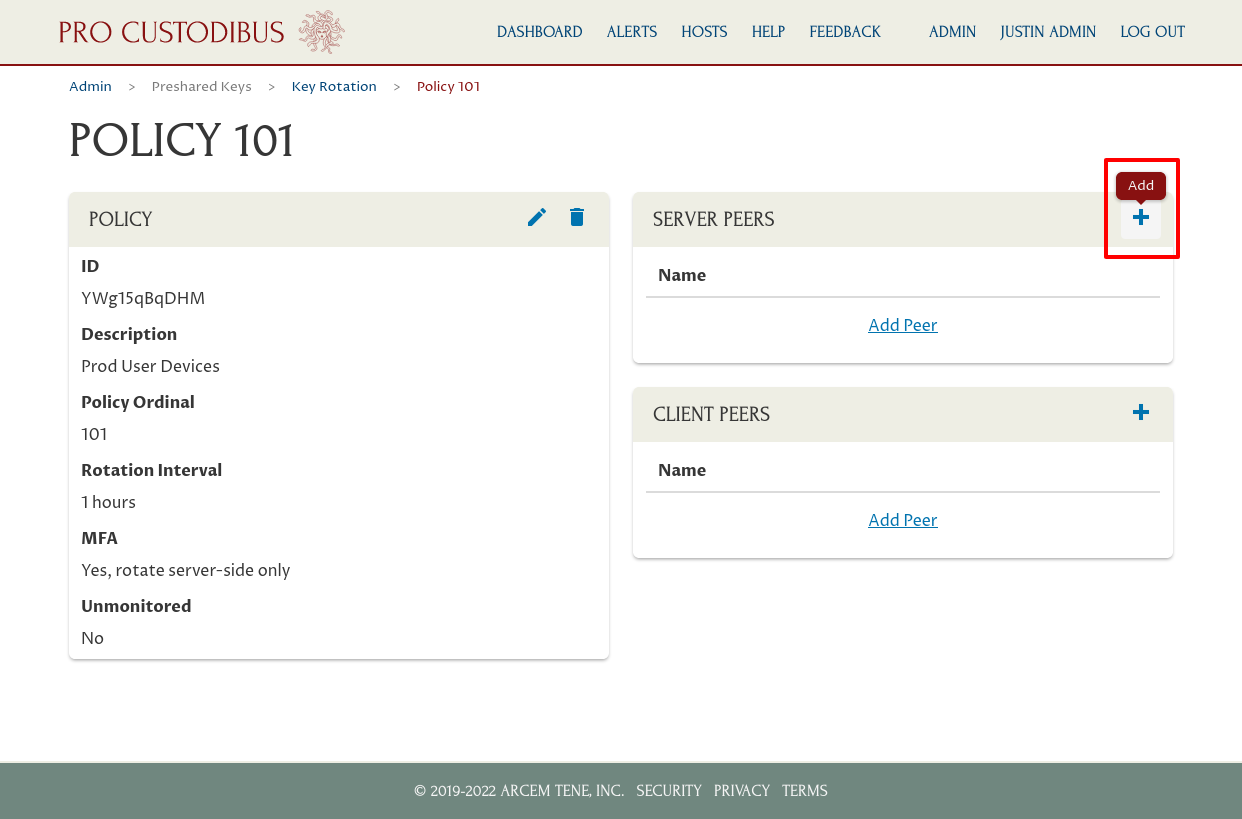
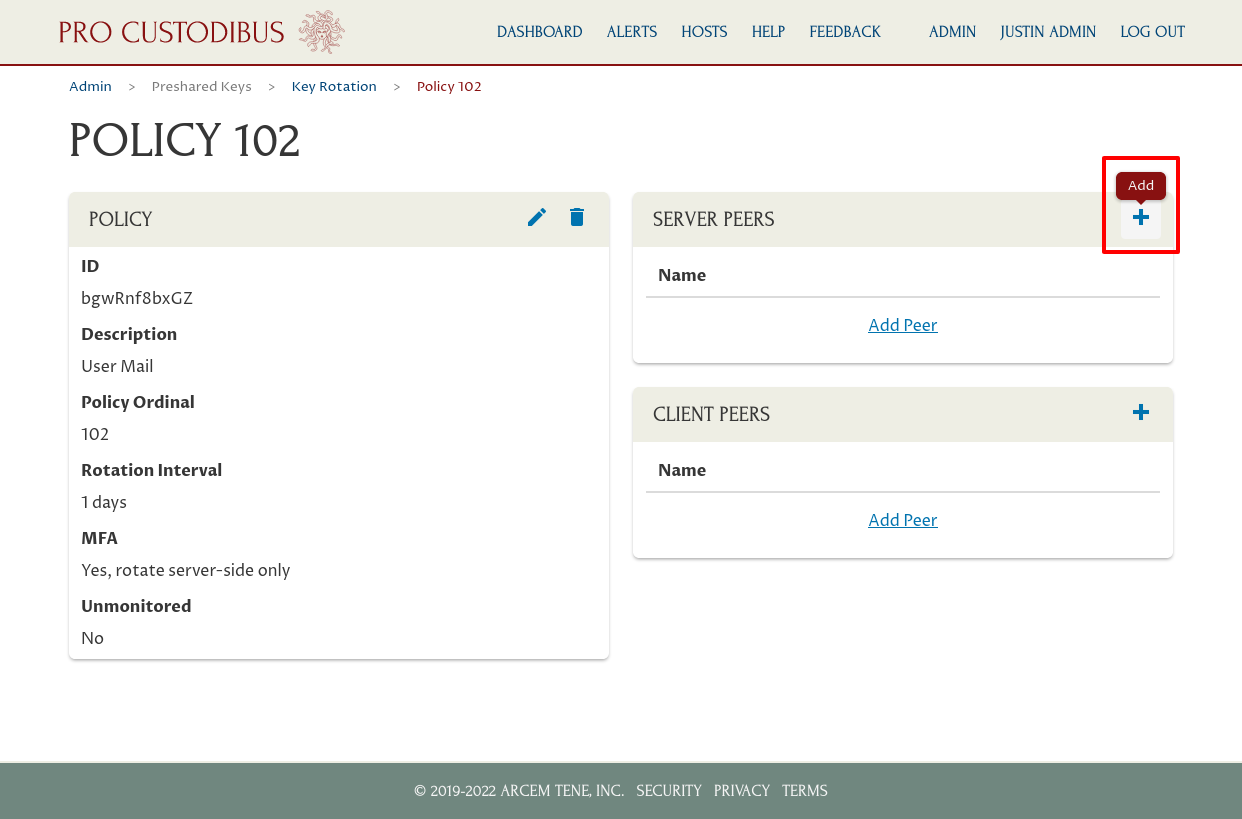
Next, we choose which peers to apply the policy to. We want to apply this policy to connections from user devices to certain production servers, so we’ll select the peers used by those connections on the production servers.
Click the Add (plus) icon of the Server Peers panel to do so:
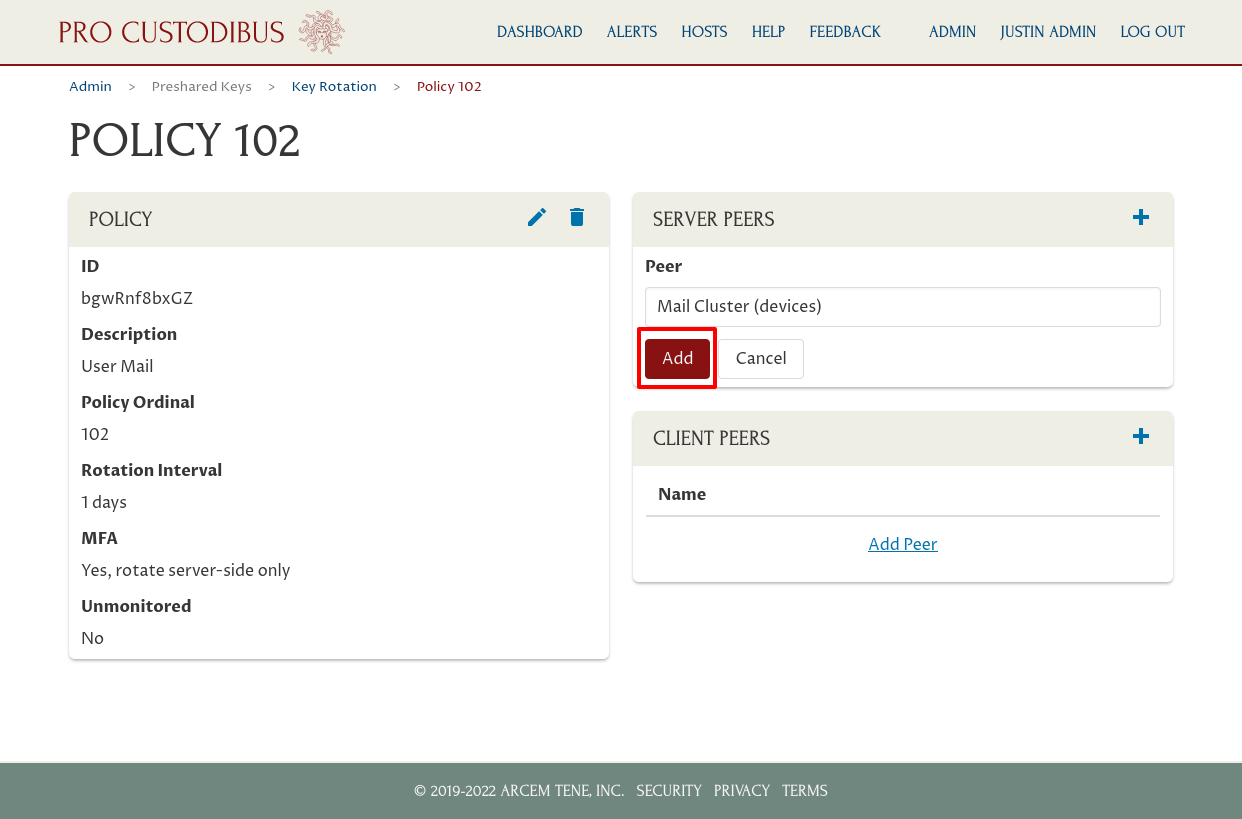
Select the first peer to apply the policy to from the Peer dropdown:

In this case, we’ve selected the peer used to connect to user devices from the App Cluster gateway. Click the Add button to add the selected peer to the policy:

Repeat these steps for the other peers you want to add; in this case we’ve also added the peers used to connect from the DB Cluster gateway and Log Cluster gateway to the user-devices network:
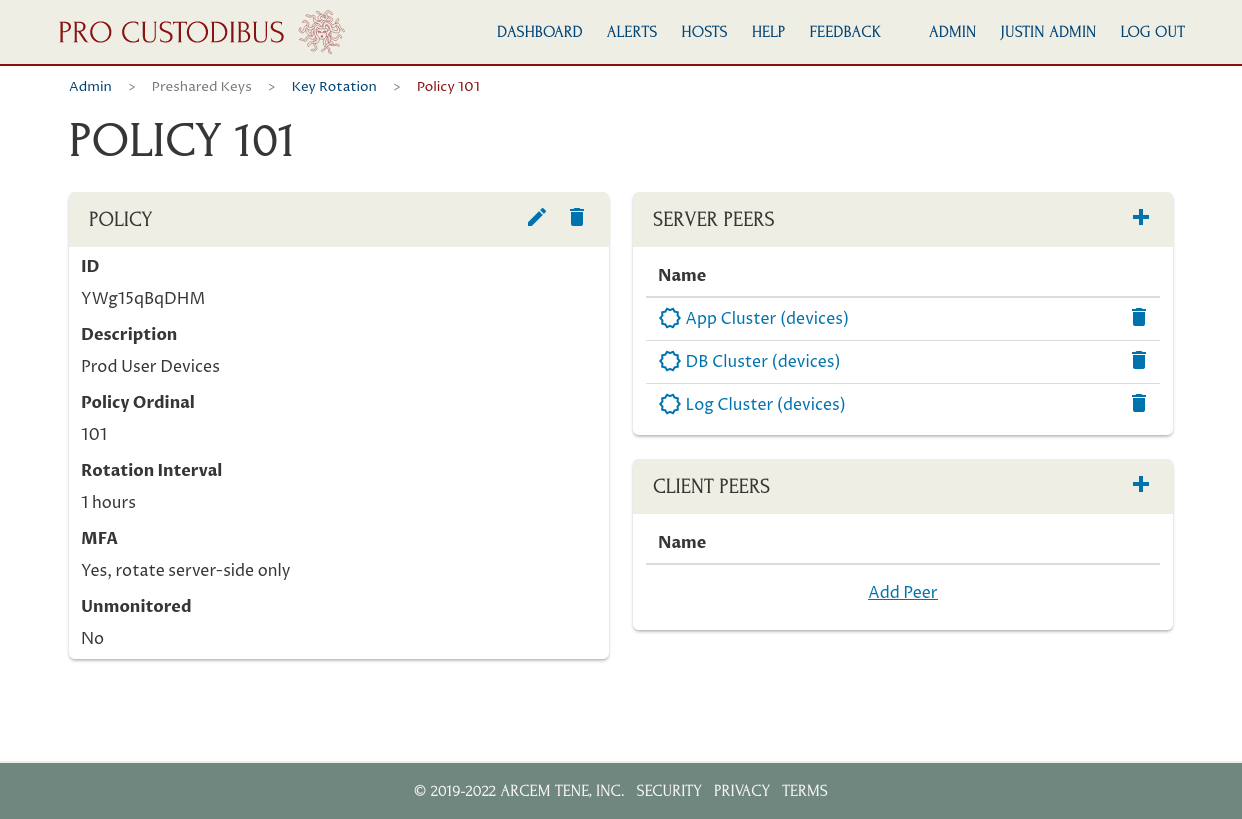
Now Pro Custodibus will automatically rotate the preshared keys used by all connections of these three “server-side” peers once an hour. And because this is an MFA policy, Pro Custodibus will rotate the key on the server side only — once the preshared key of a given connection has been rotated, in order to use the connection, the user on the “client side” of the connection will have to log into Pro Custodibus to synchronize the preshared key on her side of the connection with the newly rotated key.
A Second Server-Side MFA Policy
To create a second policy for a separate set of server-side peers, the “User Mail” policy, we would navigate back to the Key Rotation page, and click the Add (plus) icon again:
We’d fill out the form on the Add Policy page similar to the previous policy, but this time we’d:
-
Select a different ordinal for the policy (like “102”) to enter into the Policy Ordinal field;
-
Select an interval appropriate for this policy (like “1 day”) to enter into the Rotation Interval field.
Then click the Add button:
Next, click the Add (plus) icon of the Server Peers panel to add the server-side peers for this policy:
In this case, we’ve selected the peer used on the Mail Cluster gateway for user devices. Click the Add button to add the selected peer to the policy:
If we wanted to apply this policy to other server-side peers, we could add additional peers; but in this case we only want to apply to the connections of a single peer:
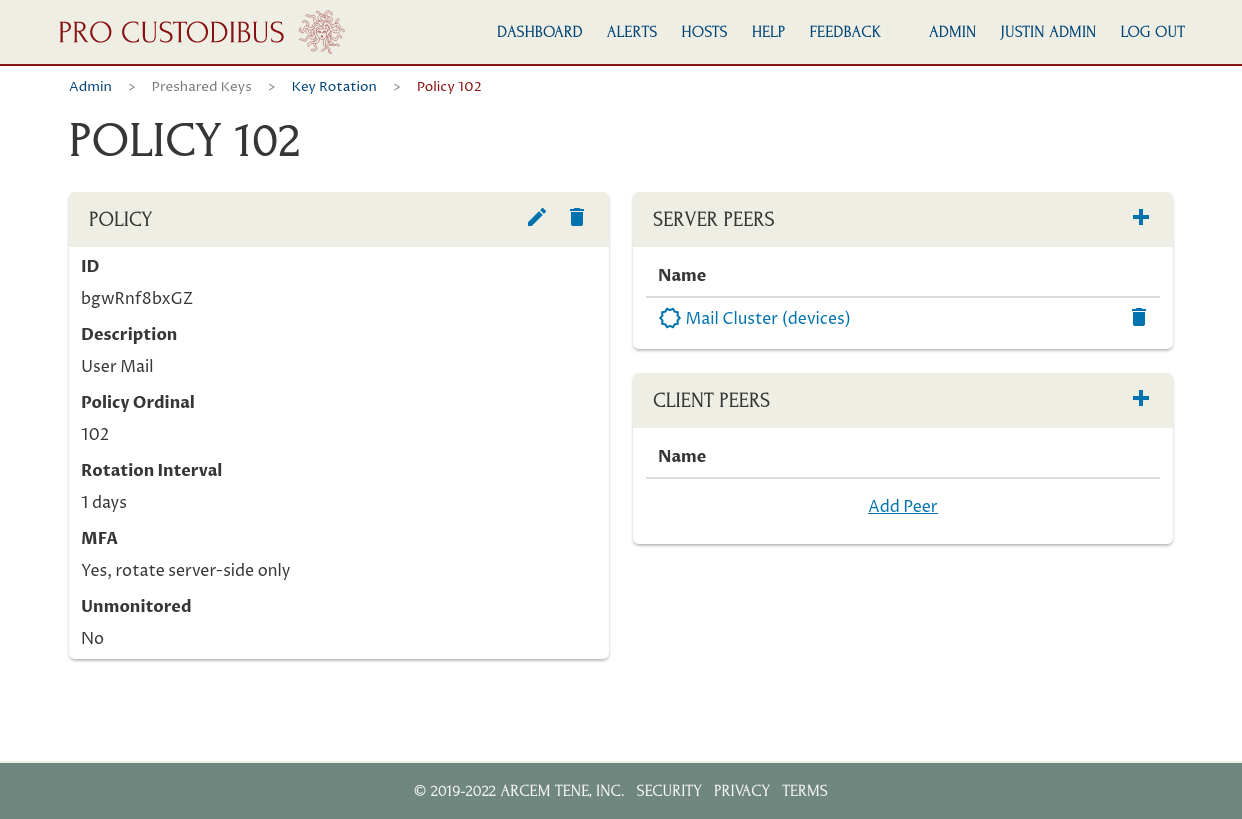
Now Pro Custodibus will automatically rotate the preshared keys used by all connections to the Mail Cluster gateway once a day (and just on the “server side” of these connections, because it’s an MFA policy).
A Client-Side MFA Policy
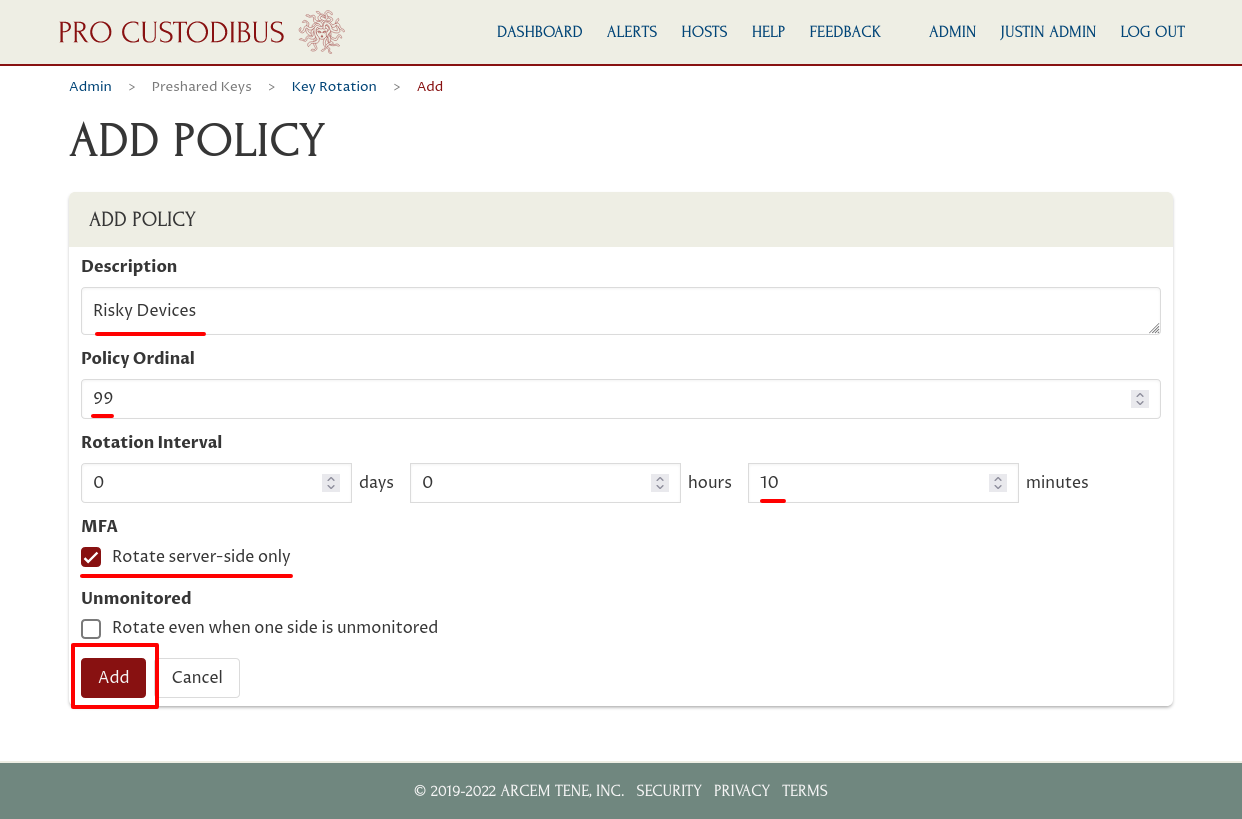
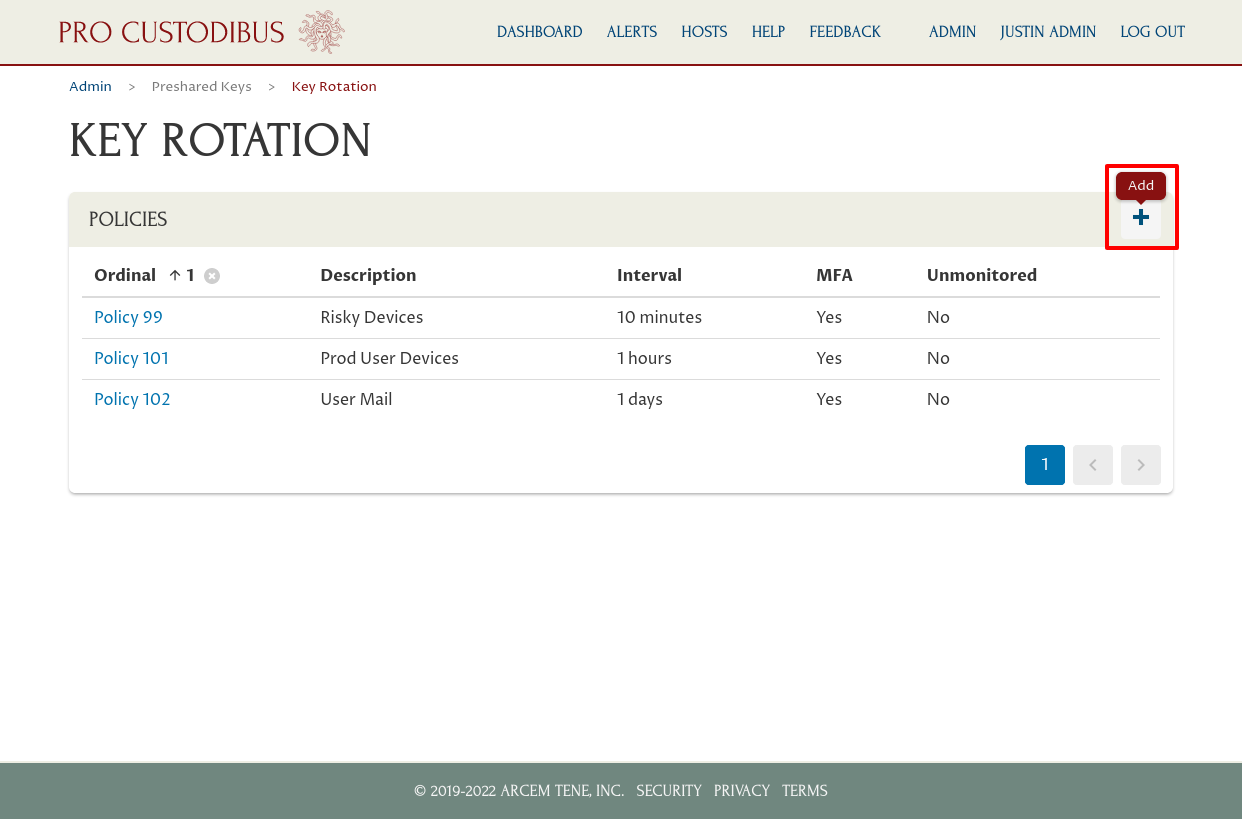
To create our third policy, this time for a set of specific client-side peers — the “Risky Devices” policy — we would navigate back to the Key Rotation page, and click the Add (plus) icon again:
We’d fill out the form on the Add Policy page similar to the previous two policies, but this time we’d:
-
Select a lower ordinal for the policy (like “99”) to enter into the Policy Ordinal field — we want this policy to apply in preference to the other policies we’ve created (with ordinal numbers “101” and “102”);
-
Select an interval appropriate for this policy (like “10 minutes”) to enter into the Rotation Interval field.
Then click the Add button:
Next, click the Add (plus) icon of the Client Peers panel to add client-side peers to this policy:
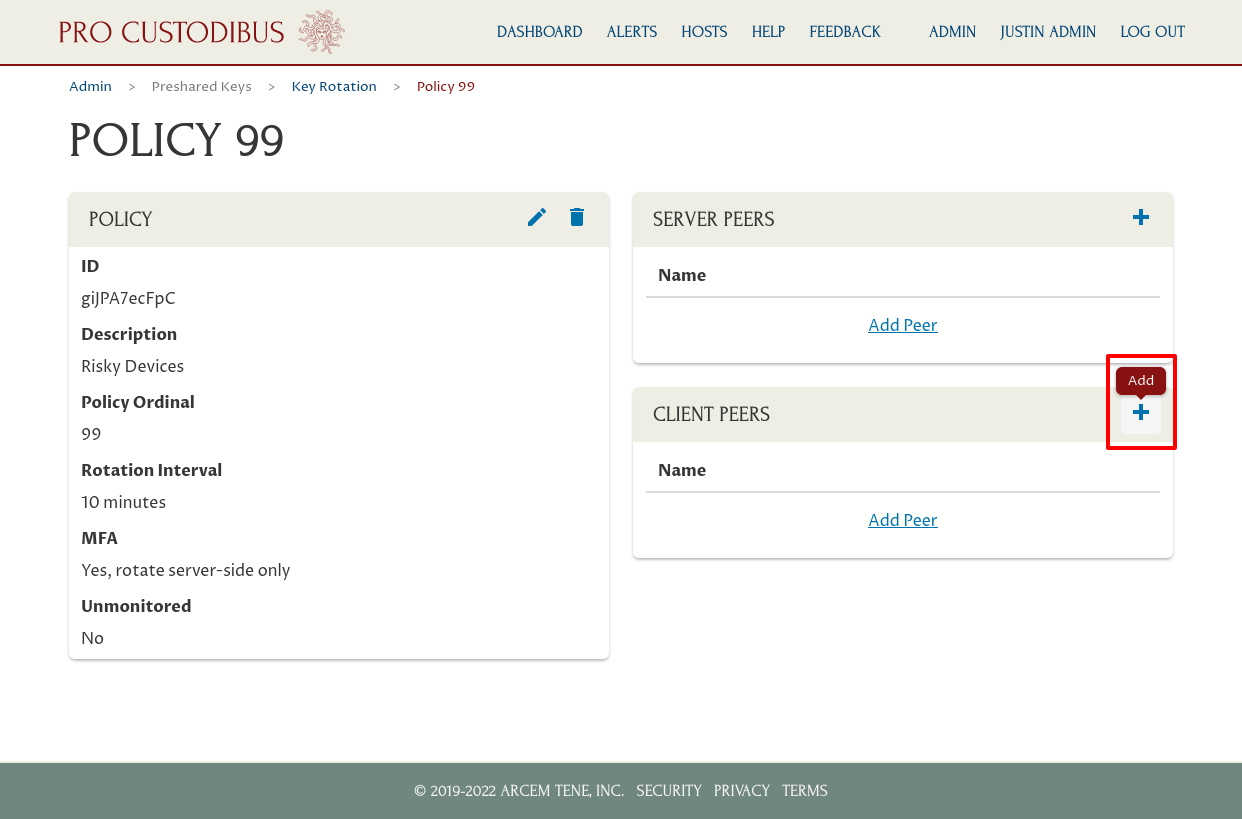
In this case, we’ve selected the peer used by Justin’s Laptop. Click the Add button to add the selected peer to the policy:
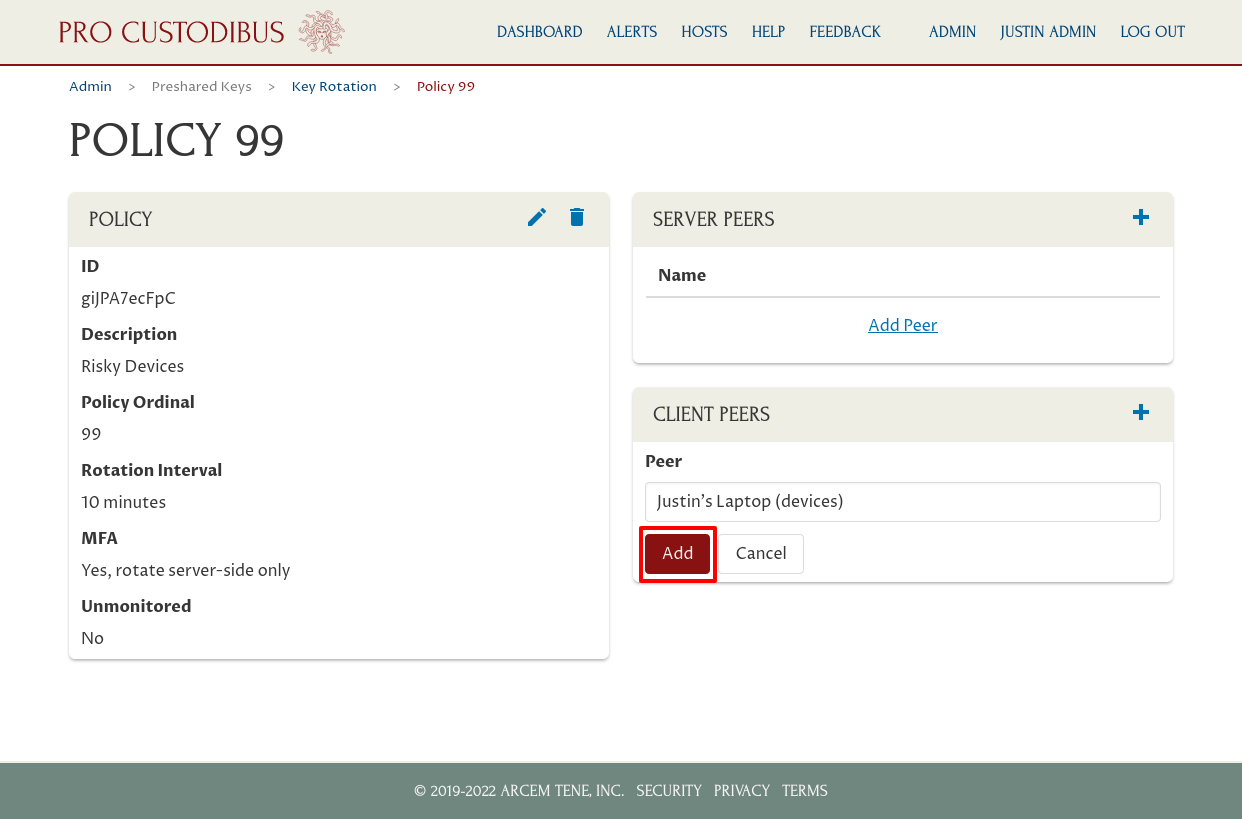
If we wanted to apply this policy to other client-side peers, we could add additional peers; but in this case we only want to apply this policy to Justin’s Laptop:
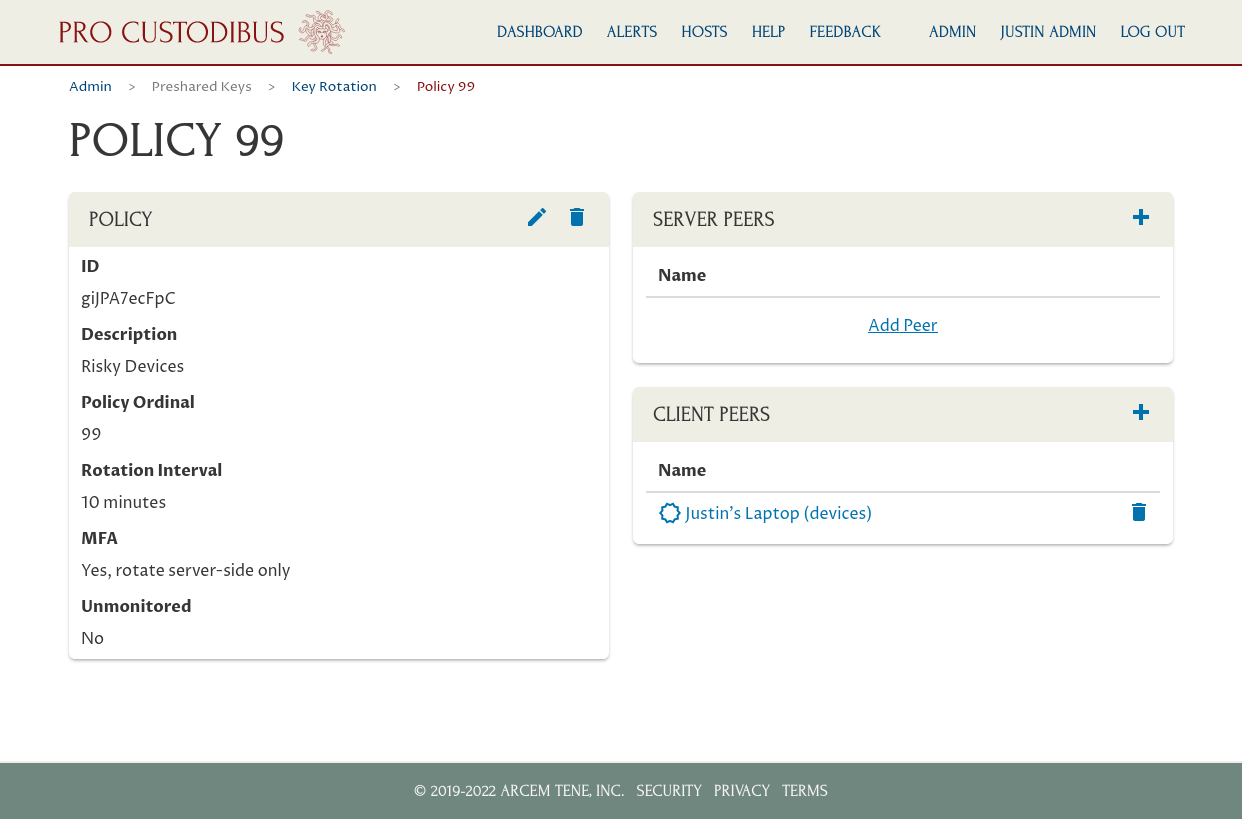
Now Pro Custodibus will automatically rotate the preshared keys used by all connections to Justin’s Laptop every 10 minutes. And because this is an MFA policy, Pro Custodibus will rotate each key on the server-side only — and because we’ve selected Justin’s Laptop as a client peer, this means the preshared key on the other side of the connection will be rotated.
So in order to use a WireGuard connection from his laptop, Justin will have to log into Pro Custodibus to synchronize the preshared key used by the connection to his laptop (and if he uses the connection for more than 10 minutes, he’ll have to log in again to re-synchronize the key after its next rotation).
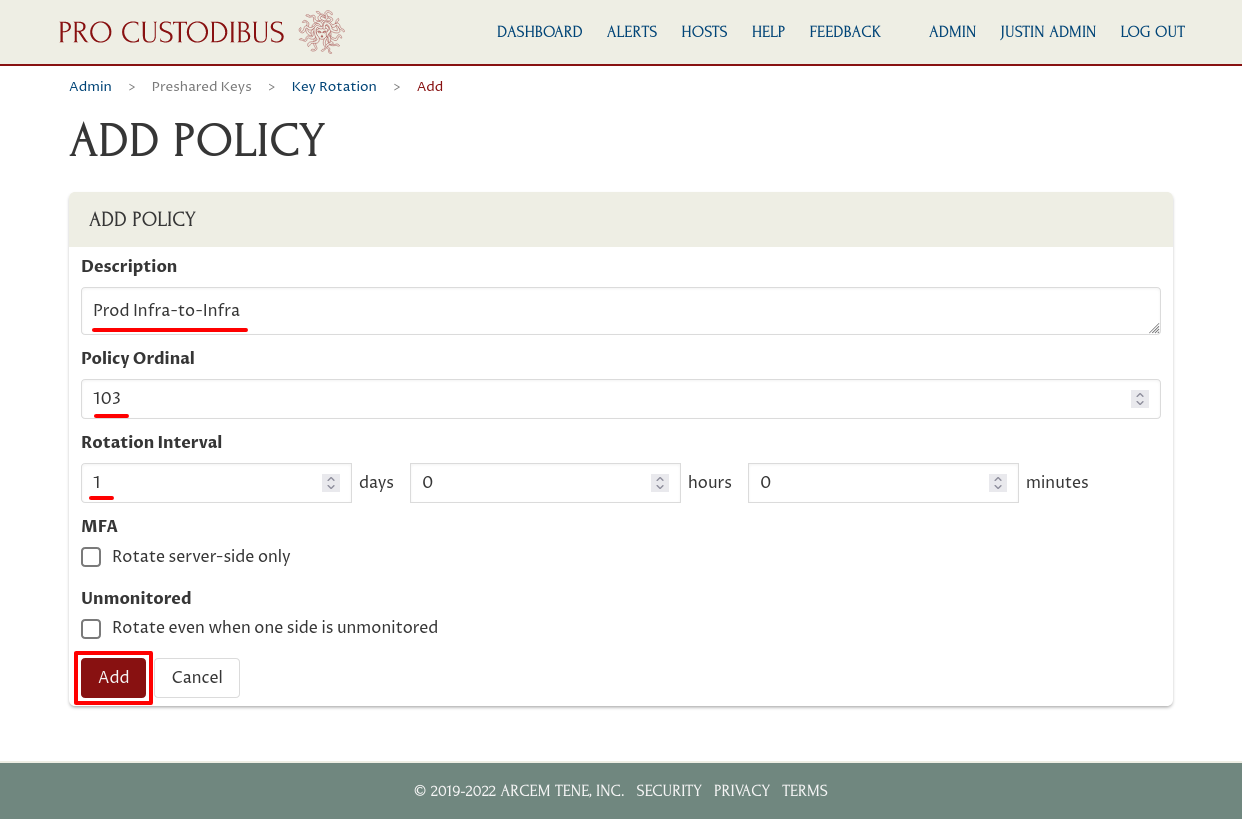
A Non-MFA Policy
To create our fourth policy, this time a non-MFA policy, the “Prod Infra-to-Infra” policy, we would navigate back to the Key Rotation page, and click the Add (plus) icon again:
We’d fill out the form on the Add Policy page similar to the previous two policies, but this time we’d:
-
Select a different ordinal for the policy (like “103”) to enter into the Policy Ordinal field;
-
Select an interval appropriate for this policy (like “1 day”) to enter into the Rotation Interval field;
-
Don’t select the MFA checkbox — this way the preshared key on both sides of the connection will be rotated together.
Then click the Add button:
Next, click the Add (plus) icon of the Peers panel to add peers to this policy. Note that unlike with our previous policies, we don’t have separate “Server Peers” and “Client Peers” panels; because this is not an MFA policy, there is no distinction between “server side” and “client side” with this policy:
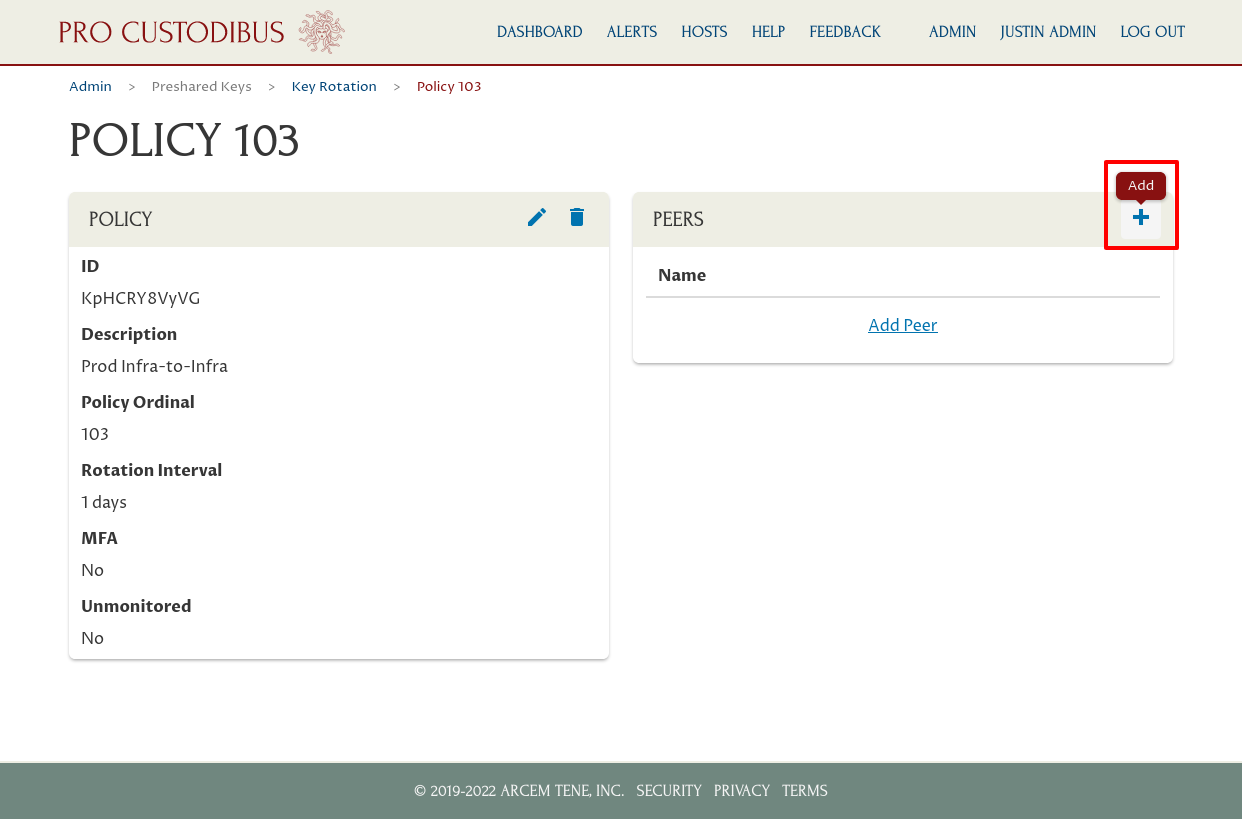
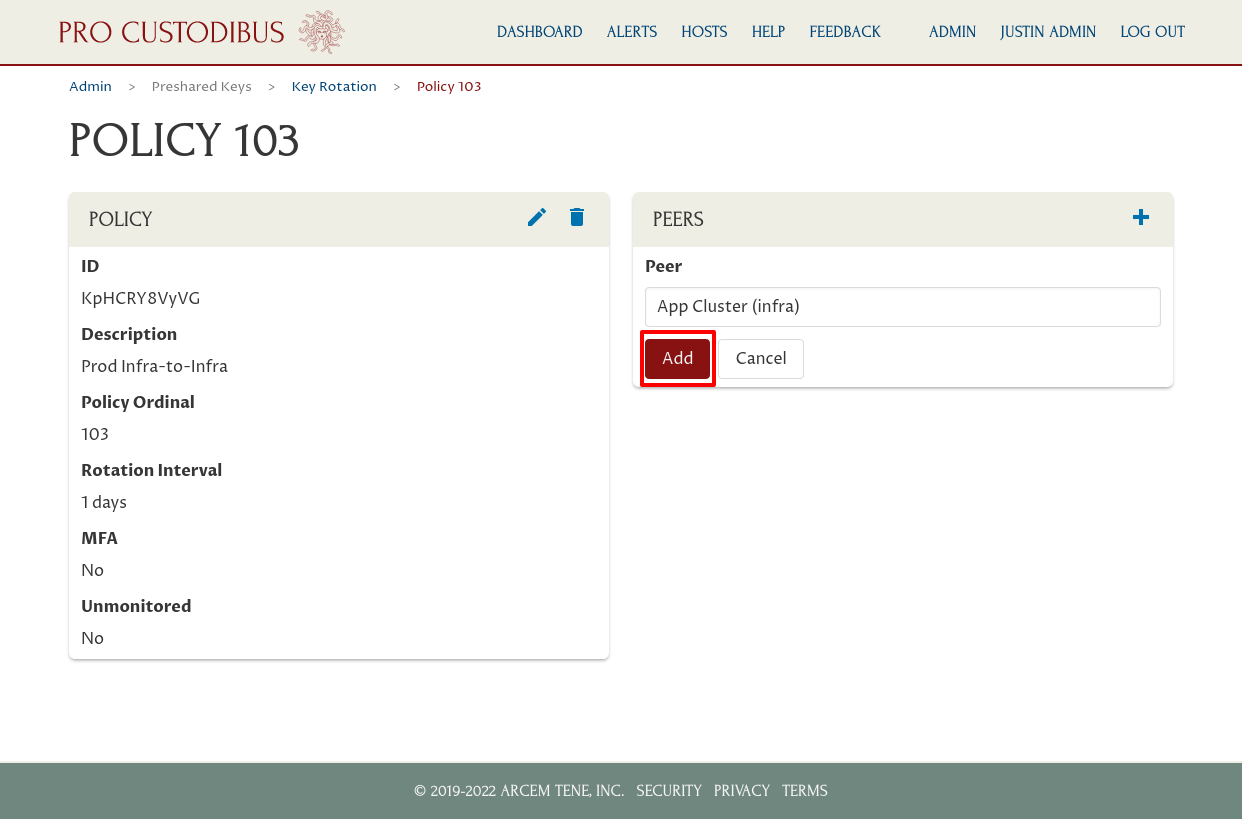
In this case, we’ve selected the peer used to connect to other infrastructure from the App Cluster gateway. Note that this is a different peer than we used for the first policy — it’s the peer used for our infrastructure-to-infrastructure network on the App Cluster gateway, not the peer used for our user-devices network. (While you can add the same peer to more than one policy, Pro Custodibus will apply only one policy — the policy with the lowest ordinal.)
Click the Add button to add the selected peer to the policy:
Repeat these steps for the other peers you want to add; in this case we’ve also added the peers used to connect the infrastructure-to-infrastructure network to the DB Cluster gateway and Log Cluster gateway:

Now Pro Custodibus will automatically rotate the preshared keys used by all connections of these peers once a day. And because this is not an MFA policy, Pro Custodibus will rotate the key on both sides of the connection in tandem — no human intervention is needed to maintain the connection.
Monitor Rotation State
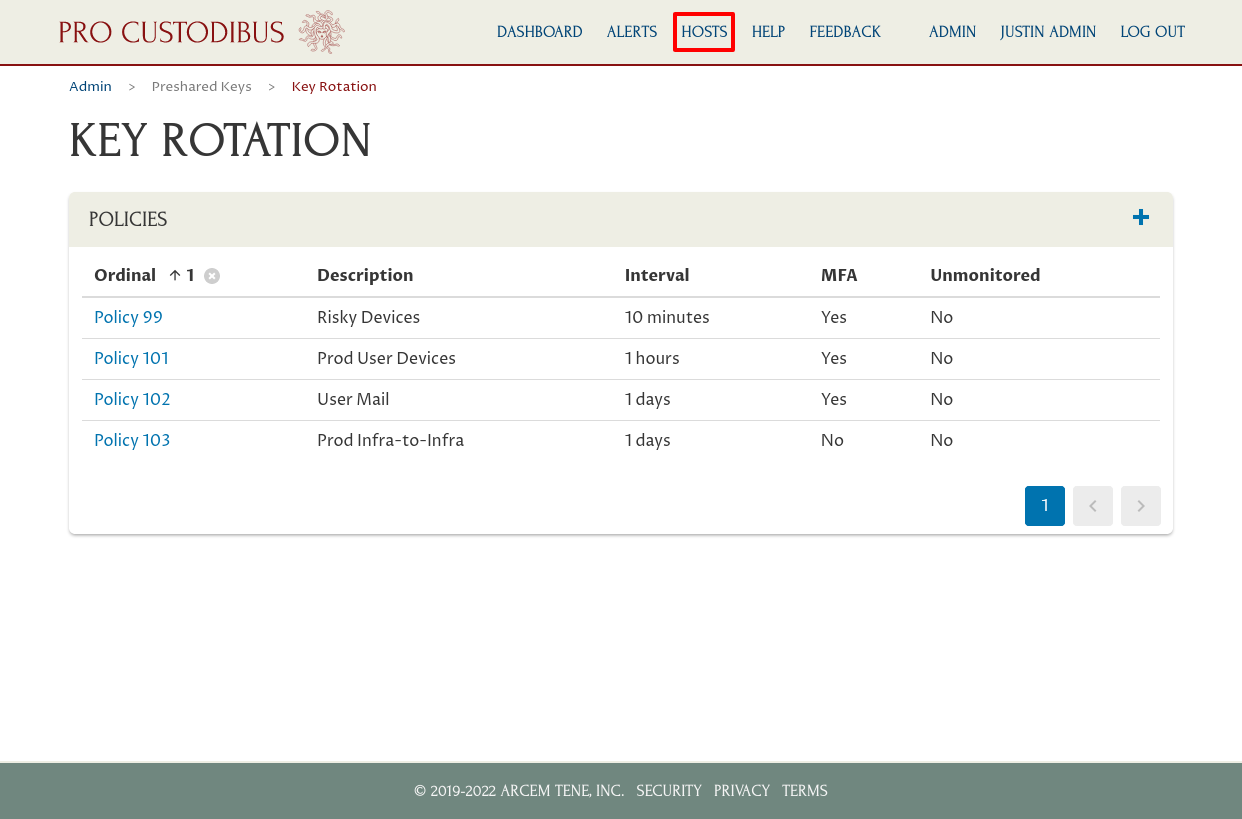
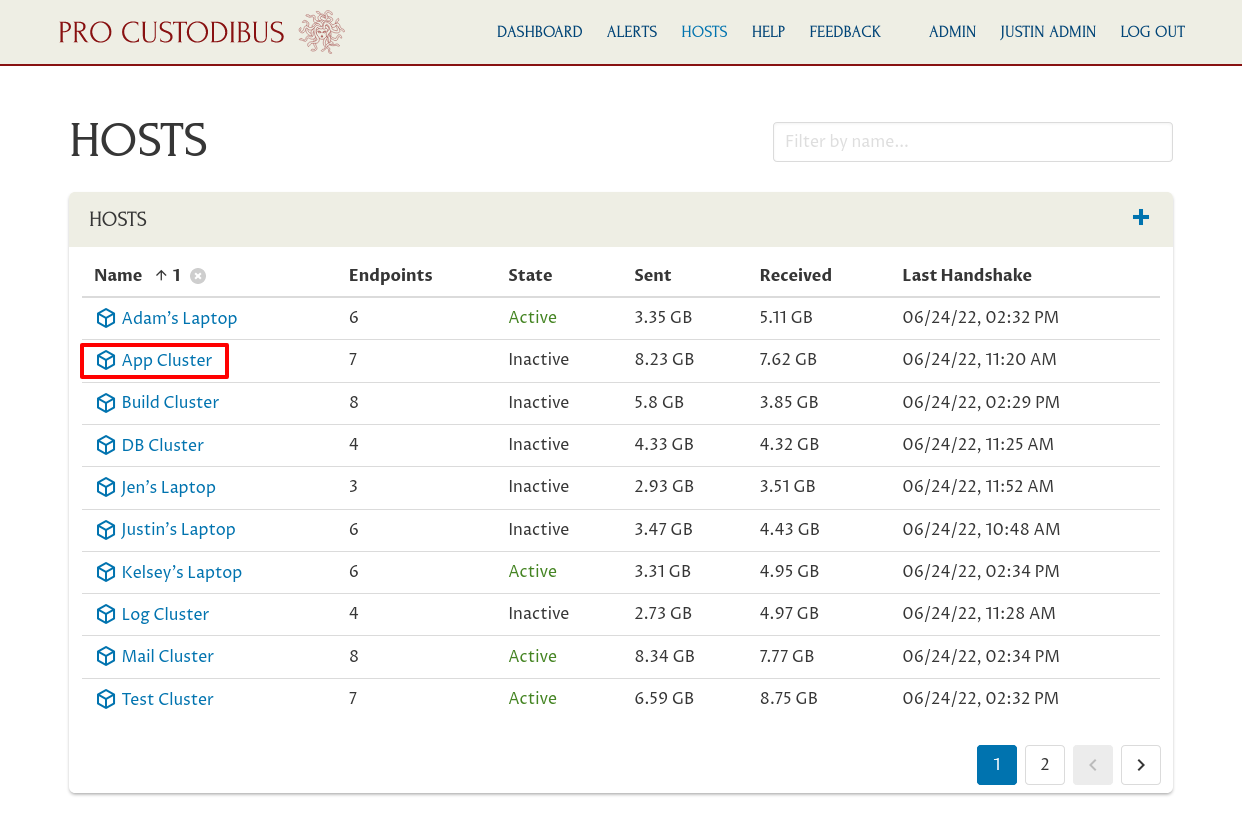
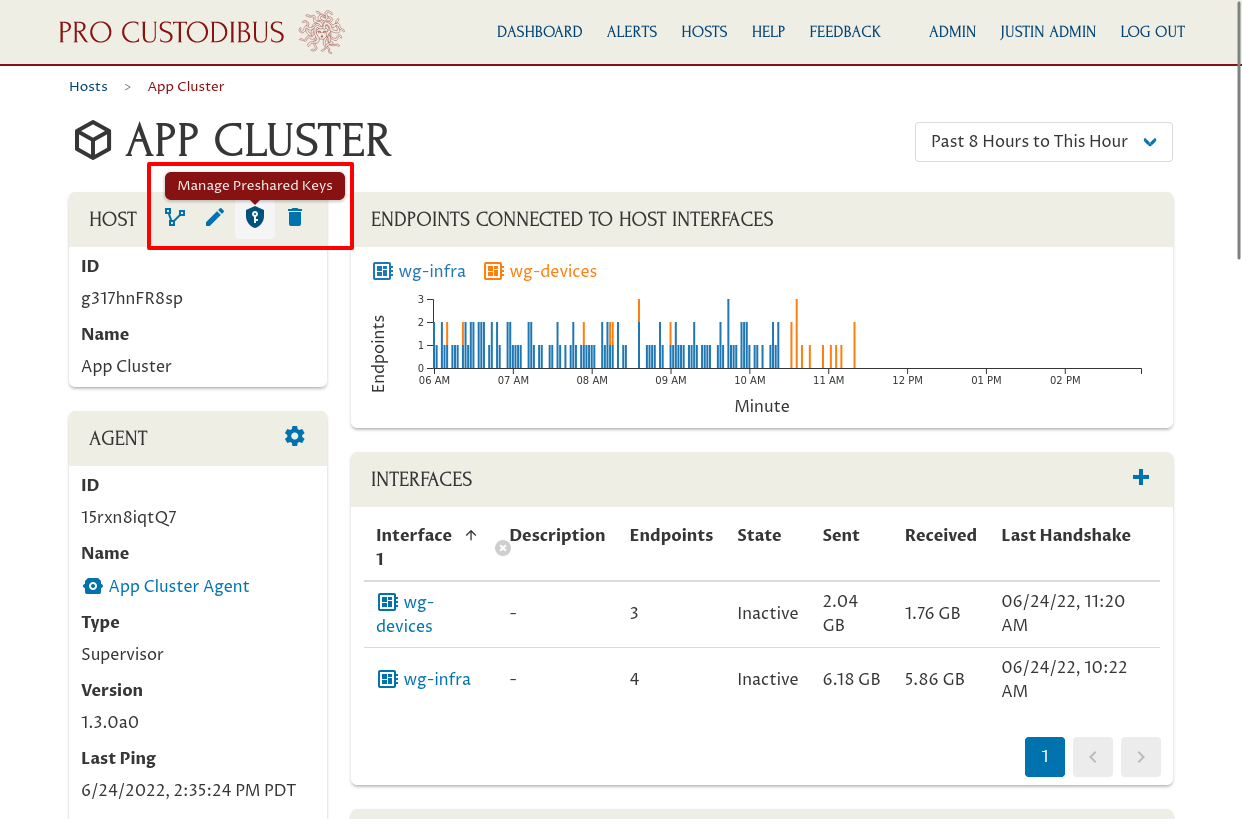
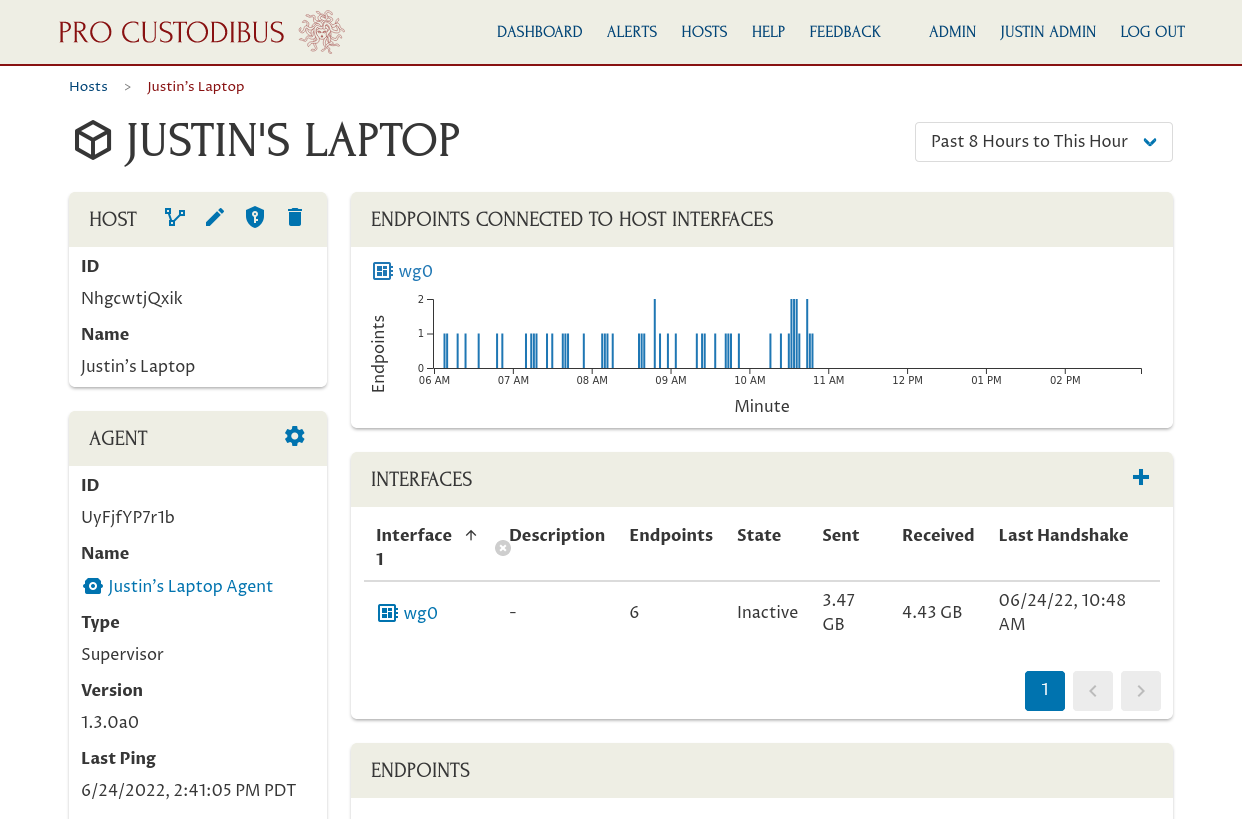
Once the key-rotation policies have been set up, an admin can monitor the rotation state of a specific host by navigating to the hosts page via the Hosts link in the app header:
And then click on the link to a particular host, like the App Cluster gateway host in this case:
And then click on the Manage Preshared Keys (key-on-shield) icon in the Host panel:
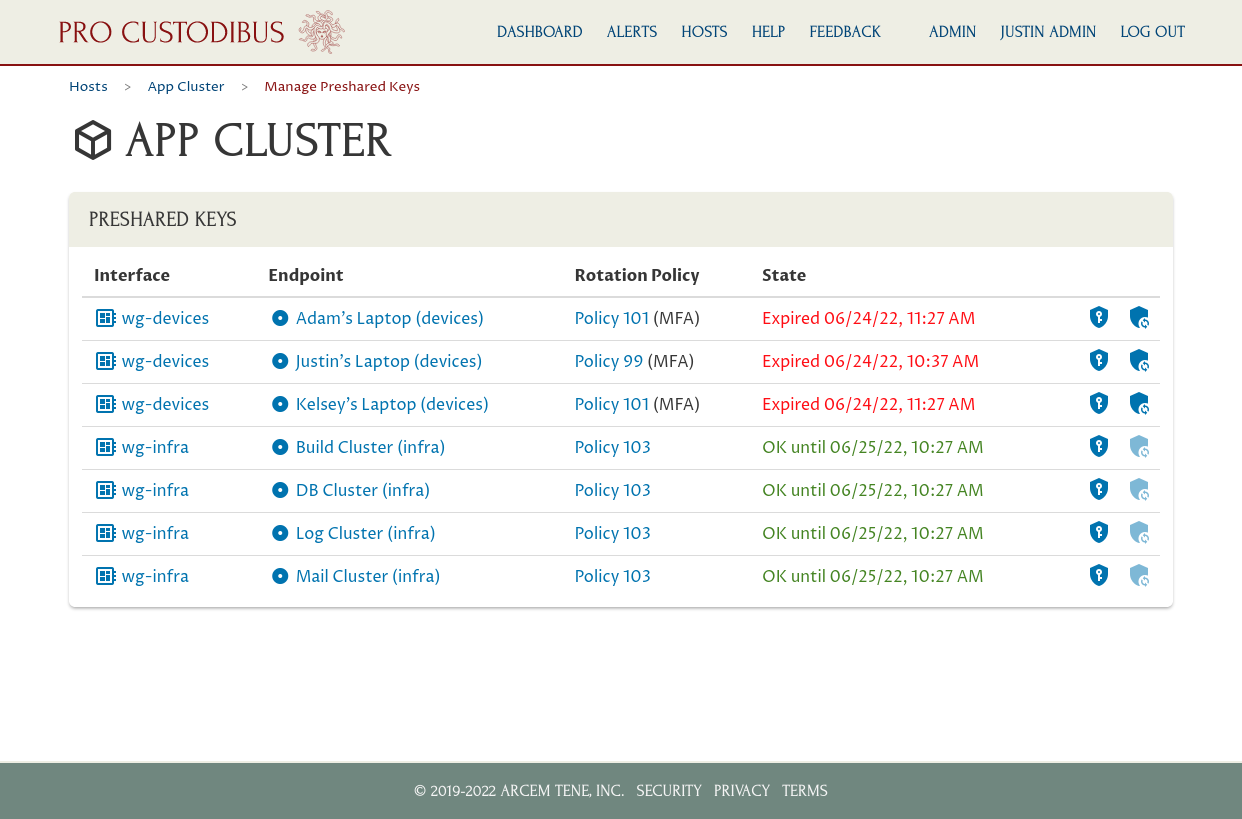
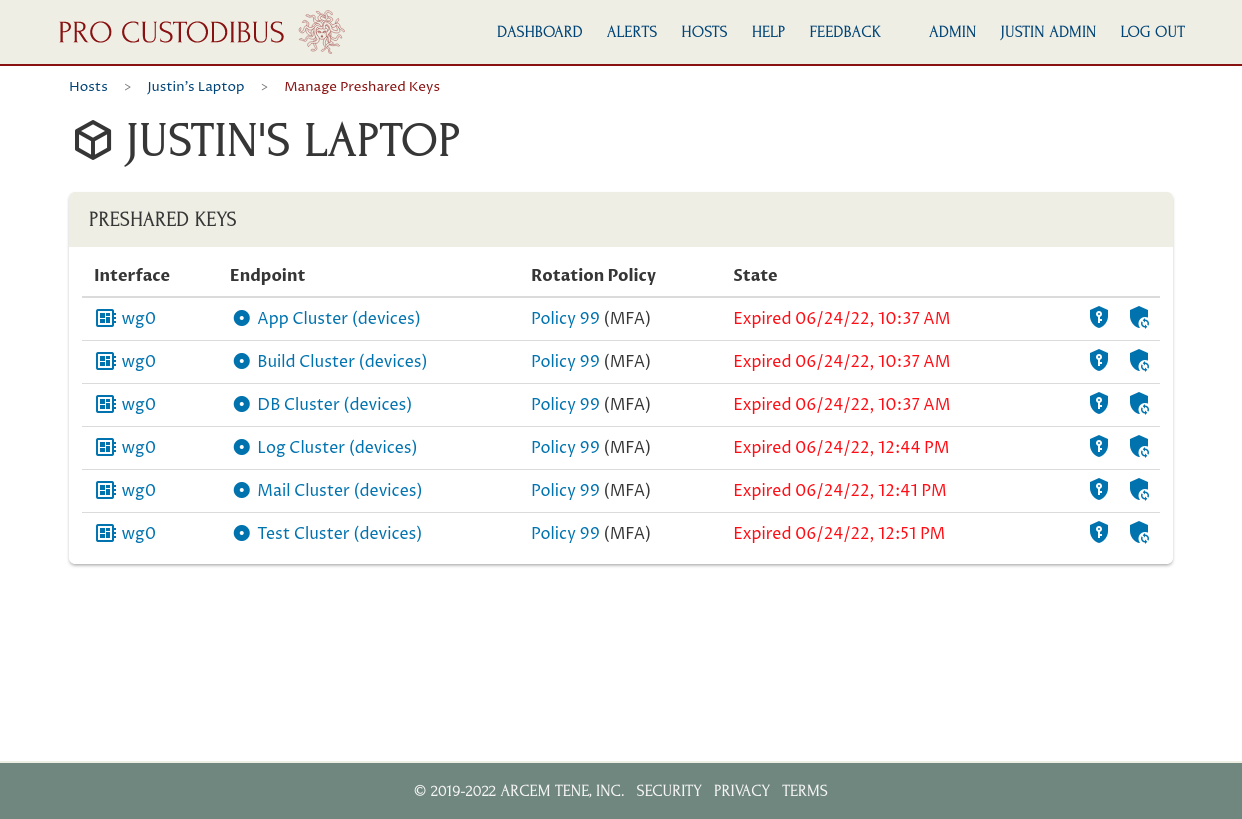
This page will list all the WireGuard connections on this host that are monitored by Pro Custodibus:
-
The Interface column shows the connection’s WireGuard interface on the host;
-
The Endpoint column shows the connection’s endpoint from the host;
-
The Rotation Policy column shows the key-rotation policy that applies to the connection (if any);
-
The State column shows the key-synchronization state of the connection;
-
The Mange Key (key-on-shield) icon allows an you to view or change the key used by the connection;
-
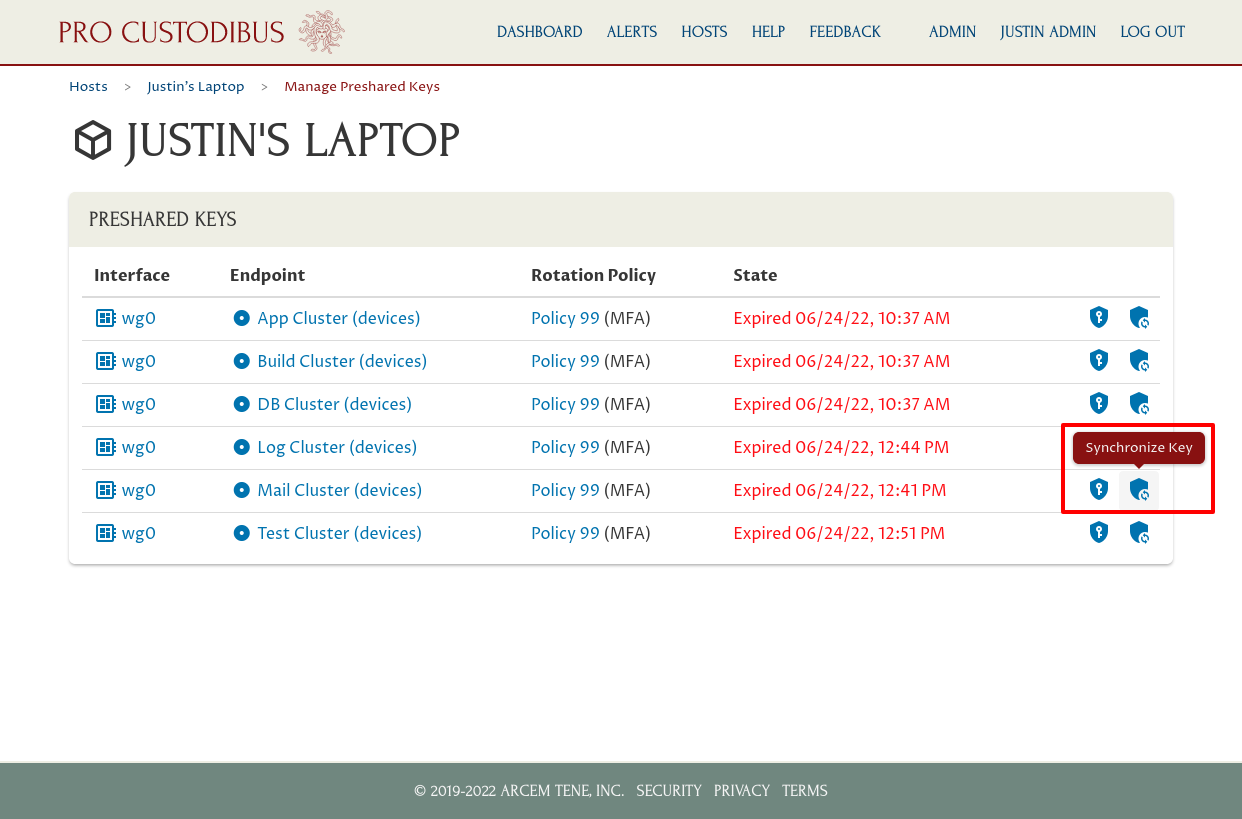
The Synchronize Key (circle-on-shield) icon allows an you to synchronize the key from the other side of the connection to this host.
Connections with a red state (Expired or Mismatch) cannot be used until the preshared key has been synchronized. Connections with a yellow state (Pending) have a state change pending. Connections with a green state (OK or Match) have a matching key, and are available for use. Connections with a black state (No Key Used or -) aren’t using a preshared key (or the host on the other side of the connection isn’t monitored by Pro Custodibus):
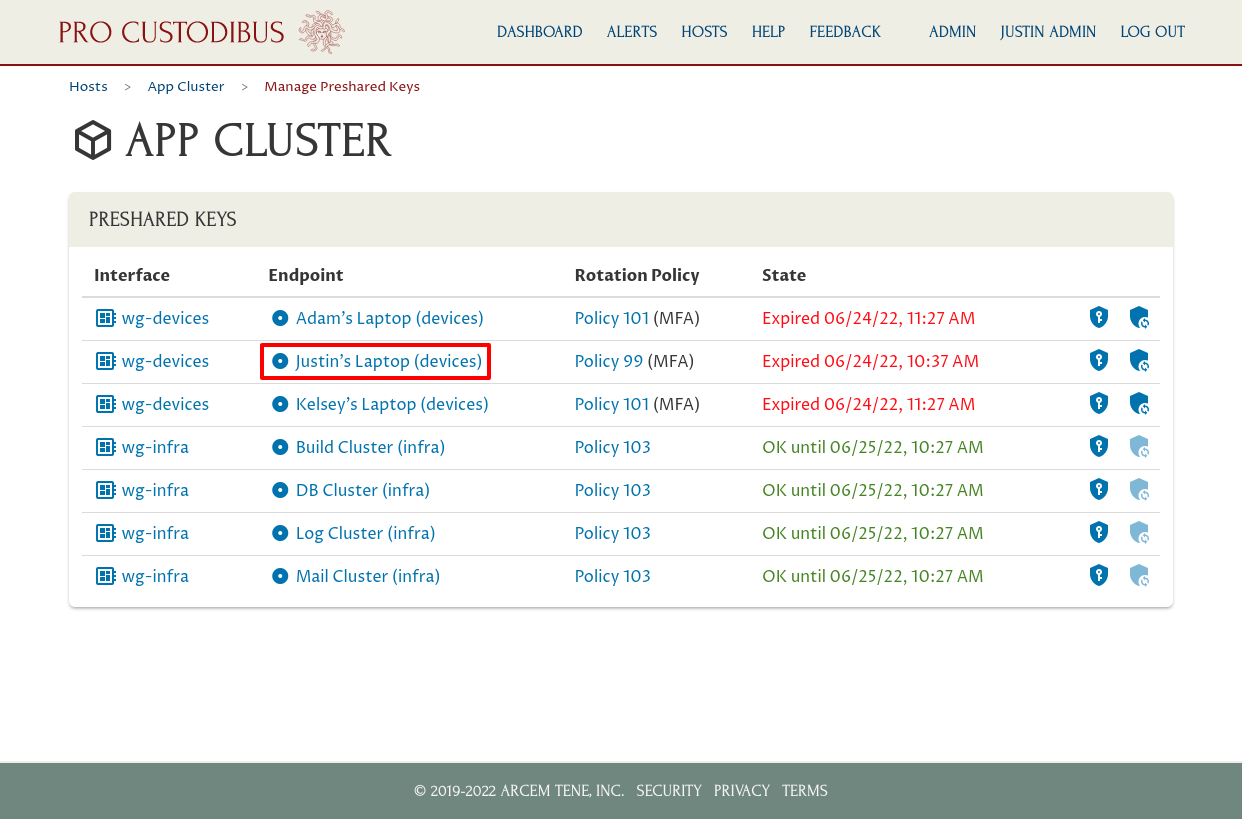
To navigate to the host on the other side of the connection, click on an endpoint, like Justin’s Laptop (devices) in this case:
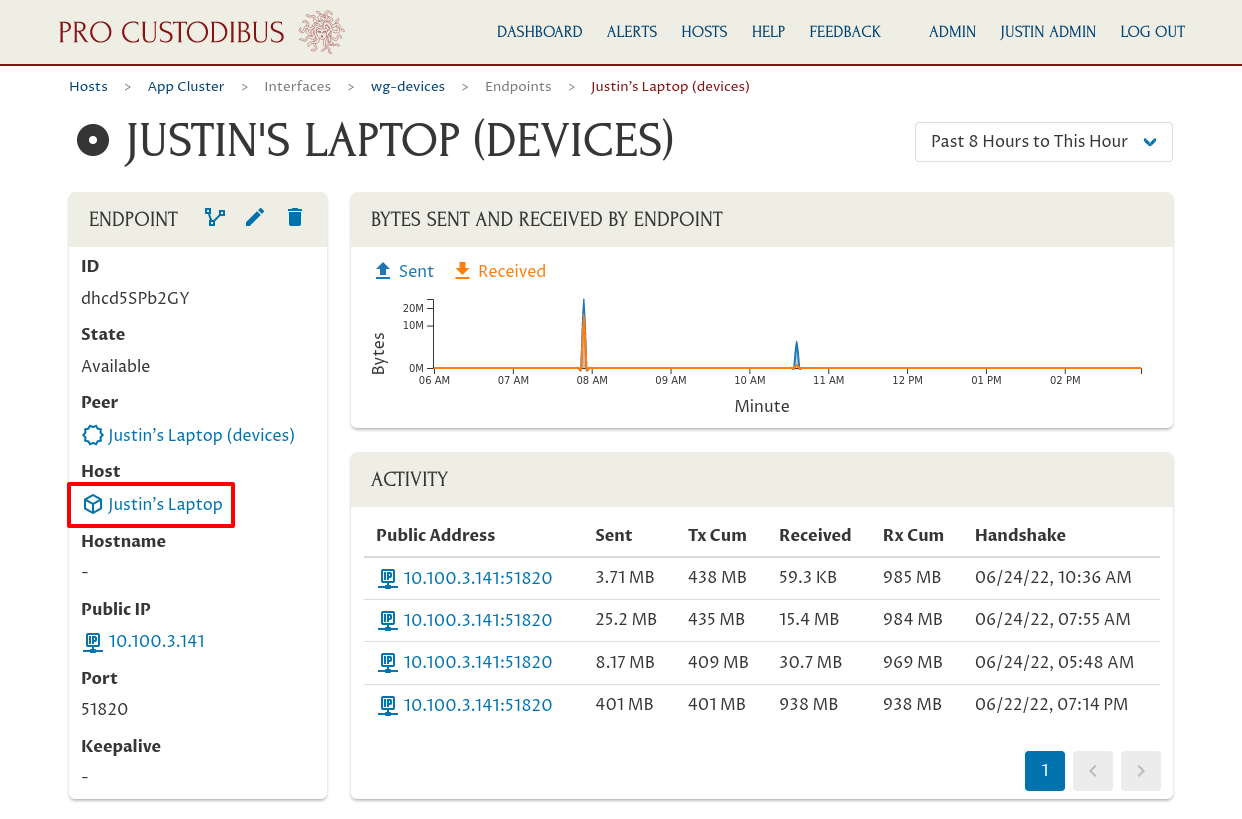
This will take you to the page for that endpoint; from there click the Host link in the Endpoint panel, to Justin’s Laptop in this case:
You can monitor the preshared-key rotation state of this host by clicking the Manage Preshared Keys (key-on-shield) icon in the Host panel:
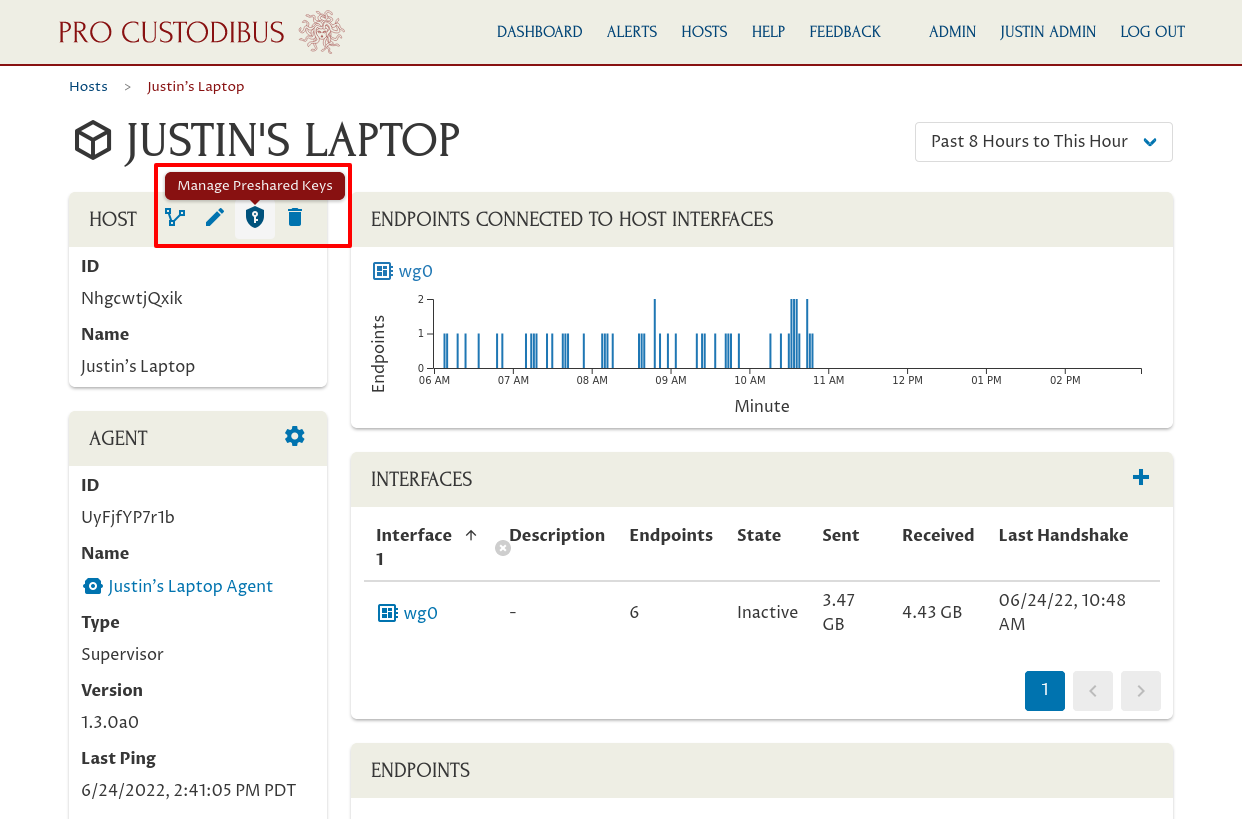
This page will list all the WireGuard connections on this host that are monitored by Pro Custodibus:
To override MFA temporarily for a connection, you can click the Synchronize Key (circle-on-shield) icon:
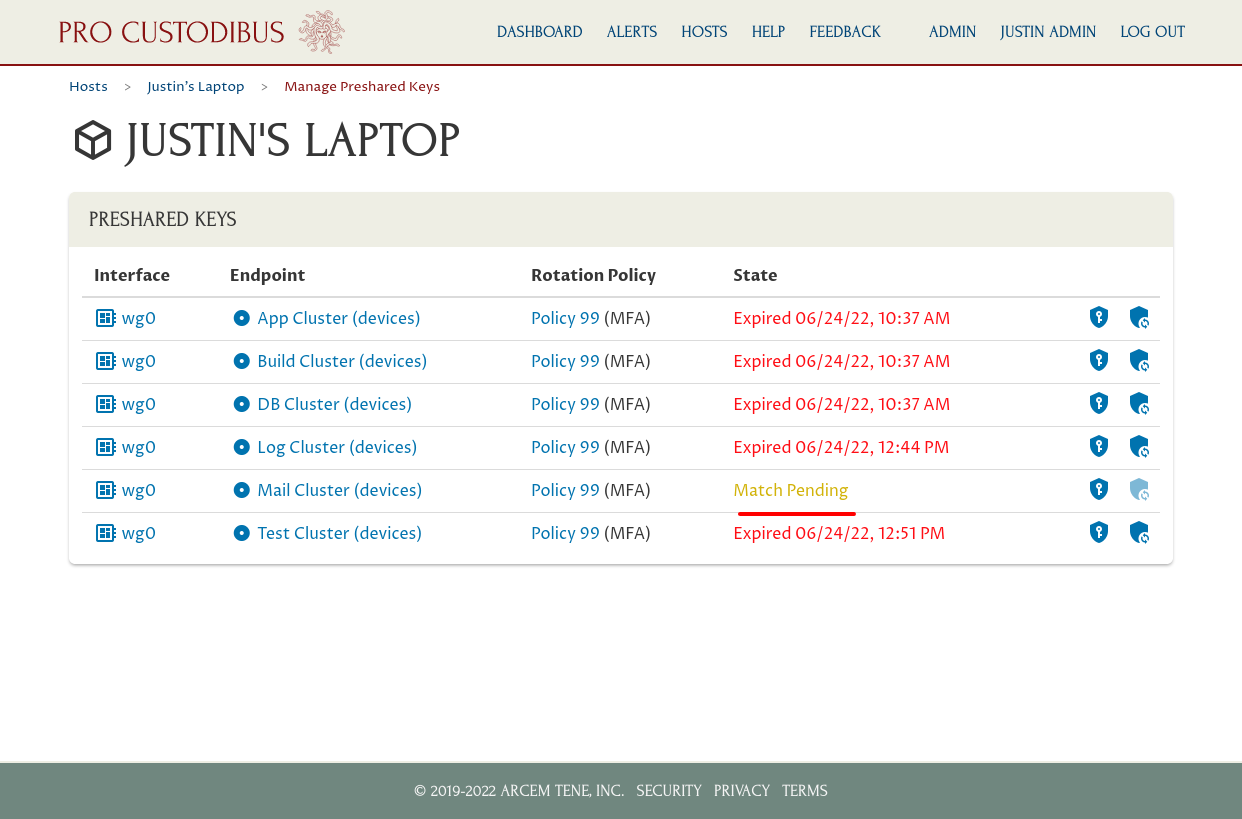
This will synchronize the preshared key for this connection on this host with the preshared key used by the other side of the connection. It may take a minute or two to complete; while it is pending, you’ll see a Match Pending state listed for the connection:
If you refresh the page once the synchronization is complete, you’ll see the state change to OK for the connection:
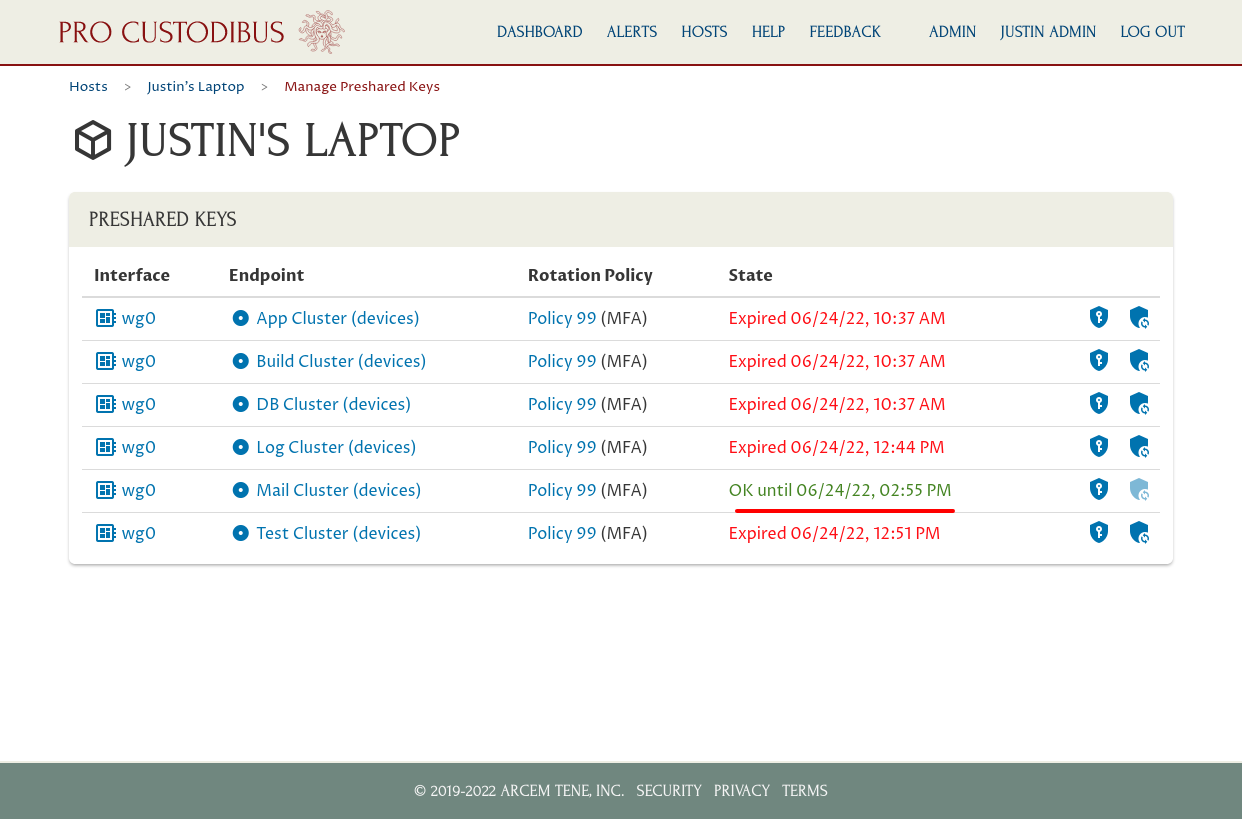
The connection will now be usable until the preshared key is rotated again (in this case, until 2:55 PM).
Connect Hosts and Users
In order for the MFA flow to work for a host, the user who uses the host must have a Pro Custodibus user account, and that user account must be associated with the host. See the Set Up a New User Device with WireGuard MFA article for a tutorial on how to set up a brand new user with MFA.
To connect an existing user to a host, navigate to the main page for the host. For example, to connect the user account for the “Justin” user to the “Justin’s Laptop” host, navigate to the Justin’s Laptop host:
Then scroll down to the Users panel, and click the Add (plus) icon:
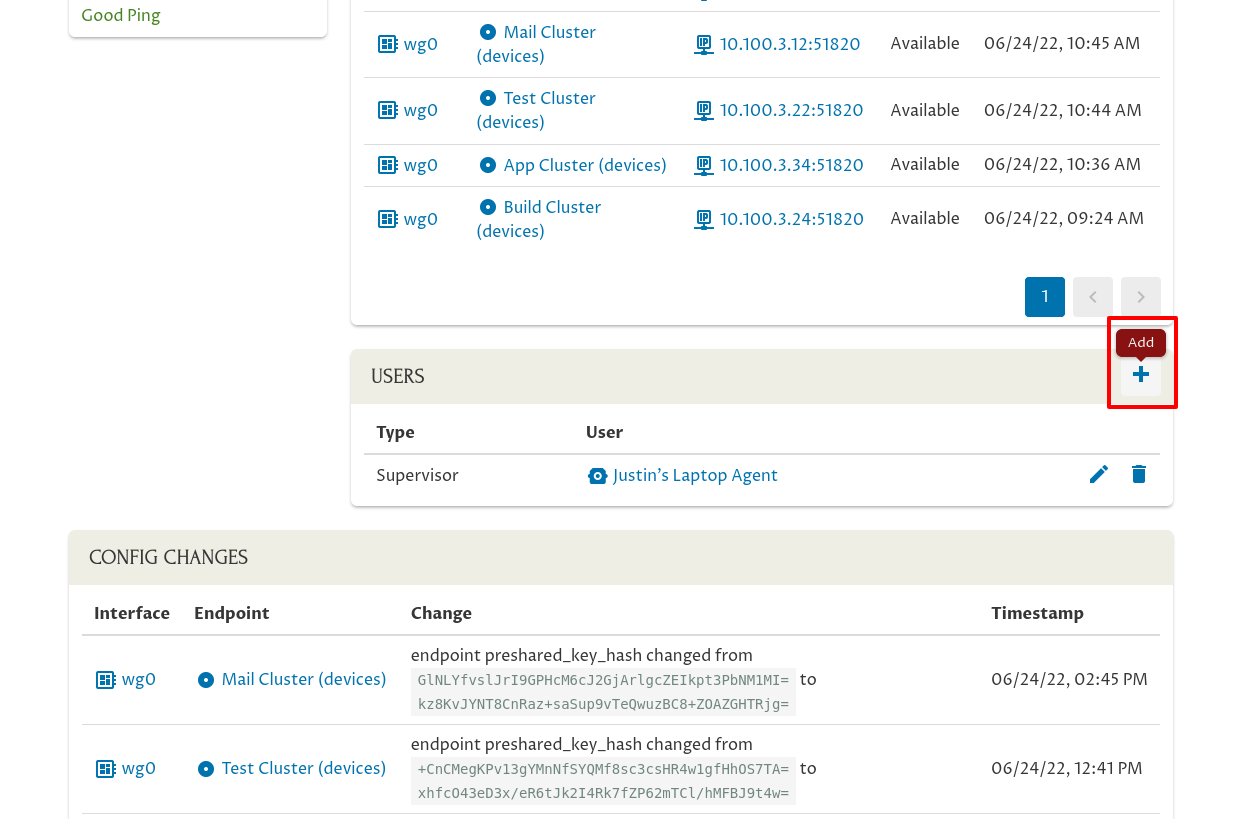
Select the user to add from the User dropdown:
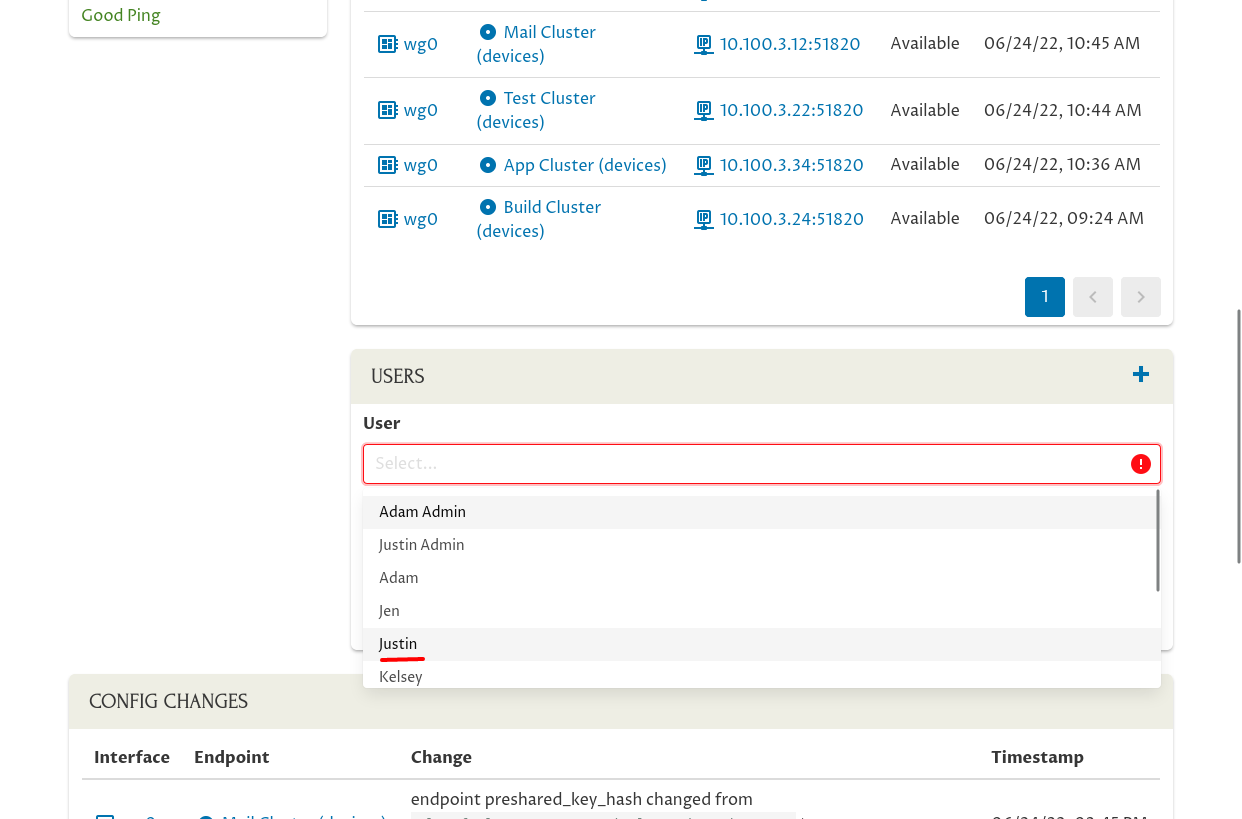
Then select “User” from the Type dropdown, and click the Add button:
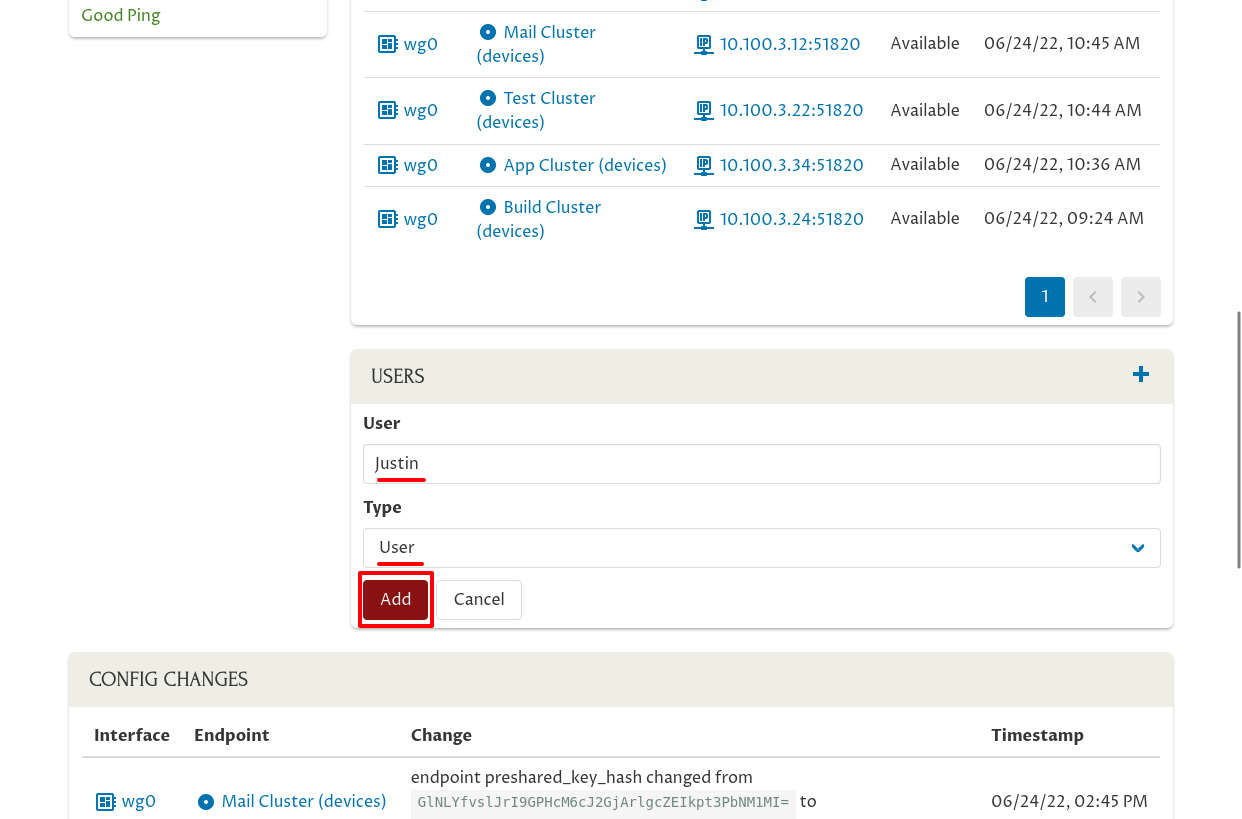
This will connect the user to the host as a regular, non-administrative user:
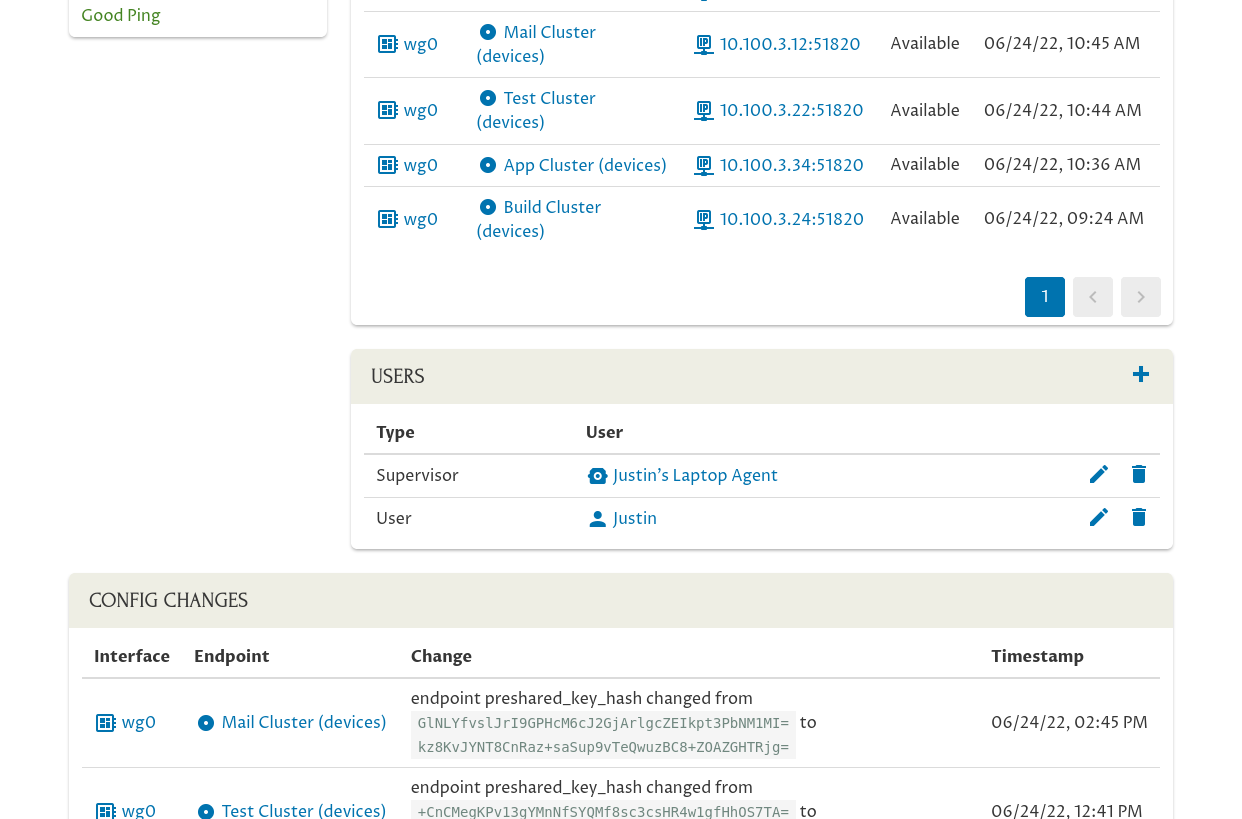
Hosts that represent user devices generally should have two users added to them:
-
The Pro Custodibus agent running on the device (added automatically when you set up the host);
-
The user who uses the device.
How To Use It
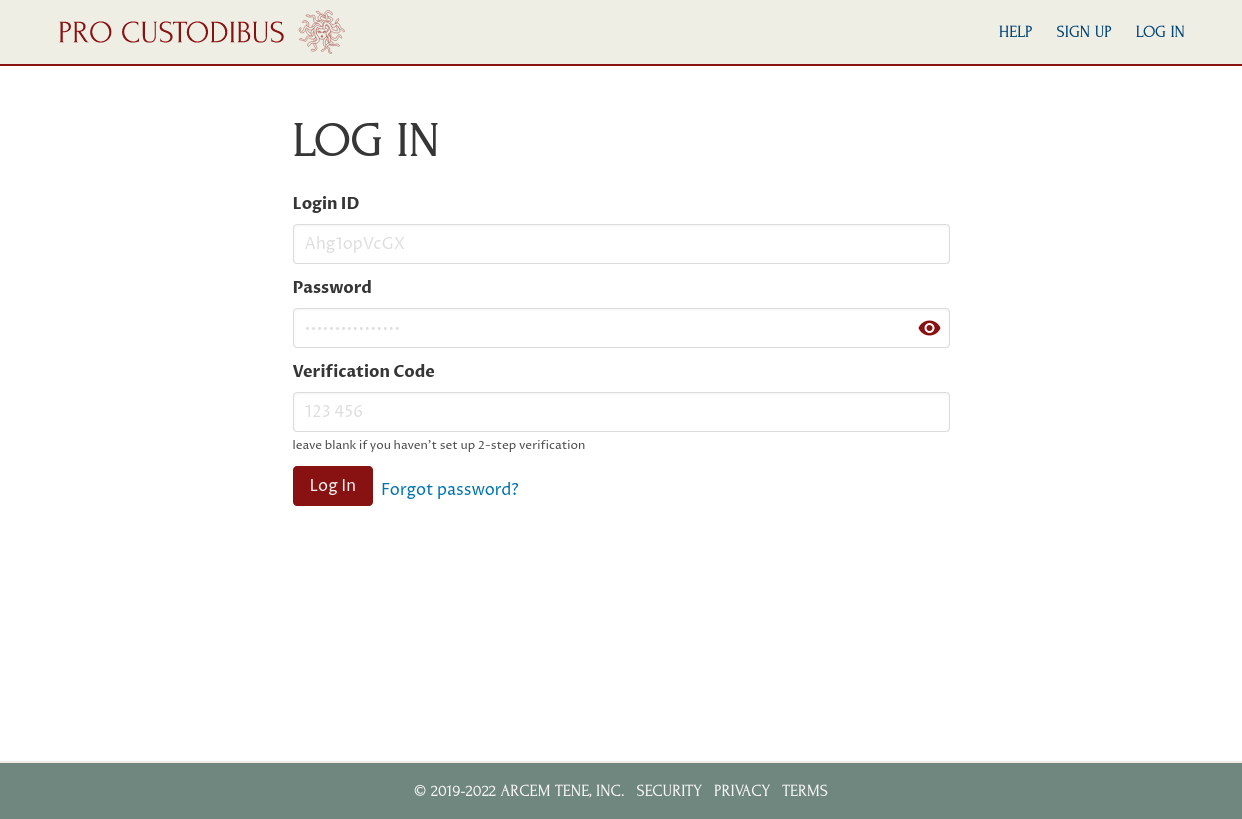
For a user to use a WireGuard connection protected by multi-factor authentication, she has to log into Pro Custodibus first.
In the above sections, we set up a key-rotation policy that requires MFA for the WireGuard connections managed by Pro Custodibus on Justin’s laptop, and associated the Pro Custodibus user account for Justin with the Pro Custodibus host record for Justin’s laptop. So for Justin to use one of those connections, he has to log into Pro Custodibus with that user account:
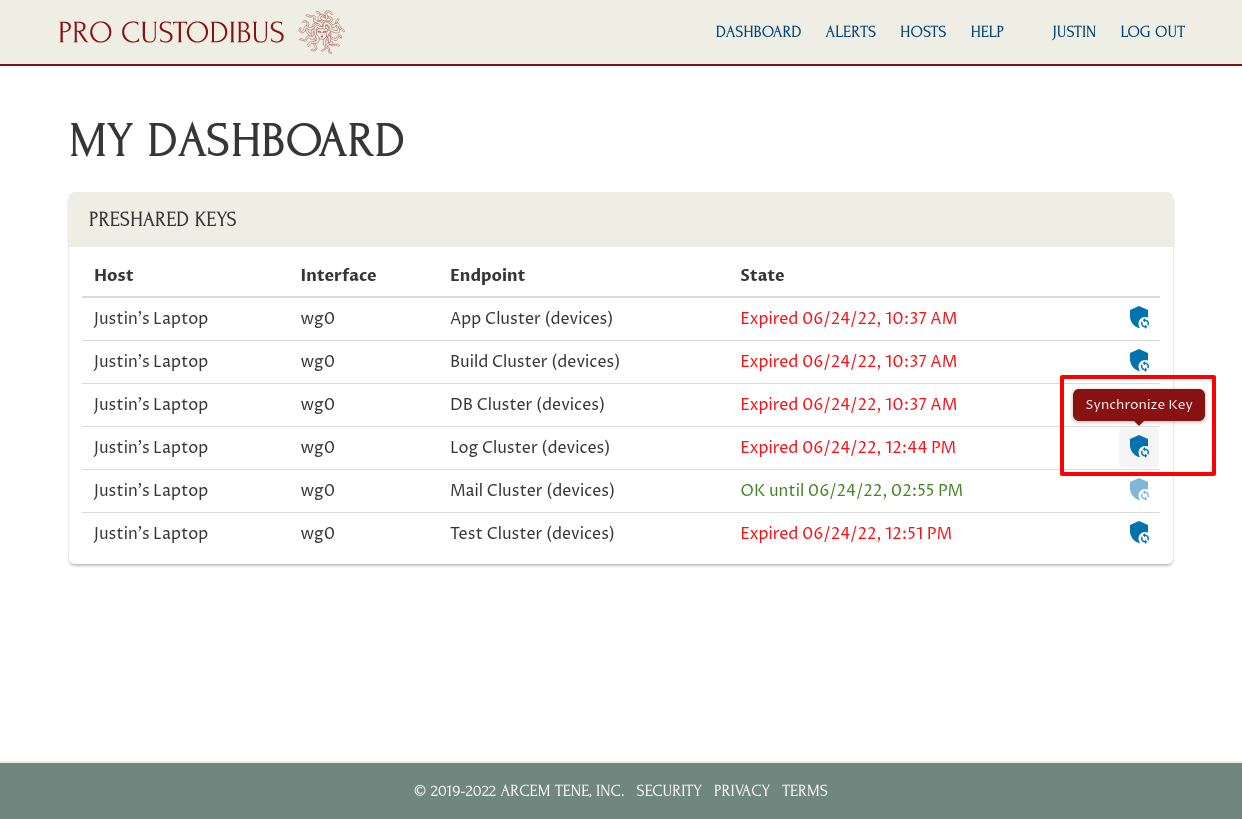
Once he logs in, this is what he’ll see:
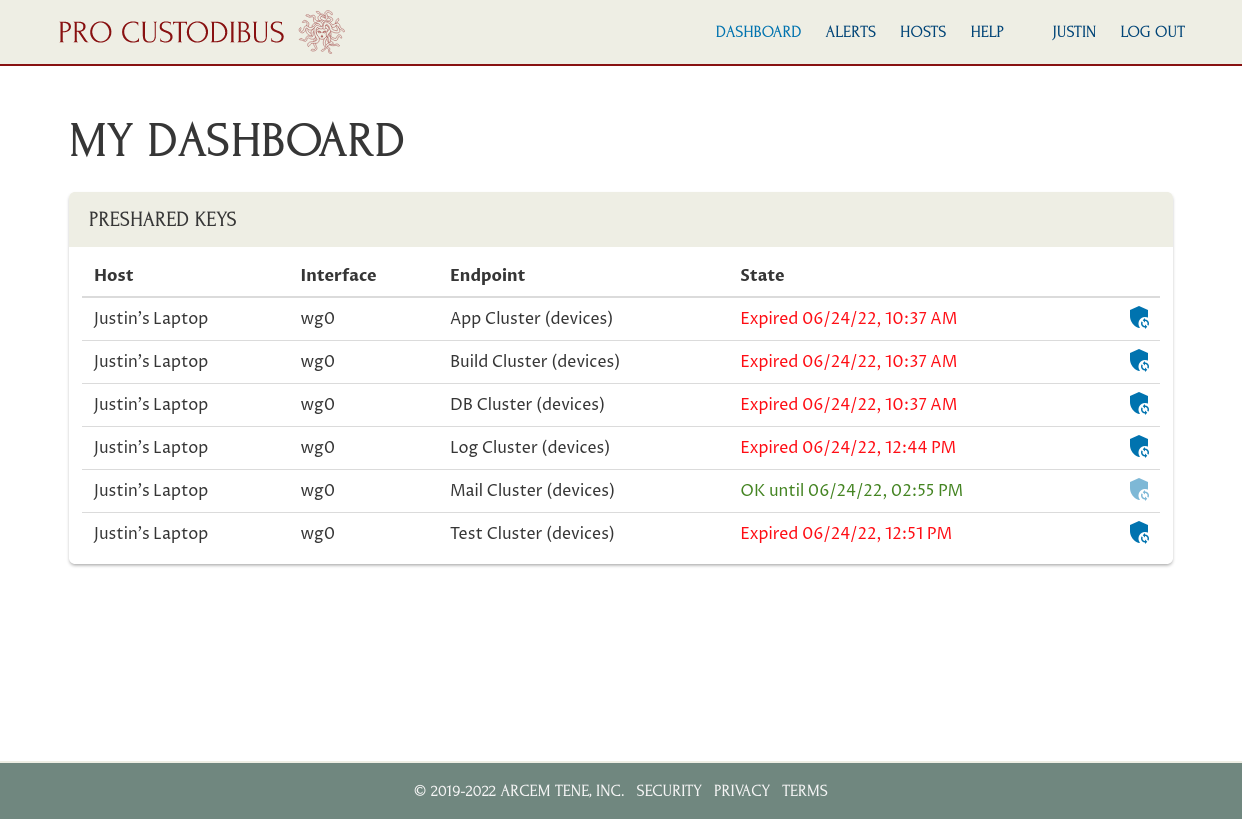
At the end of the Monitor Rotation State section above, we had temporarily overridden MFA on Justin’s connection to the Mail Cluster, so he can use that WireGuard connection until 2:55 PM. He currently can’t use any of the other connections, because his laptop doesn’t have the preshared key that matches the other side of any of those other connections.
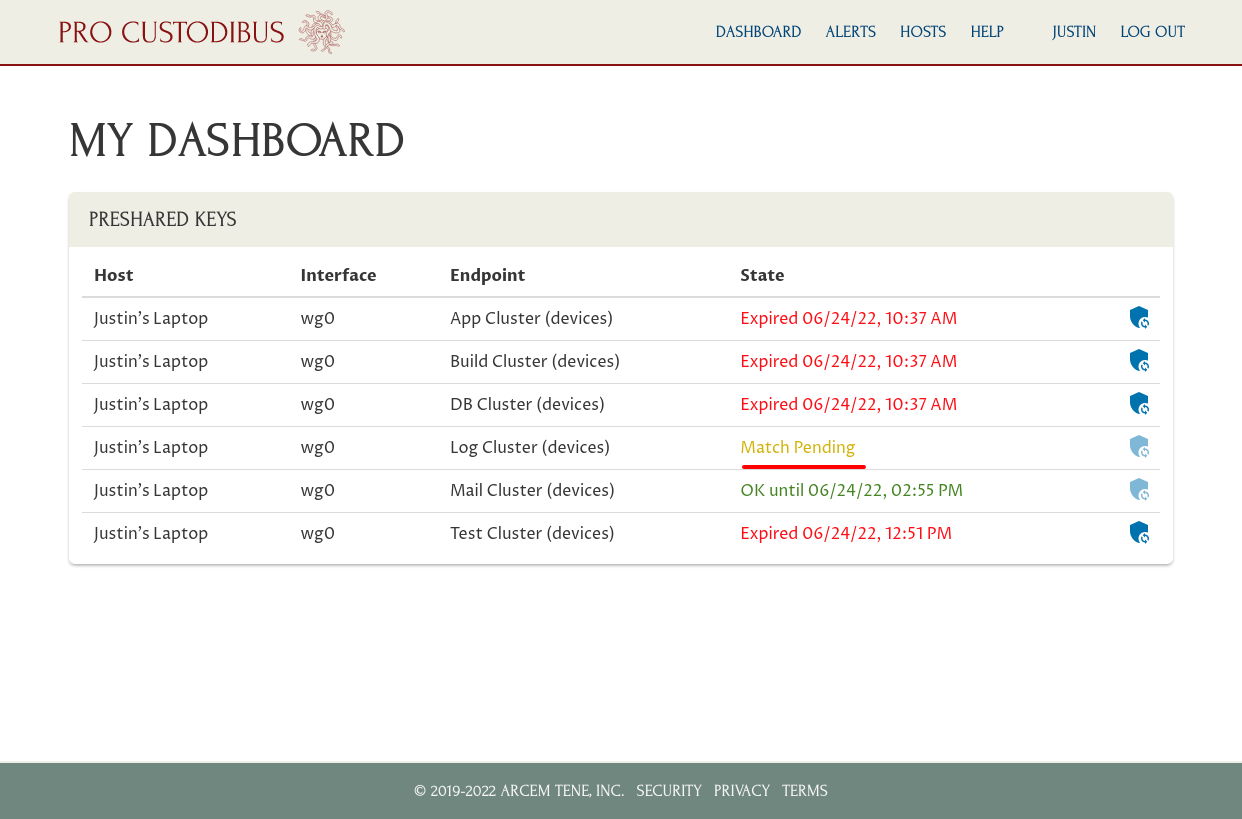
In order to use the connection from his laptop to the Log Cluster gateway, Justin has to click the Synchronize Key (circle-on-shield) icon for that connection:
This will synchronize the preshared key for this connection on his laptop with the preshared key currently used by the Log Cluster host. It may take a minute or two to complete; while it is pending, he’ll see a Match Pending state listed for that connection:
If he refreshes the page once the synchronization is complete, he’ll see the state change to OK for the connection:
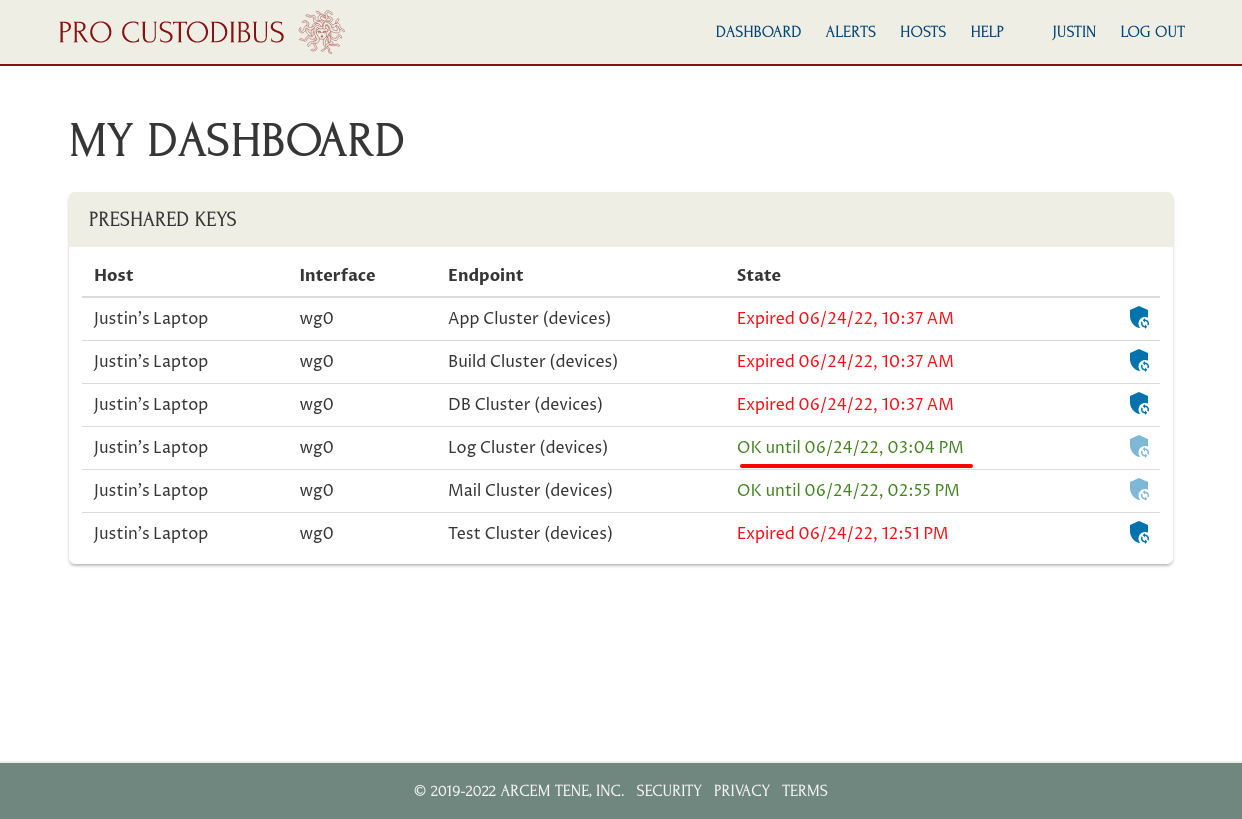
He can now use that WireGuard connection until the preshared key on the Log Cluster host is rotated again (in this case, until 3:04 PM).
Video
Here’s a video walkthrough of the same content from this article:
See the WireGuard Multi-Factor Authentication page on the Pro Custodibus documentation site for further reference.