WireGuard With AWS Split DNS
If you use a WireGuard VPN (Virtual Private Network) to connect to internal resources inside AWS, you’ll probably want to be able to use DNS names for those resources, instead of just IP addresses. This article will show you how to use an AWS Route 53 private hosted zone to set up and use private domain names for those internal resources through WireGuard.
We’ll assume you’ve already set up a working WireGuard VPN as shown by the WireGuard With AWS tutorial; with that in place, it takes just a few more steps to use the DNS nameserver built into each AWS VPC (Virtual Private Cloud) from within your WireGuard VPN. The following diagram illustrates how this will work:

When you connect your workstation to the WireGuard server in the AWS VPC, you’ll be able to resolve domain names for your private AWS resources, like the example internal application at application.internal.example.com, through the VPC’s DNS nameserver (10.10.0.2 in this example); while still being able to resolve domain names for other public Internet services through your workstation’s primary DNS nameservers (like the nameserver provided by the LAN router to which your workstation is connected, 192.168.1.1 in this example).
These are the steps we’ll cover:
Configure VPC DNS Support
The first thing to do is make sure your VPC is configured for DNS resolution. This will enable you to use the DNS nameserver built into the VPC, not only for EC2 hosts within VPC, but also for WireGuard clients connected to the WireGuard server running in the VPC.
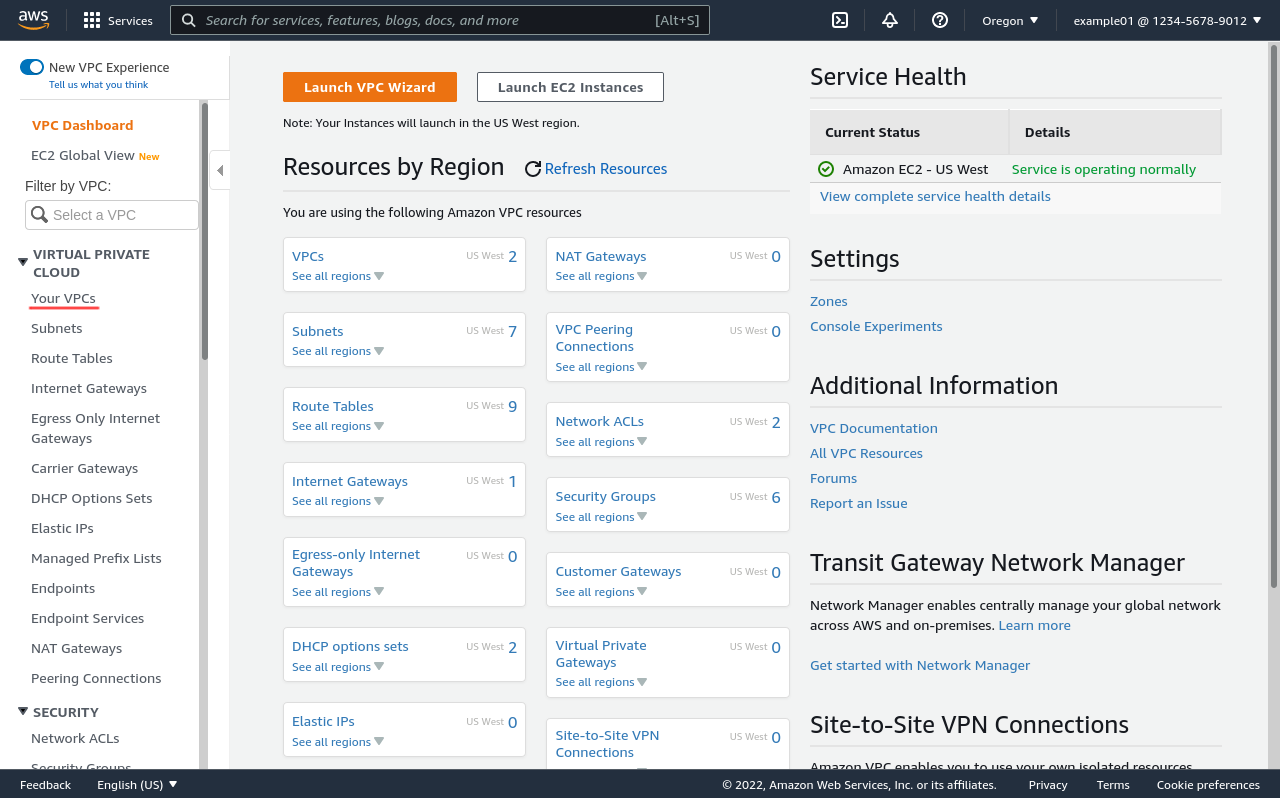
So log into the AWS Console, and navigate to the VPC service (type vpc into the AWS search bar and click the “VPC” result under “Services”). In the leftnav, click the Your VPCs link to see the list of your VPCs in the current region:
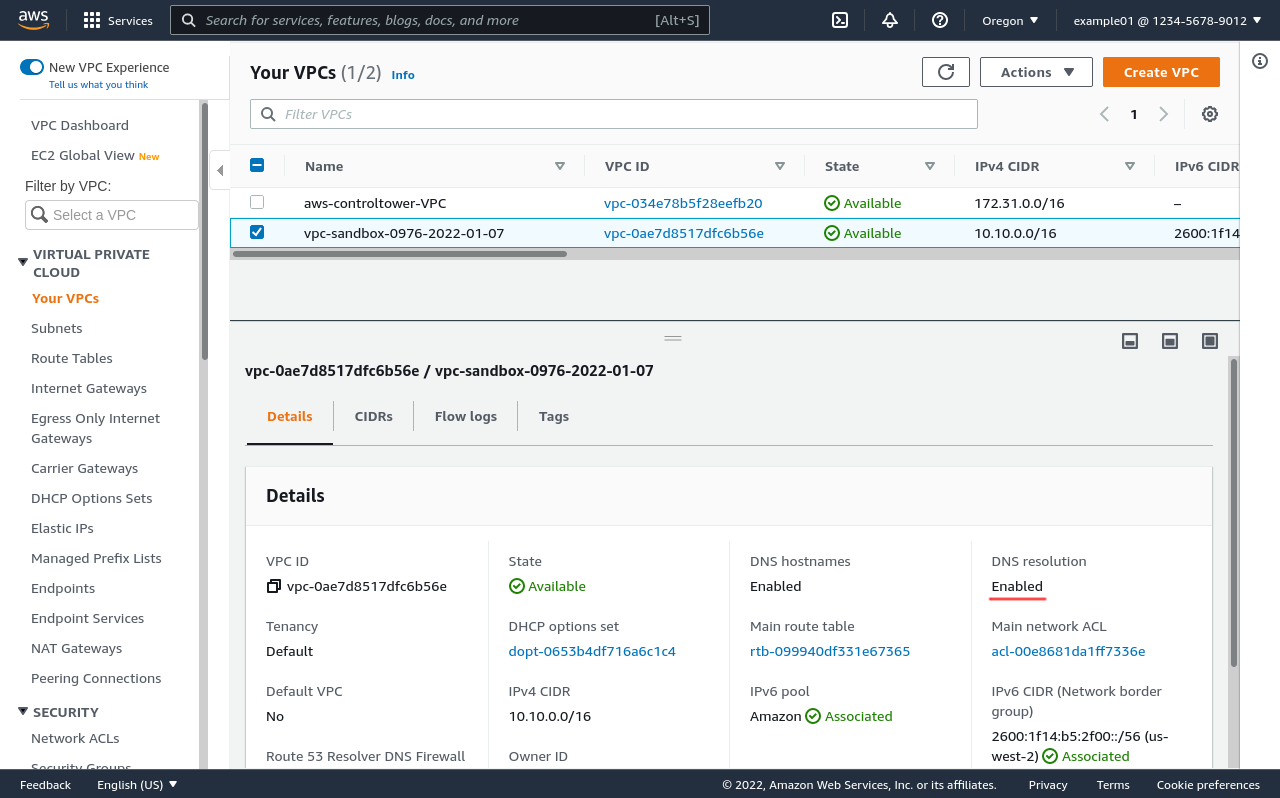
Then select the VPC with your WireGuard server running in it (in this example, vpc-sandbox-0976-2022-01-07), and view its details, looking particularly at the DNS resolution setting:
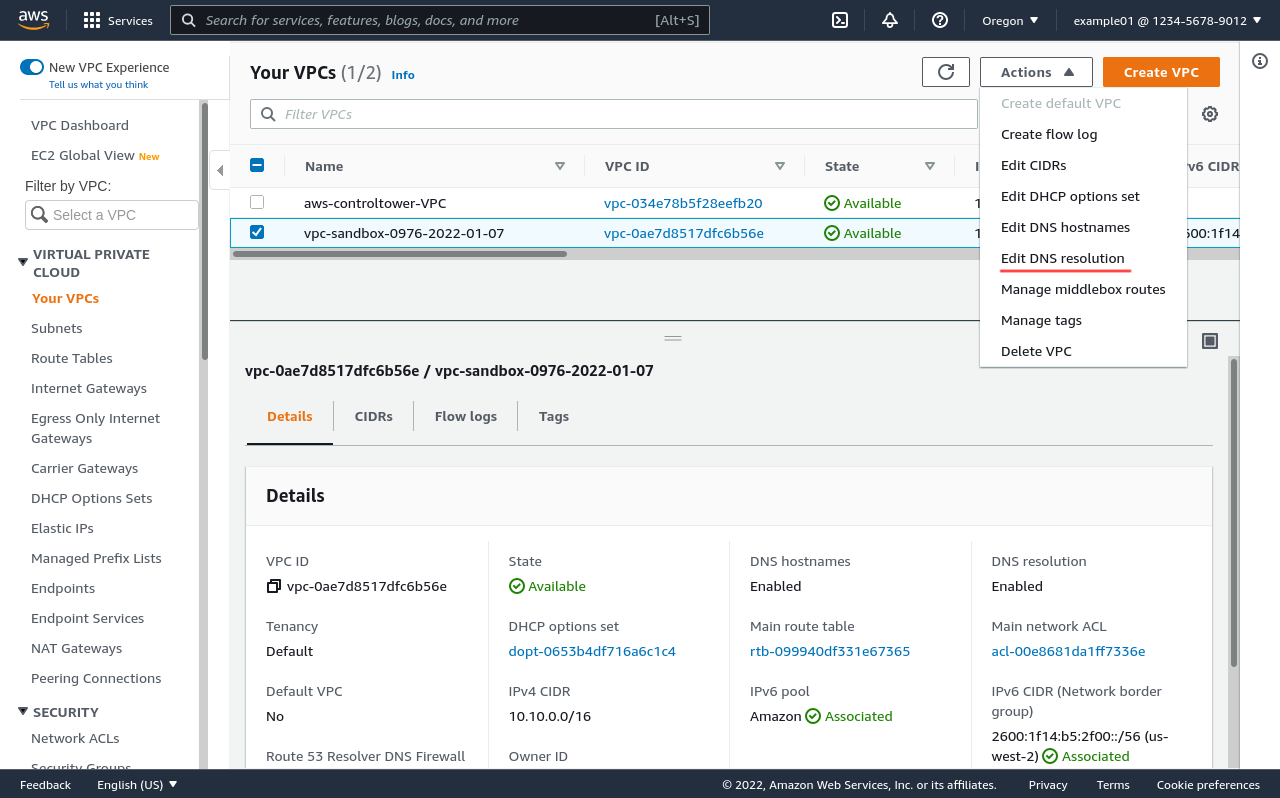
This setting is Enabled by default; but if has been disabled, re-enable it by selecting the Edit DNS resolution action from the Actions menu:
Create a Private Hosted Zone
Next, create a Route 53 private hosted zone. Unlike a normal public zone, this zone won’t be available to the public recursive nameservers you use for public DNS names (like the 8.8.8.8 nameserver Google provides, or the 1.1.1.1 nameserver from Cloudflare, or the nameservers provided by your ISP). It will only be available to the nameserver running in your VPC.
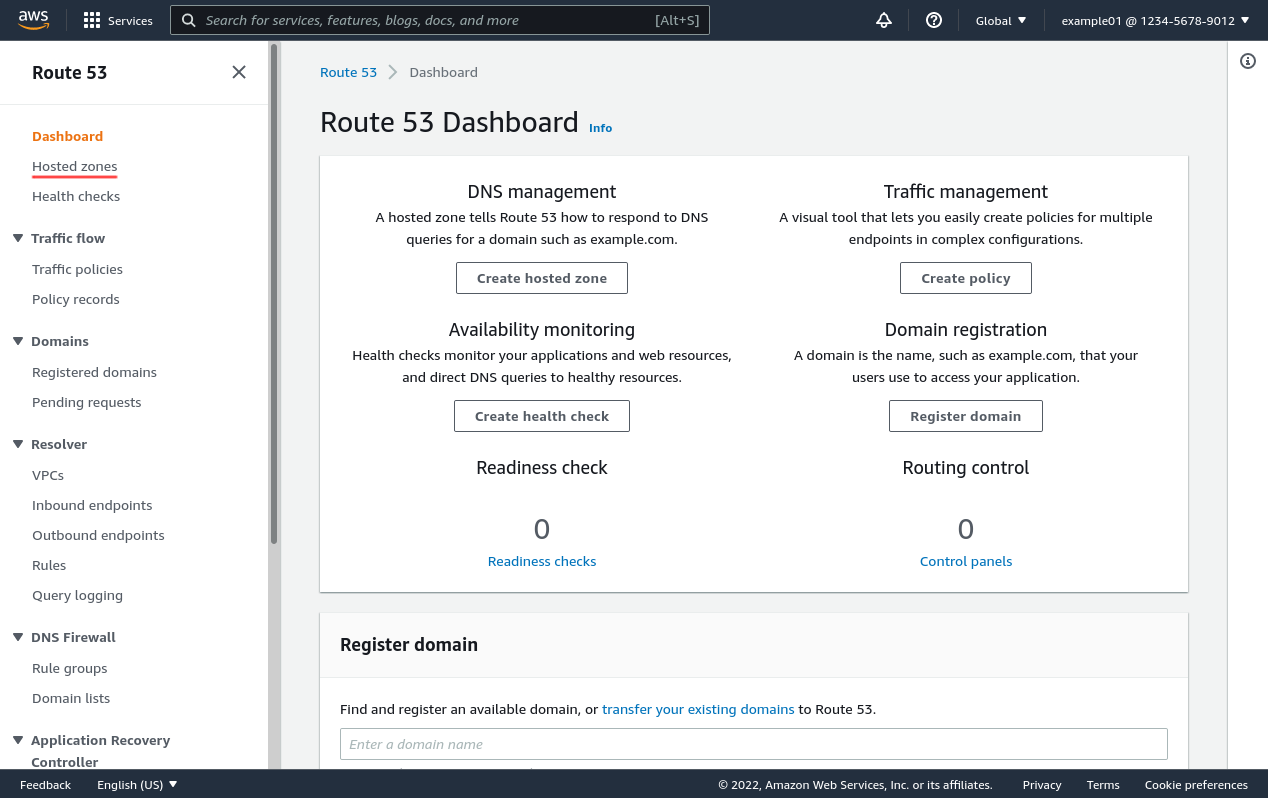
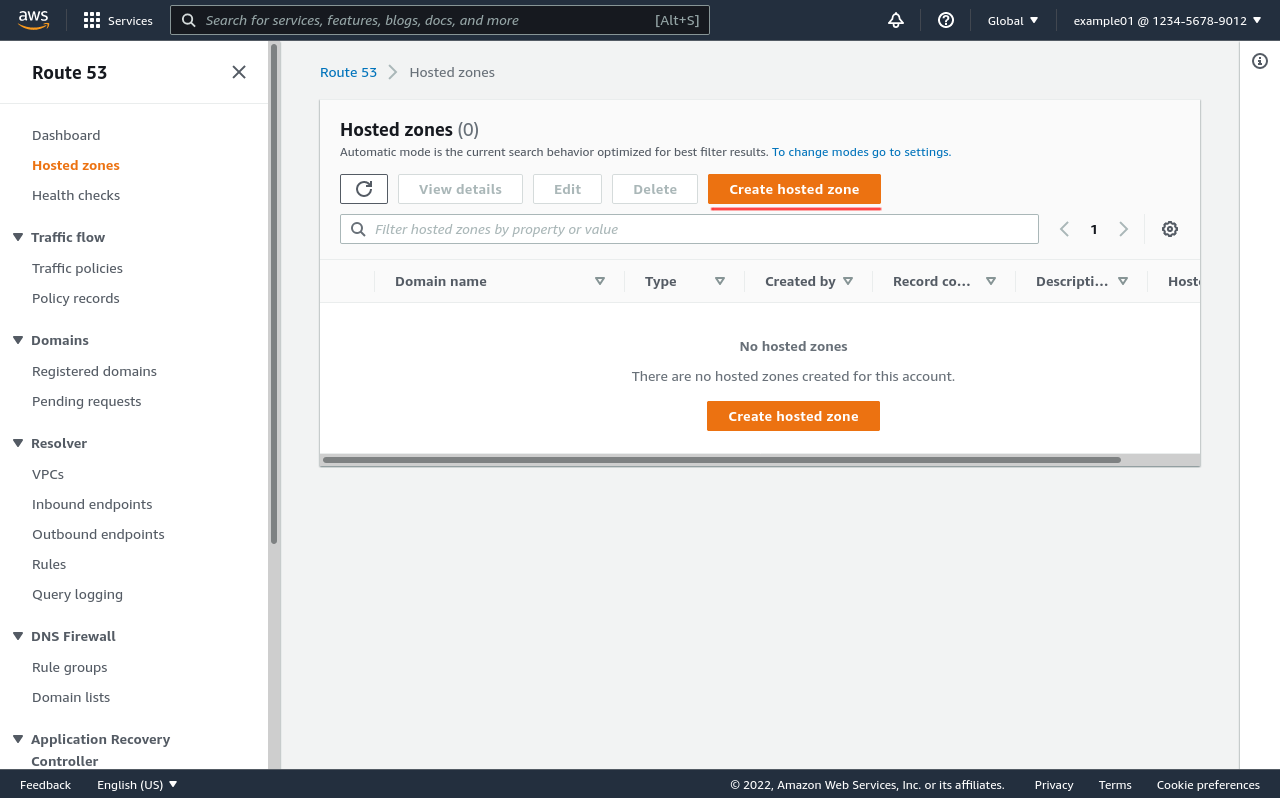
Start by navigating to the Route 53 service (type route 53 into the AWS search bar and click the “Route 53” result under “Services”). In the leftnav, click the Hosted zones link to see the list of your hosted zones:
Then click the Create hosted zone button to create a new hosted zone:
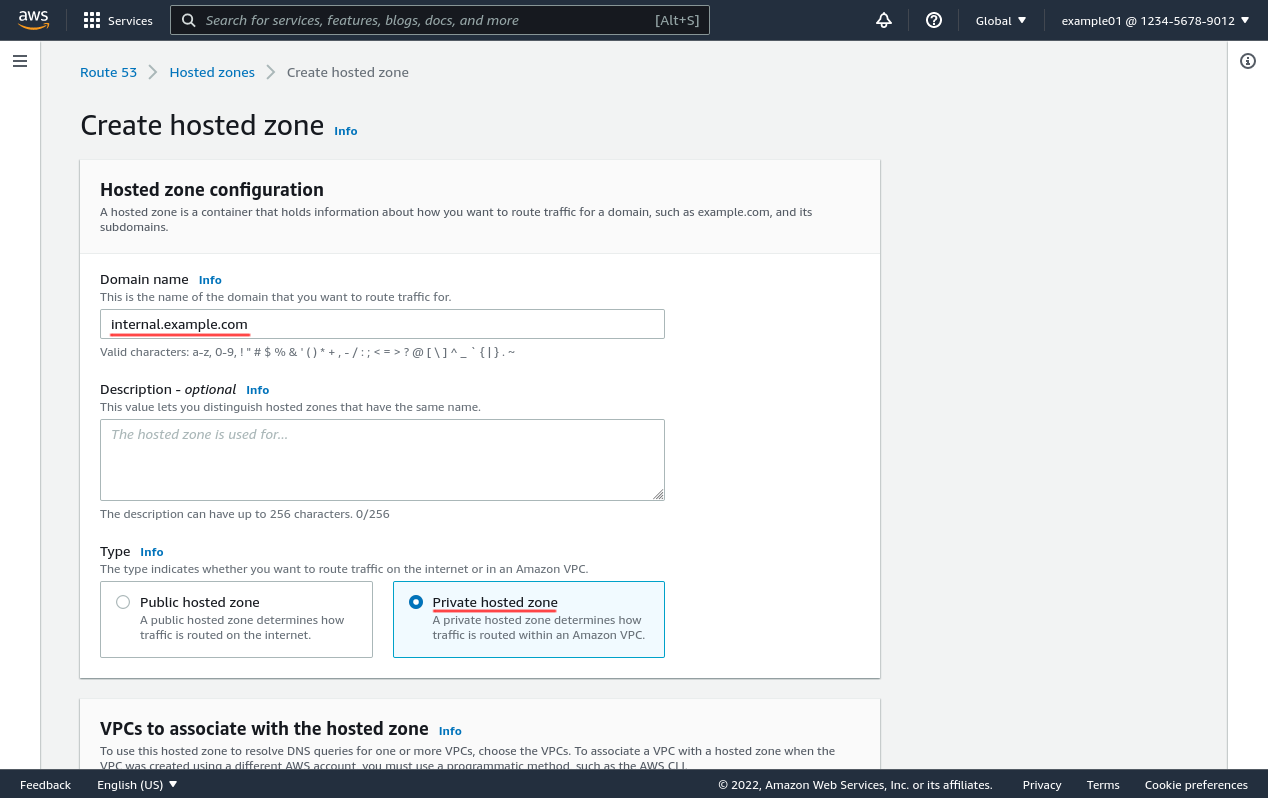
Next, enter the internal subdomain you’ll use for your internal AWS resources in the Domain field; in this example, I’ll use internal.example.com, but you can use literally any domain name you want (like tools.corp or my-vpc.us-west-2.private.example.net, etc). Then for Type, select Private hosted zone:
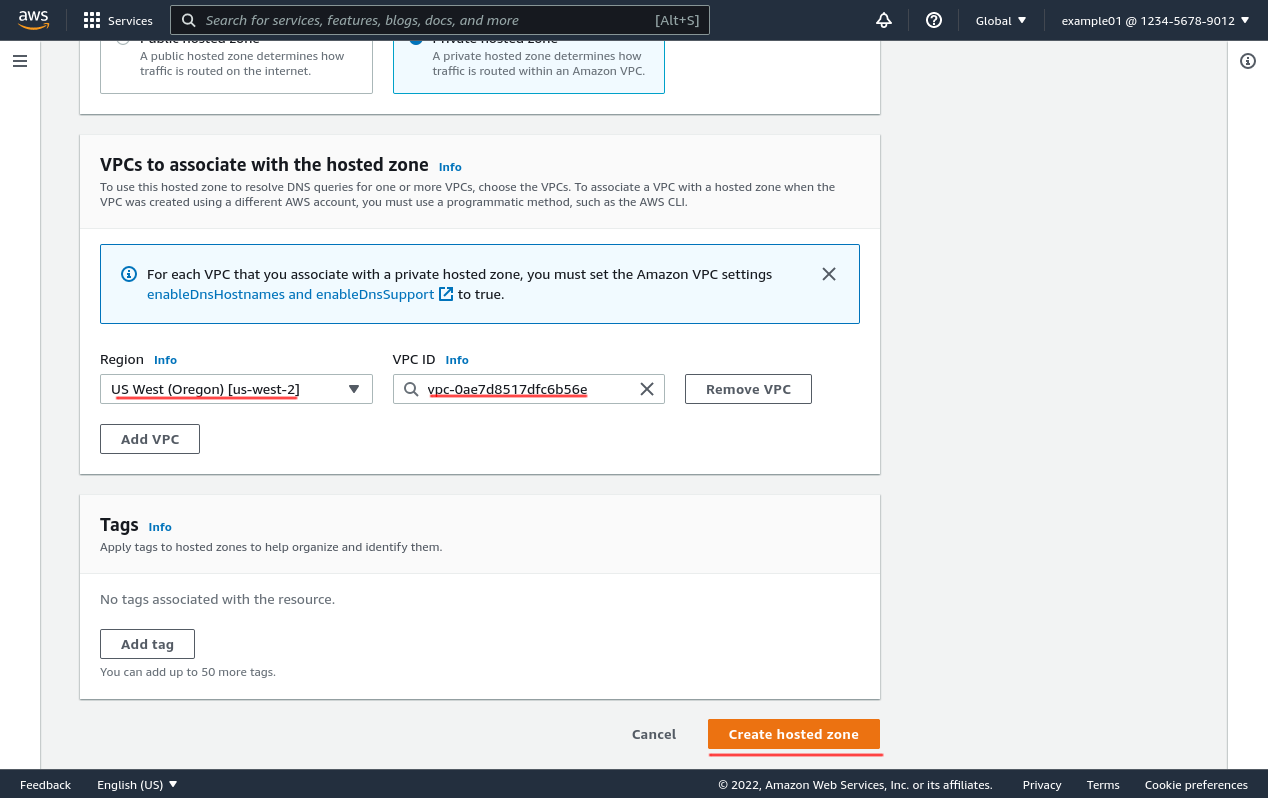
Scroll down, and select the Region and VPC ID of the VPC with your WireGuard server running in it (in this example, I’m using us-west-2 and vpc-0ae7d8517dfc6b56e for my VPC). Then click the Create hosted zone button:
Add a DNS Record for the Web App
Now create a DNS record for the internal web app instance you launched in the original WireGuard With AWS tutorial (and create additional records for each other internal resources you want to be able to access via domain name).
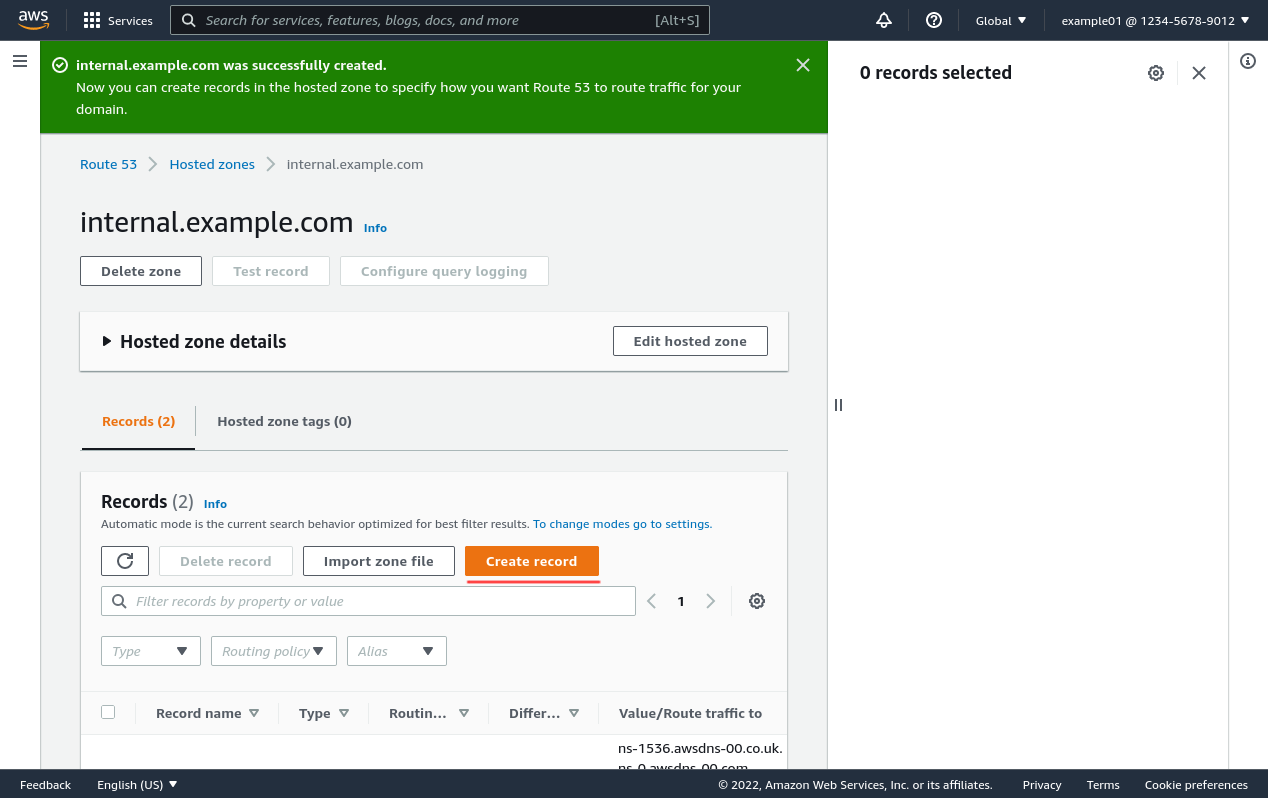
On the main page for the hosted zone you just created, click the Create record button:
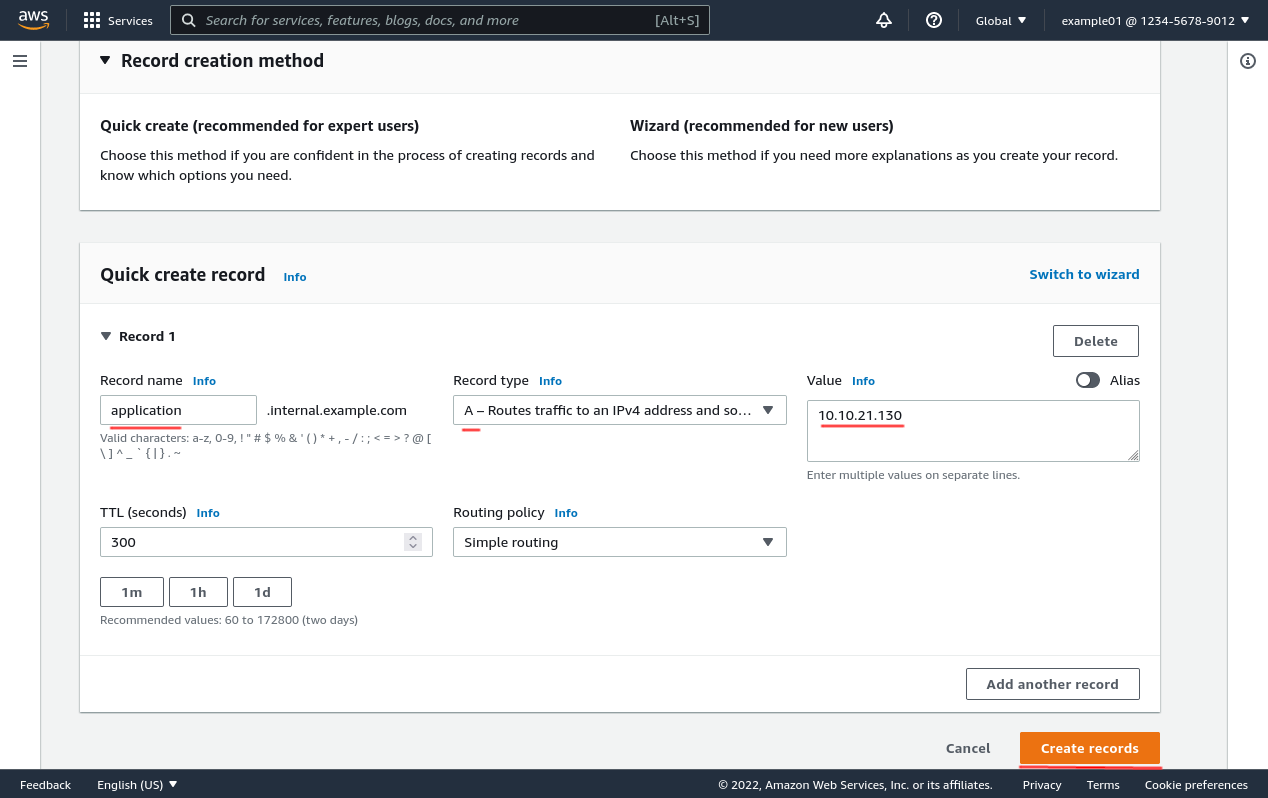
Then enter the DNS name to use for the internal app in the Record name field (for this example, I’ll use the imaginative and exciting name of application.internal.example.com). Make sure the Record type is A (the default, for an IPv4 address), and enter the internal IPv4 address of the internal app in the Value field (10.10.21.130 in this example).
Finally, click the Create records button:
Configure DNS on the WireGuard Client
The IPv4 address of the DNS nameserver running in the VPC will be the base of the IPv4 CIDR block used by the VPC, plus 2. In this example, where the VPC uses the 10.10.0.0/16 CIDR block, the DNS nameserver’s address is 10.10.0.2. If the VPC’s IPv4 CIDR block was instead 192.168.123.64/26, the DNS nameserver’s address would be 192.168.123.66. You do not need to configure any Network ACLs or Security Groups to access it — it is always accessible by any host in the VPC, from any subnet in the VPC.
|
Tip
|
The VPC’s DNS nameserver is also always available at the IPv4 address |
So, unless you’re using systemd on Linux, update your WireGuard client config to add a DNS setting like the following, to the [Interface] section of the config file:
# /etc/wireguard/my-vpc-01.conf

# local settings for Your Workstation
[Interface]
PrivateKey = AAAAAAAAAAAAAAAAAAAAAAAAAAAAAAAAAAAAAAAAAEE=
Address = 10.0.0.1/32
DNS = 10.10.0.2

# remote settings for WireGuard Server
[Peer]
PublicKey = fE/wdxzl0klVp/IR8UcaoGUMjqaWi3jAd7KzHKFS6Ds=
Endpoint = 18.217.226.255:51820
AllowedIPs = 10.10.0.0/16
This will add 10.10.0.2 to the list of DNS nameservers your workstation queries when the WireGuard interface is up. Make sure the AllowedIPs setting in the [Peer] section includes this IP address in its list of allowed IP addresses and blocks (in this example, AllowedIPs = 10.10.0.0/16, and 10.10.0.2 is in 10.10.0.0/16; but if we had instead done something like set AllowedIPs = 10.10.21.0/24, we’d need to add 10.10.0.2 explicitly to it, like AllowedIPs = 10.10.21.0/24, 10.10.0.2).
You may also want to add the subdomain internal.example.com (or whatever subdomain you configured for the Create a Private Hosted Zone step above) to this same DNS setting, if you want internal.example.com added to your DNS search domains when the WireGuard interface is up, like so:
DNS = 10.10.0.2, internal.example.com
This will configure your local workstation to try appending .internal.example.com to any unqualified hostnames you try to resolve (for example, to try to resolve application as application.internal.example.com).
DNS With Systemd
If you’re using Linux with systemd, however, using WireGuard’s DNS setting may not work correctly; in particular, you may see an error like resolvconf: command not found when your start up your WireGuard interface.
Check your /etc/resolv.conf file to determine whether or not your local system is using systemd-resolved — if the file contains the following line, you’re using systemd-resolved:
$ cat /etc/resolv.conf
# This file is managed by man:systemd-resolved(8). Do not edit.
...
In this case, rather than using WireGuard’s DNS setting, use a PostUp setting instead to achieve a similar result:
# /etc/wireguard/my-vpc-01.conf

# local settings for Your Workstation
[Interface]
PrivateKey = AAAAAAAAAAAAAAAAAAAAAAAAAAAAAAAAAAAAAAAAAEE=
Address = 10.0.0.1/32
PostUp = resolvectl dns %i 10.10.0.2; resolvectl domain %i ~internal.example.com

# remote settings for WireGuard Server
[Peer]
PublicKey = fE/wdxzl0klVp/IR8UcaoGUMjqaWi3jAd7KzHKFS6Ds=
Endpoint = 18.217.226.255:51820
AllowedIPs = 10.10.0.0/16
If you want internal.example.com to be one of your DNS search domains, remove the tilde (~) in front of it:
PostUp = resolvectl dns %i 10.10.0.2; resolvectl domain %i internal.example.com
Restart the interface after making the change (eg sudo systemctl restart wg-quick@my-vpc-01.service). Also see the WireGuard DNS Configuration for Systemd article for a few related tips.
Test It Out
In the original WireGuard With AWS tutorial, we started up a dummy webserver for the internal application at 10.10.21.130 on port 8080, and connected to it from our local workstation with the following command:
$ curl 10.10.21.130:8080
<!DOCTYPE HTML PUBLIC "-//W3C//DTD HTML 4.01//EN" "http://www.w3.org/TR/html4/strict.dtd">
<html>
...
But if you set up the application.internal.example.com domain name to point to 10.10.21.130 in the Add a DNS Record for the Web App step above, you can now access that same internal app by domain name:
$ curl application.internal.example.com:8080
<!DOCTYPE HTML PUBLIC "-//W3C//DTD HTML 4.01//EN" "http://www.w3.org/TR/html4/strict.dtd">
<html>
...
And if you configured internal.example.com as a search domain in the Configure DNS on the WireGuard Client step above, you can also access that same internal app just by using the hostname part of the fully-qualified domain name:
$ curl application:8080
<!DOCTYPE HTML PUBLIC "-//W3C//DTD HTML 4.01//EN" "http://www.w3.org/TR/html4/strict.dtd">
<html>
...
Troubleshooting
If you see an error from cURL like Could not resolve host: application.internal.example.com, try using the dig or nslookup command both on your local workstation and on the WireGuard server, and compare the results.
Dig on the WireGuard Server
With dig on the WireGuard server, you should see a result like this, where the WireGuard server’s local resolver (127.0.0.53) is questioned about the A record for application.internal.example.com, and answers back with the 10.10.21.130 IP address:
$ dig application.internal.example.com

; <<>> DiG 9.16.1-Ubuntu <<>> application.internal.example.com
;; global options: +cmd
;; Got answer:
;; ->>HEADER<<- opcode: QUERY, status: NOERROR, id: 63617
;; flags: qr rd ra; QUERY: 1, ANSWER: 1, AUTHORITY: 0, ADDITIONAL: 1

;; OPT PSEUDOSECTION:
; EDNS: version: 0, flags:; udp: 65494
;; QUESTION SECTION:
;application.internal.example.com. IN   A

;; ANSWER SECTION:
application.internal.example.com. 300 IN A      10.10.21.130

;; Query time: 0 msec
;; SERVER: 127.0.0.53#53(127.0.0.53)
;; WHEN: Sun Jan 09 00:09:20 UTC 2022
;; MSG SIZE  rcvd: 77
If you don’t get an IP address back, try querying the VPC’s nameserver directly:
$ dig application.internal.example.com @10.10.0.2

; <<>> DiG 9.16.1-Ubuntu <<>> application.internal.example.com @10.10.0.2
;; global options: +cmd
;; Got answer:
;; ->>HEADER<<- opcode: QUERY, status: NOERROR, id: 46298
;; flags: qr rd ra; QUERY: 1, ANSWER: 1, AUTHORITY: 0, ADDITIONAL: 1

;; OPT PSEUDOSECTION:
; EDNS: version: 0, flags:; udp: 4096
;; QUESTION SECTION:
;application.internal.example.com. IN   A

;; ANSWER SECTION:
application.internal.example.com. 300 IN A      10.10.21.130

;; Query time: 3 msec
;; SERVER: 10.10.0.2#53(10.10.0.2)
;; WHEN: Sun Jan 09 00:16:02 UTC 2022
;; MSG SIZE  rcvd: 77
If you still don’t get an answer back, make sure that you have:
-
Enabled DNS resolution on the VPC (see the Configure VPC DNS Support section)
-
Connected the VPC to the
internal.example.comzone (see the Create a Private Hosted Zone section) -
Added an
applicationrecord to theinternal.example.comzone (see the Add a DNS Record for the Web App)
Dig on the WireGuard Client
With dig on your local workstation, you should see a result like this, where the VPC nameserver (10.10.0.2) is questioned about the A record for application.internal.example.com, and answers back with the 10.10.21.130 IP address:
$ dig application.internal.example.com

; <<>> DiG 9.16.1-Ubuntu <<>> application.internal.example.com
;; global options: +cmd
;; Got answer:
;; ->>HEADER<<- opcode: QUERY, status: NOERROR, id: 58660
;; flags: qr rd ra; QUERY: 1, ANSWER: 1, AUTHORITY: 0, ADDITIONAL: 1

;; OPT PSEUDOSECTION:
; EDNS: version: 0, flags:; udp: 65494
;; QUESTION SECTION:
;application.internal.example.com. IN   A

;; ANSWER SECTION:
application.internal.example.com. 300 IN A      10.10.21.130

;; Query time: 27 msec
;; SERVER: 10.10.0.2#53(10.10.0.2)
;; WHEN: Sat Jan 08 16:17:36 PST 2022
;; MSG SIZE  rcvd: 77
If dig instead hangs, make sure your WireGuard client config’s AllowedIPs setting includes the IP address of the VPC’s nameserver (see the Configure DNS on the WireGuard Client section).
If dig shows it’s querying a different nameserver than your VPC’s nameserver, the DNS setting from WireGuard is being ignored, so you’ll probably have to add the VPC’s nameserver to your system’s network configuration manually.
Nslookup on the WireGuard Server
With nslookup on the WireGuard server, you should see a result like this, where nslookup queries the WireGuard server’s local resolver (127.0.0.53) for the application.internal.example.com name, and is answered with an address of 10.10.21.130:
$ nslookup application.internal.example.com
Server:         127.0.0.53
Address:        127.0.0.53#53

Non-authoritative answer:
Name:   application.internal.example.com
Address: 10.10.21.130
If you instead receive an error like server can’t find application.internal.example.com: NXDOMAIN, try querying the VPC’s nameserver directly:
$ nslookup application.internal.example.com 10.10.0.2
Server:         10.10.0.2
Address:        10.10.0.2#53

Non-authoritative answer:
Name:   application.internal.example.com
Address: 10.10.21.130
If you still receive an error, make sure that you have:
-
Enabled DNS resolution on the VPC (see the Configure VPC DNS Support section)
-
Connected the VPC to the
internal.example.comzone (see the Create a Private Hosted Zone section) -
Added an
applicationrecord to theinternal.example.comzone (see the Add a DNS Record for the Web App)
Nslookup on the WireGuard Client
With nslookup on your local workstation, you should see a result like this, where nslookup queries the VPC nameserver (10.10.0.2) for the application.internal.example.com name, and is answered with an address of 10.10.21.130:
$ nslookup application.internal.example.com
Server:         10.10.0.2
Address:        10.10.0.2#53

Non-authoritative answer:
Name:   application.internal.example.com
Address: 10.10.21.130
If nslookup instead hangs, make sure your WireGuard client config’s AllowedIPs setting includes the IP address of the VPC’s nameserver (see the Configure DNS on the WireGuard Client section).
If nslookup shows it’s querying a different nameserver than your VPC’s nameserver, the DNS setting from WireGuard is being ignored, so you’ll probably have to add the VPC’s nameserver to your system’s network configuration manually.
Resolvectl on the WireGuard Client
If you’re using systemd-resolved (see the DNS With Systemd sub-section), use resolvectl instead of dig or nslookup. First just run resolvectl with no arguments to check systemd-resolved’s current settings; they should look like this:
$ resolvectl
Global
       LLMNR setting: no
MulticastDNS setting: no
  DNSOverTLS setting: no
      DNSSEC setting: no
    DNSSEC supported: no
          DNSSEC NTA: 10.in-addr.arpa
                      16.172.in-addr.arpa
                      168.192.in-addr.arpa
                      17.172.in-addr.arpa
                      ...
                      local
                      private
                      test

Link 3 (my-vpc-01)
      Current Scopes: DNS
DefaultRoute setting: no
       LLMNR setting: yes
MulticastDNS setting: no
  DNSOverTLS setting: no
      DNSSEC setting: no
    DNSSEC supported: no
  Current DNS Server: 10.10.0.2
         DNS Servers: 10.10.0.2
          DNS Domain: ~internal.example.com

Link 2 (eth0)
      Current Scopes: DNS
DefaultRoute setting: yes
       LLMNR setting: yes
MulticastDNS setting: no
  DNSOverTLS setting: no
      DNSSEC setting: no
    DNSSEC supported: no
  Current DNS Server: 192.168.1.1
         DNS Servers: 192.168.1.1
          DNS Domain: ~.
If your WireGuard link (Link 3 in this example) does not include the VPC’s DNS settings, make sure you use the PreUp command from the DNS With Systemd sub-section in your WireGuard config, instead of WireGuard’s own DNS setting.
Next, try looking up the internal app domain name with resolvectl; the result should look like this:
$ resolvectl query application.internal.example.com
application.internal.example.com: 10.10.21.130 -- link: my-vpc-01

-- Information acquired via protocol DNS in 26.1ms.
-- Data is authenticated: no
If resolvectl instead hangs, make sure your WireGuard client config’s AllowedIPs setting includes the IP address of the VPC’s nameserver (see the Configure DNS on the WireGuard Client section).
If you see an error message like resolve call failed: 'application.internal.example.com' not found, make sure you have:
-
Enabled DNS resolution on the VPC (see the Configure VPC DNS Support section)
-
Connected the VPC to the
internal.example.comzone (see the Create a Private Hosted Zone section) -
Added an
applicationrecord to theinternal.example.comzone (see the Add a DNS Record for the Web App)